Settings & team
Account-level settings aren't behind one single "Settings" page in Tabulox — they're split across a few focused screens: the account overview (business details, branding, payouts, team), a dedicated Team page, Email templates, and Billing. This page is a map of all of them.
Account overview
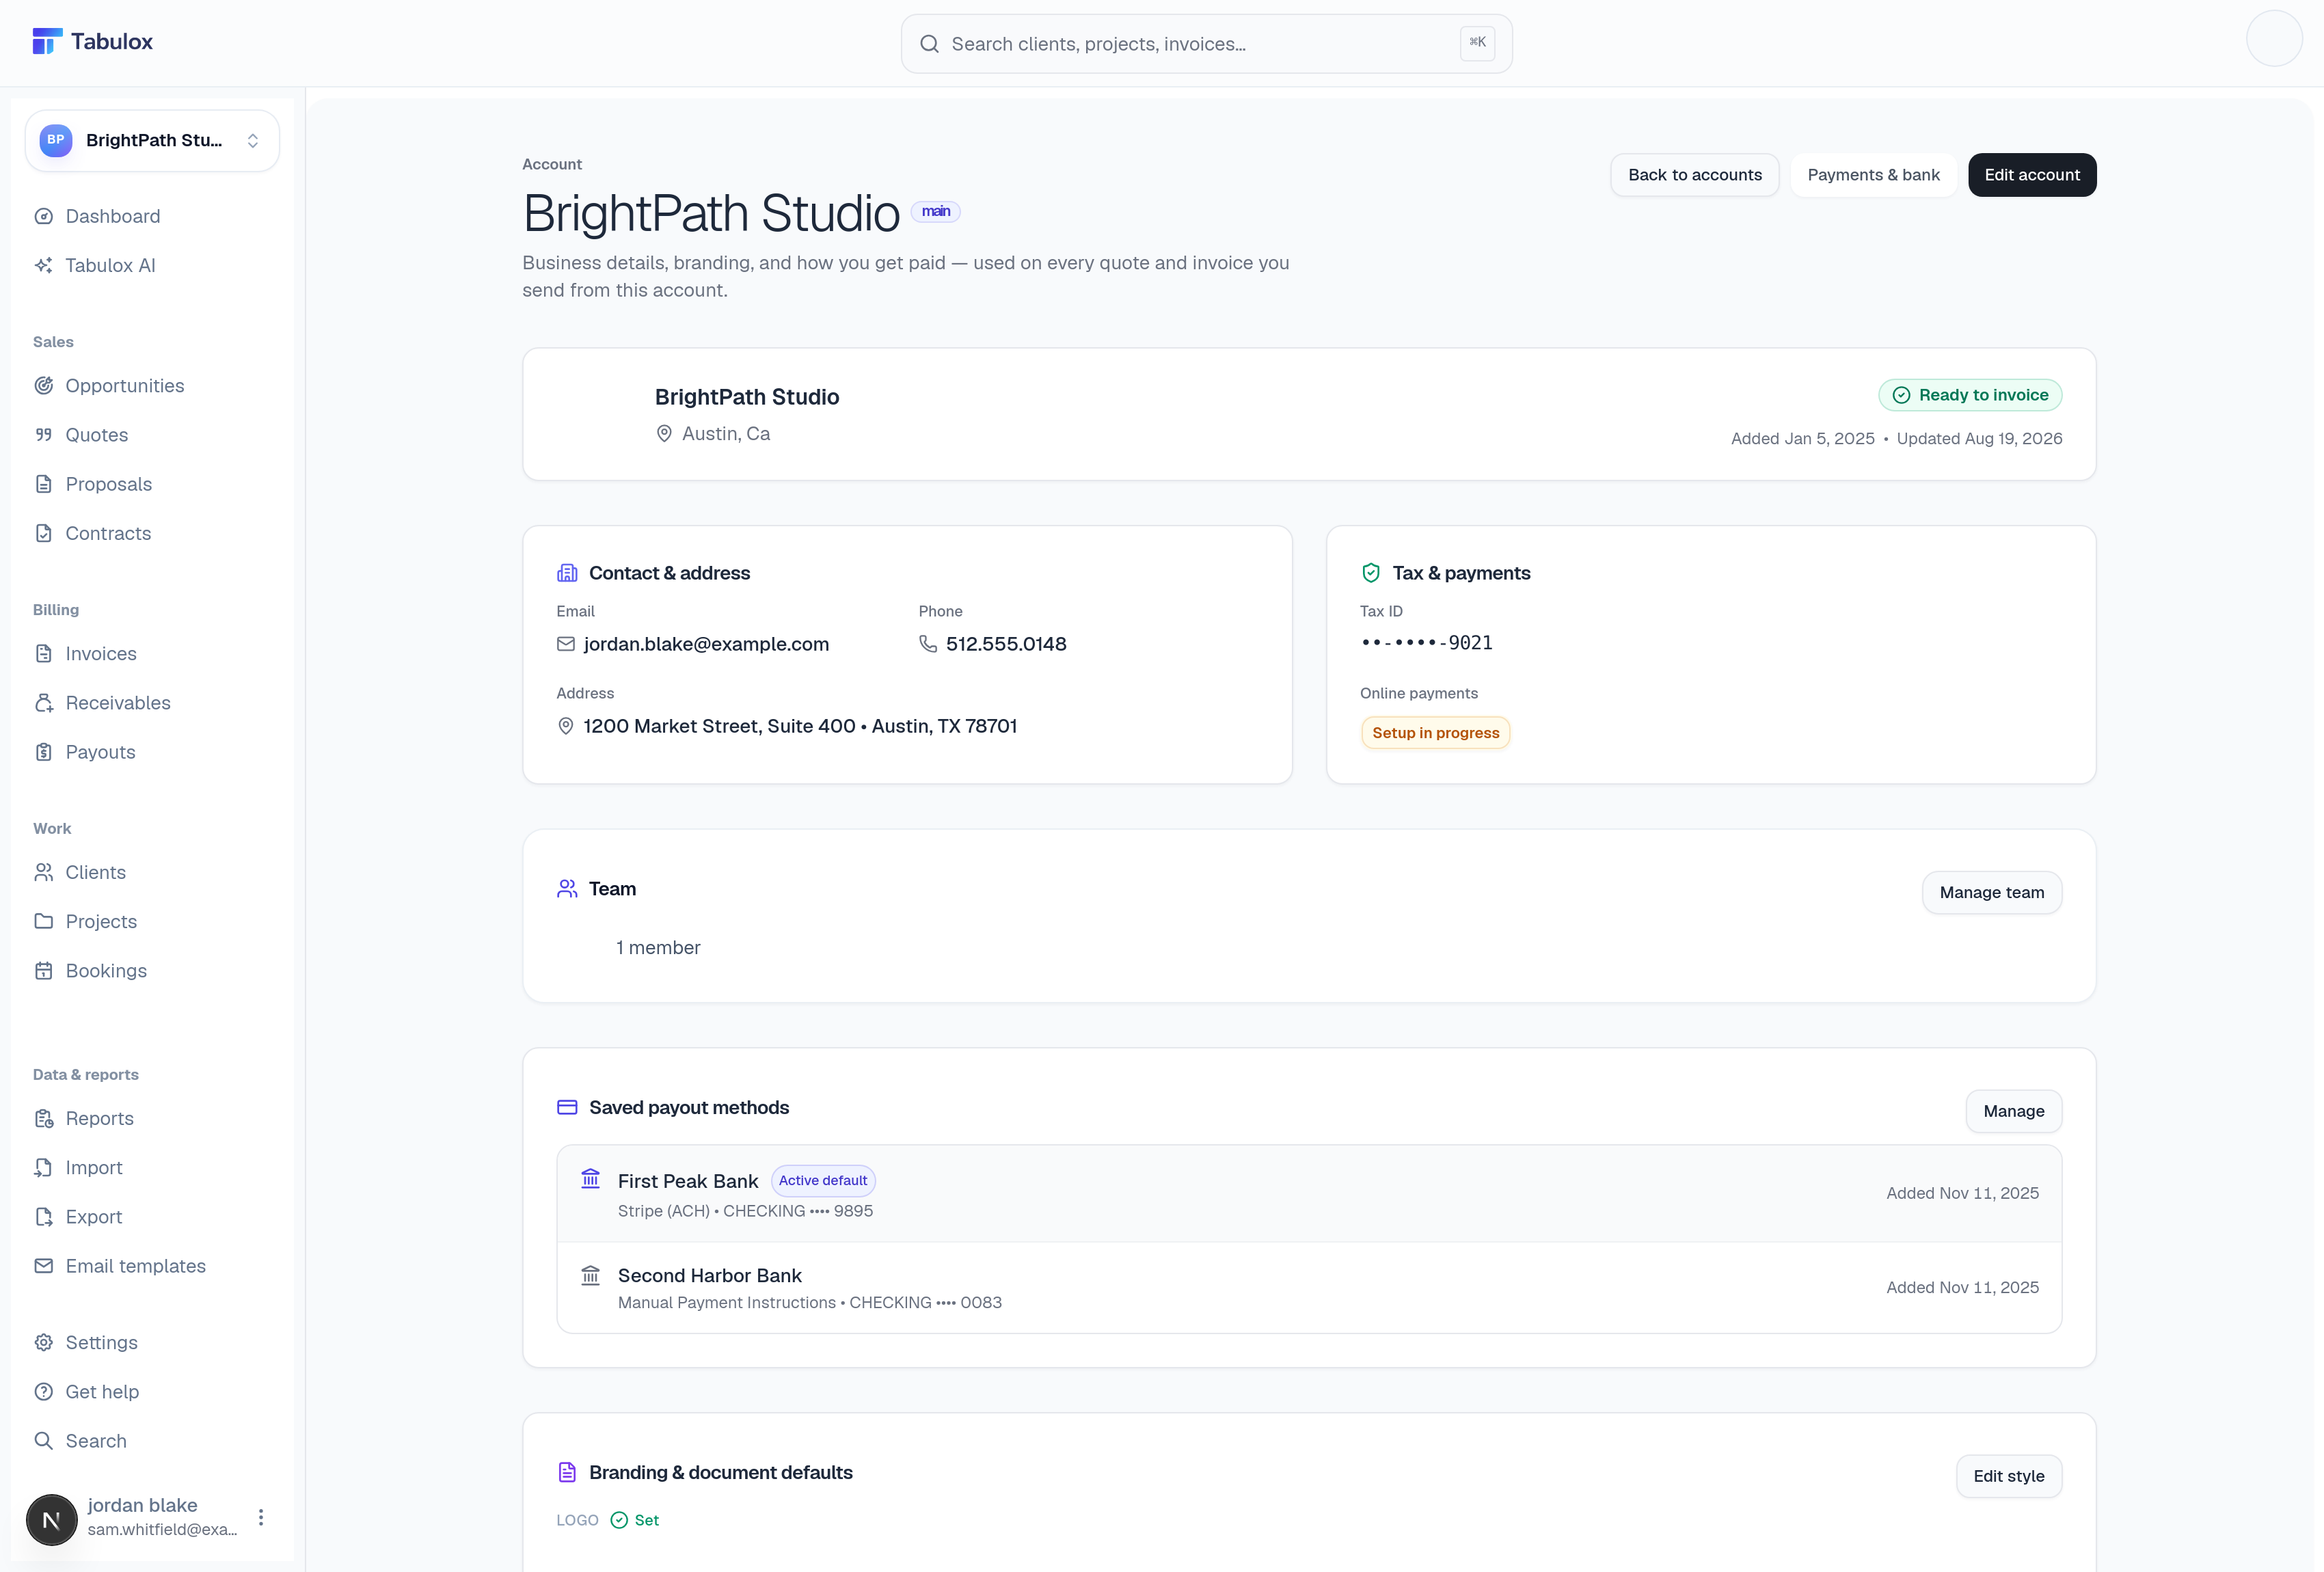
Click your workspace name at the top of the sidebar, then Back to accounts → your account (or go straight to the account you're in) to land here. It's the closest thing to a control center:
- Contact & address
Business email, phone, and mailing address — this is what shows up on quotes, invoices, and proposals sent from this account.
- Tax & payments
Your tax ID (masked except the last four digits) and whether online payments are fully set up. "Setup in progress" here means Stripe onboarding isn't finished — see Setting up how you get paid below.
- Team
A quick member count with a Manage team button into the full Team page.
- Saved payout methods
Bank accounts connected for receiving funds — Stripe ACH or manual payment instructions, with one marked as the active default.
The Edit account button (top right) is where you update the business name, logo, and address that get stamped on every document you send.
Editing your business details
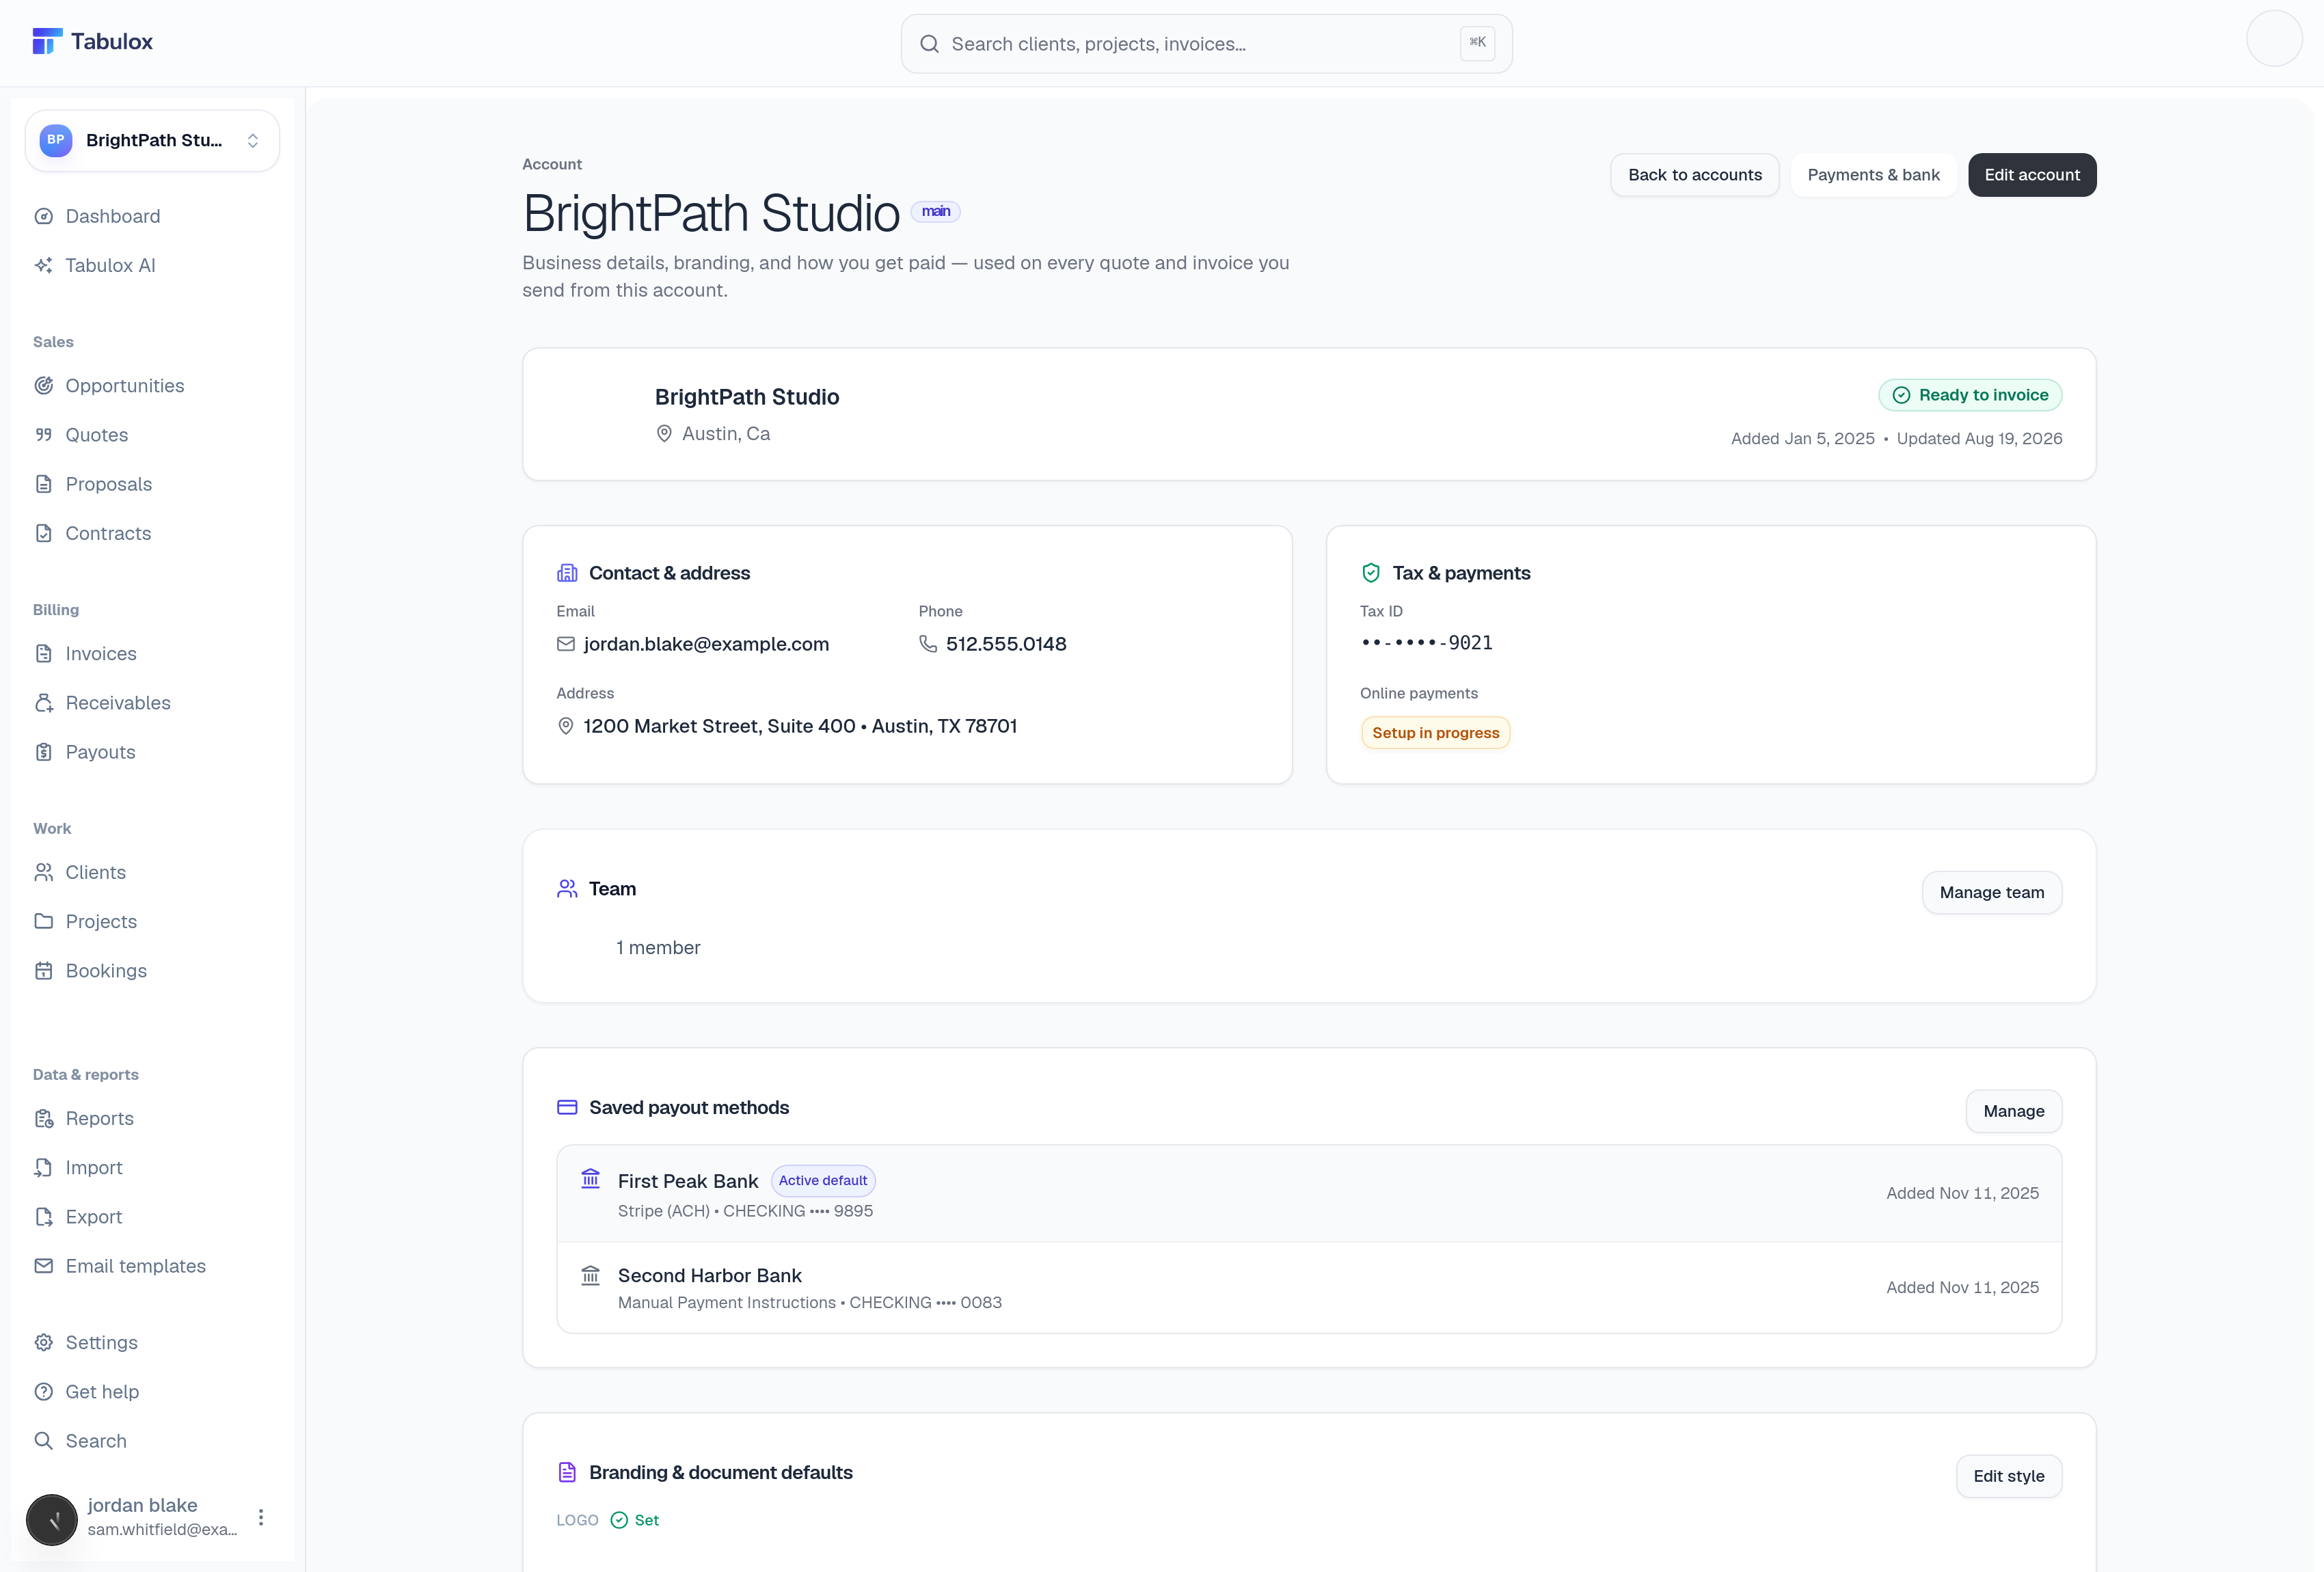
- Identity
Account name (shown throughout the app and on documents), an optional secondary name (useful if you run more than one entity — "Main," "US Entity," "EU Entity"), and your logo.
- Logo
Upload a square image, ideally 256×256px or larger (PNG or SVG). This is what shows on quotes, invoices, and every PDF you send — set it once here and it's stamped everywhere automatically.
- Contact
The name, email, and phone number clients see as your business's point of contact — separate from your own login email.
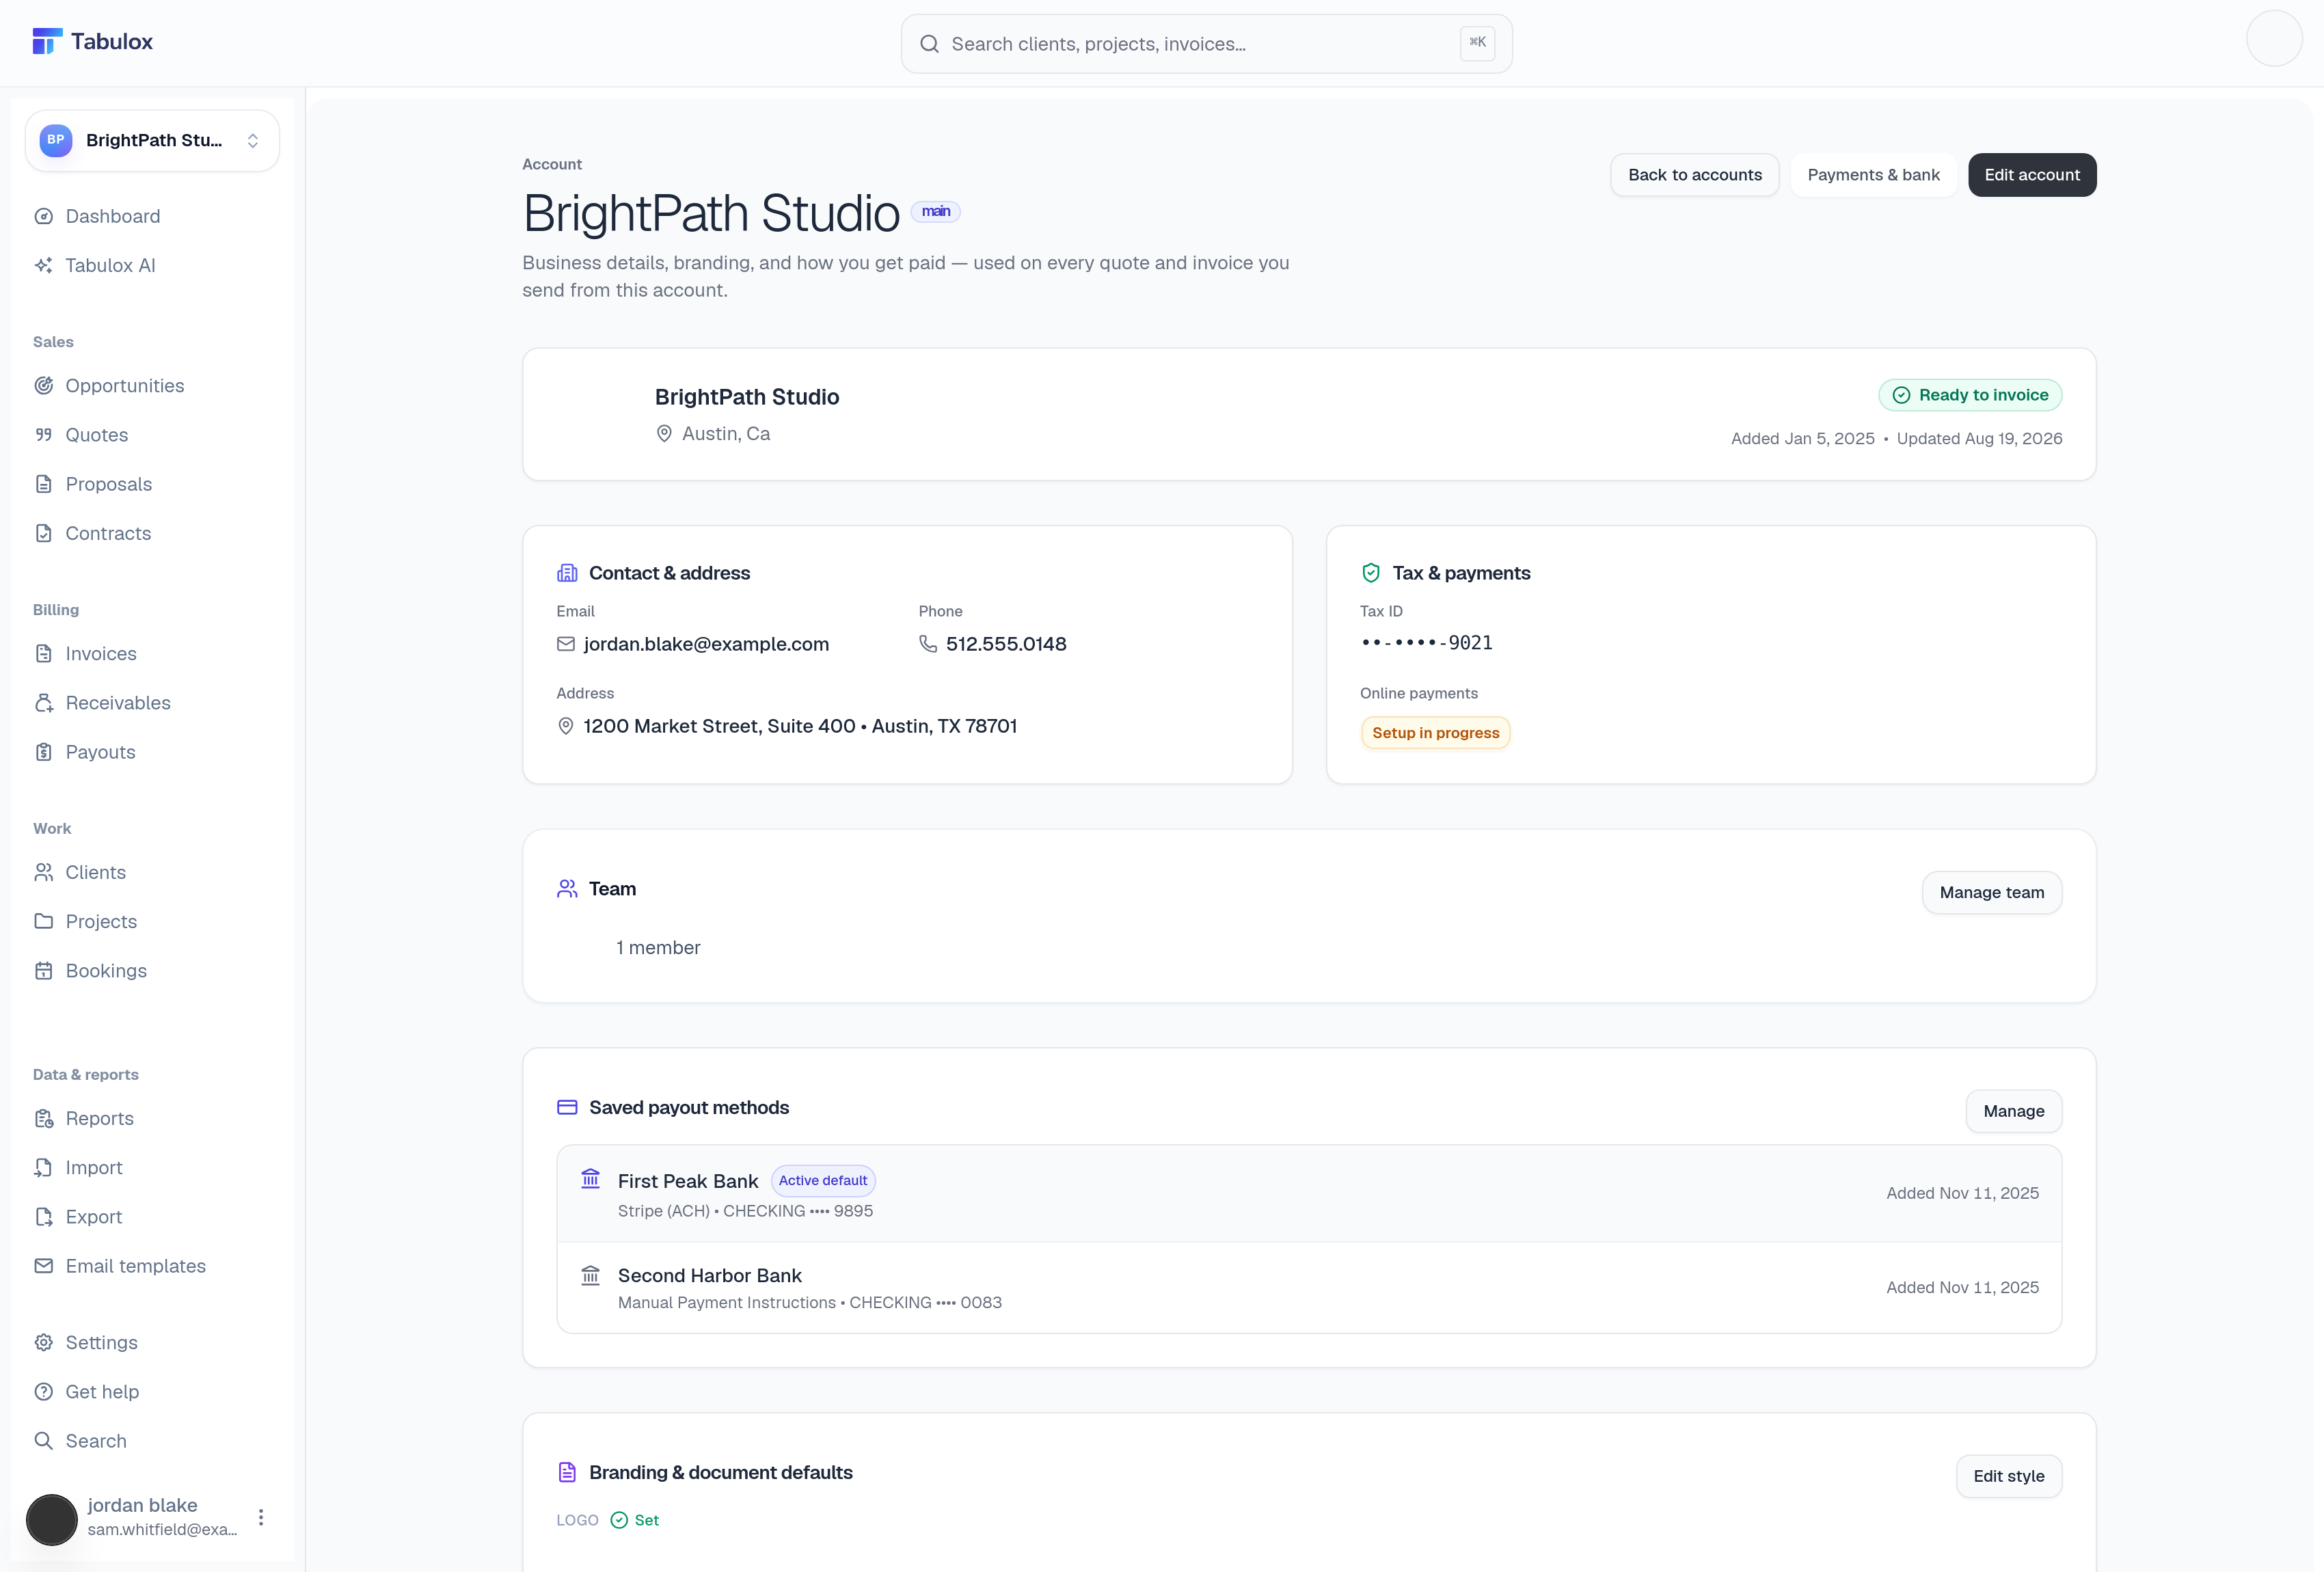
- Address
Your official mailing address. This prints on every document and is also what payment processors use to verify your business, so keep it accurate — it can hold up Stripe verification if it doesn't match your bank records.
- Federal Tax ID (EIN)
Used for payouts, 1099s, and shows (masked, last four digits only) on the account overview. Not required to start invoicing, but required before Stripe will release payouts to a US bank account.
A profile completeness bar at the top tracks how much of this you've filled in — it's not a gate on anything, just a nudge toward a client-ready profile before you start sending real documents.
Setting up how you get paid
This is the part that actually determines whether a client can pay an
invoice you send them. Get there via Payments & bank from the account
overview page, or directly at /accounts/<id>/payments.
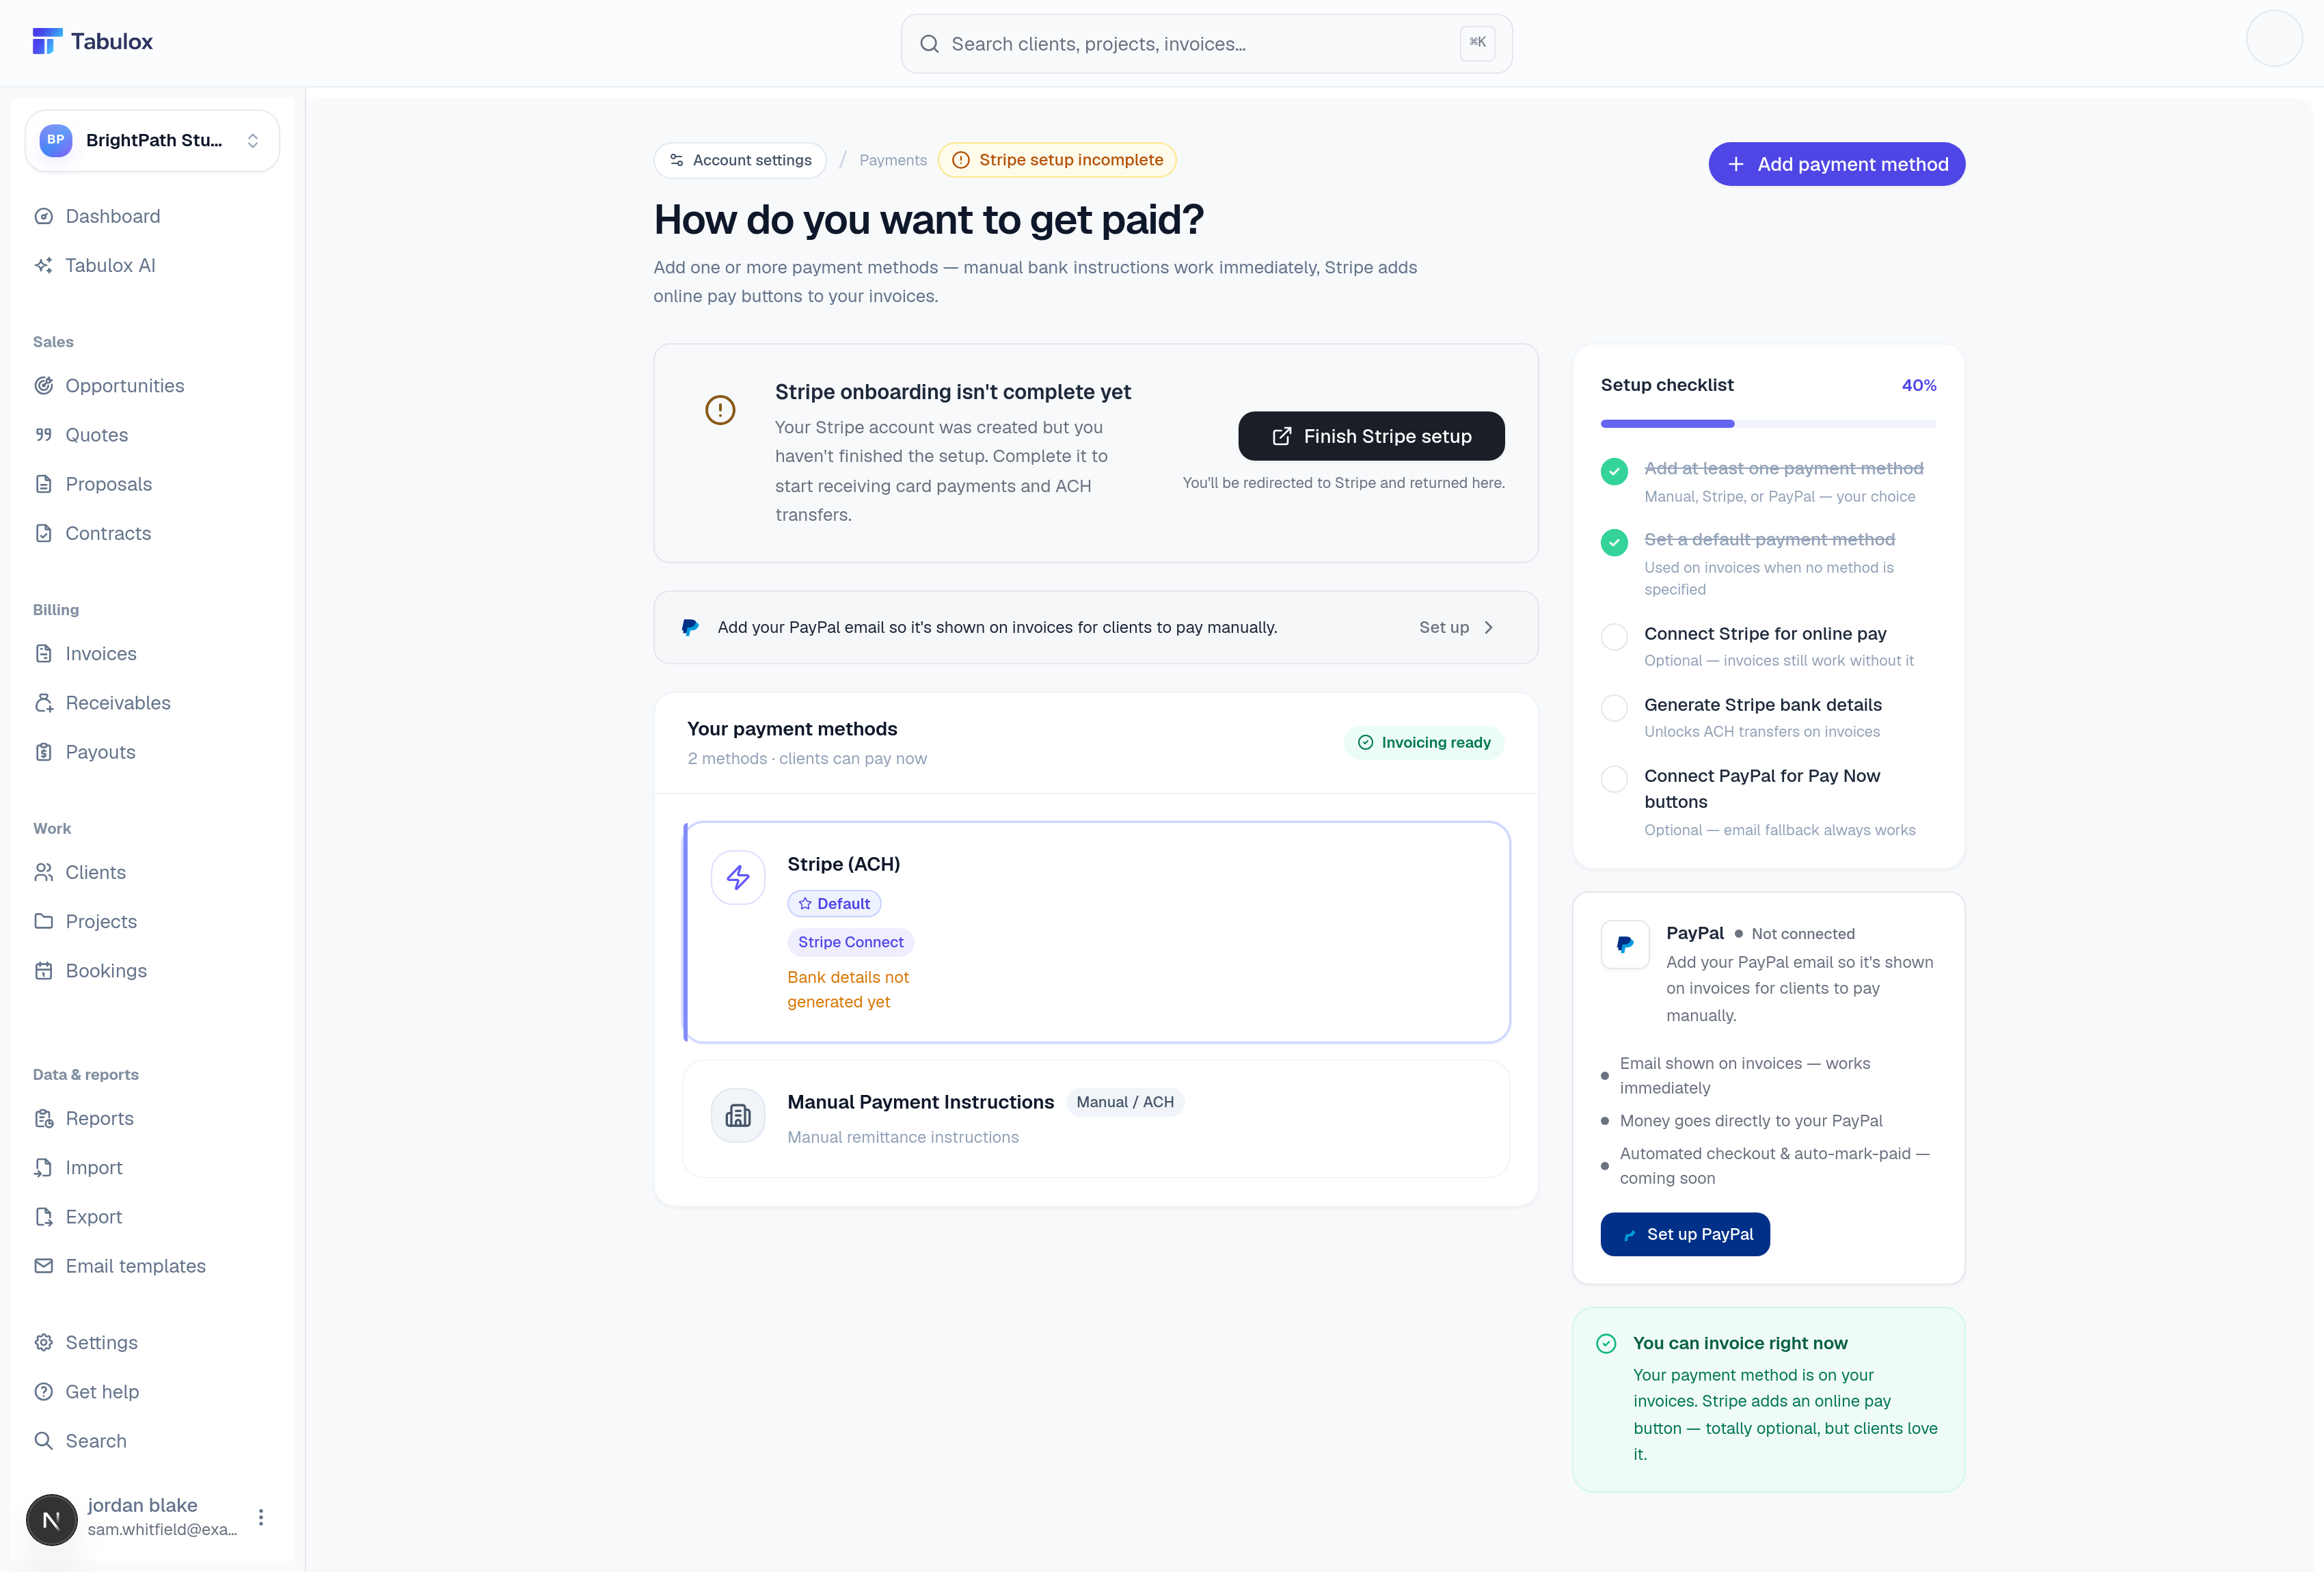
You don't have to pick one. Add as many methods as you want and set a default — Tabulox shows whatever's on the invoice (Stripe pay button, manual instructions, PayPal email) based on what's attached to it.
There are three ways to get paid, and they're not mutually exclusive:
- Manual / ACH — works immediately
Type your bank transfer instructions as plain text (account number, routing number, bank name). They print on every invoice exactly as written, and the client pays via their own bank. No verification, no waiting — this is live the moment you save it.
- Stripe — recommended
Clients get a real "Pay now" button on the invoice and can pay by card or ACH in under a minute. Funds land in your bank on a schedule you control. This is the only option that lets Tabulox auto-mark an invoice paid the moment the client pays.
- PayPal
Add your PayPal email and it's shown on the invoice for the client to send payment to directly. Lighter weight than Stripe — no processing fees taken by Tabulox, no bank-level verification, just an email address clients pay to manually.
Connecting Stripe, step by step
Click Connect Stripe (in the banner, or the button next to "New remittance profile" when adding a payment method).
- You're redirected to Stripe
No existing Stripe account needed — Tabulox creates one for you as part of this flow. Stripe asks for your business details, bank account, and identity verification info. Takes about two minutes for most people.
- Stripe onboarding finishes, you're returned here
Land back on the Payments page automatically. If you closed the tab or stopped partway, the banner switches from "Connect Stripe" to Finish Stripe setup — click it again to pick up exactly where you left off.
- Generate bank details
Once Stripe onboarding is complete, click Generate bank details (or Gen bank details on the profile card) to mint the ACH routing/account numbers that unlock bank-transfer payments on top of card payments. Until this step, Stripe accepts card payments but not ACH.
A profile card marked Stripe (ACH) with "Bank details not generated yet" in amber means Stripe is connected but this last step is still pending — that's exactly what "Generate bank details" fixes.
If you ever need to change which bank account Stripe pays out to, click Update bank on the Stripe profile card — this reopens Stripe's own account-management flow rather than a Tabulox form, since Stripe is the system of record for your payout bank account.
Adding a payment method manually
Click Add payment method to open the same form used for all three types:
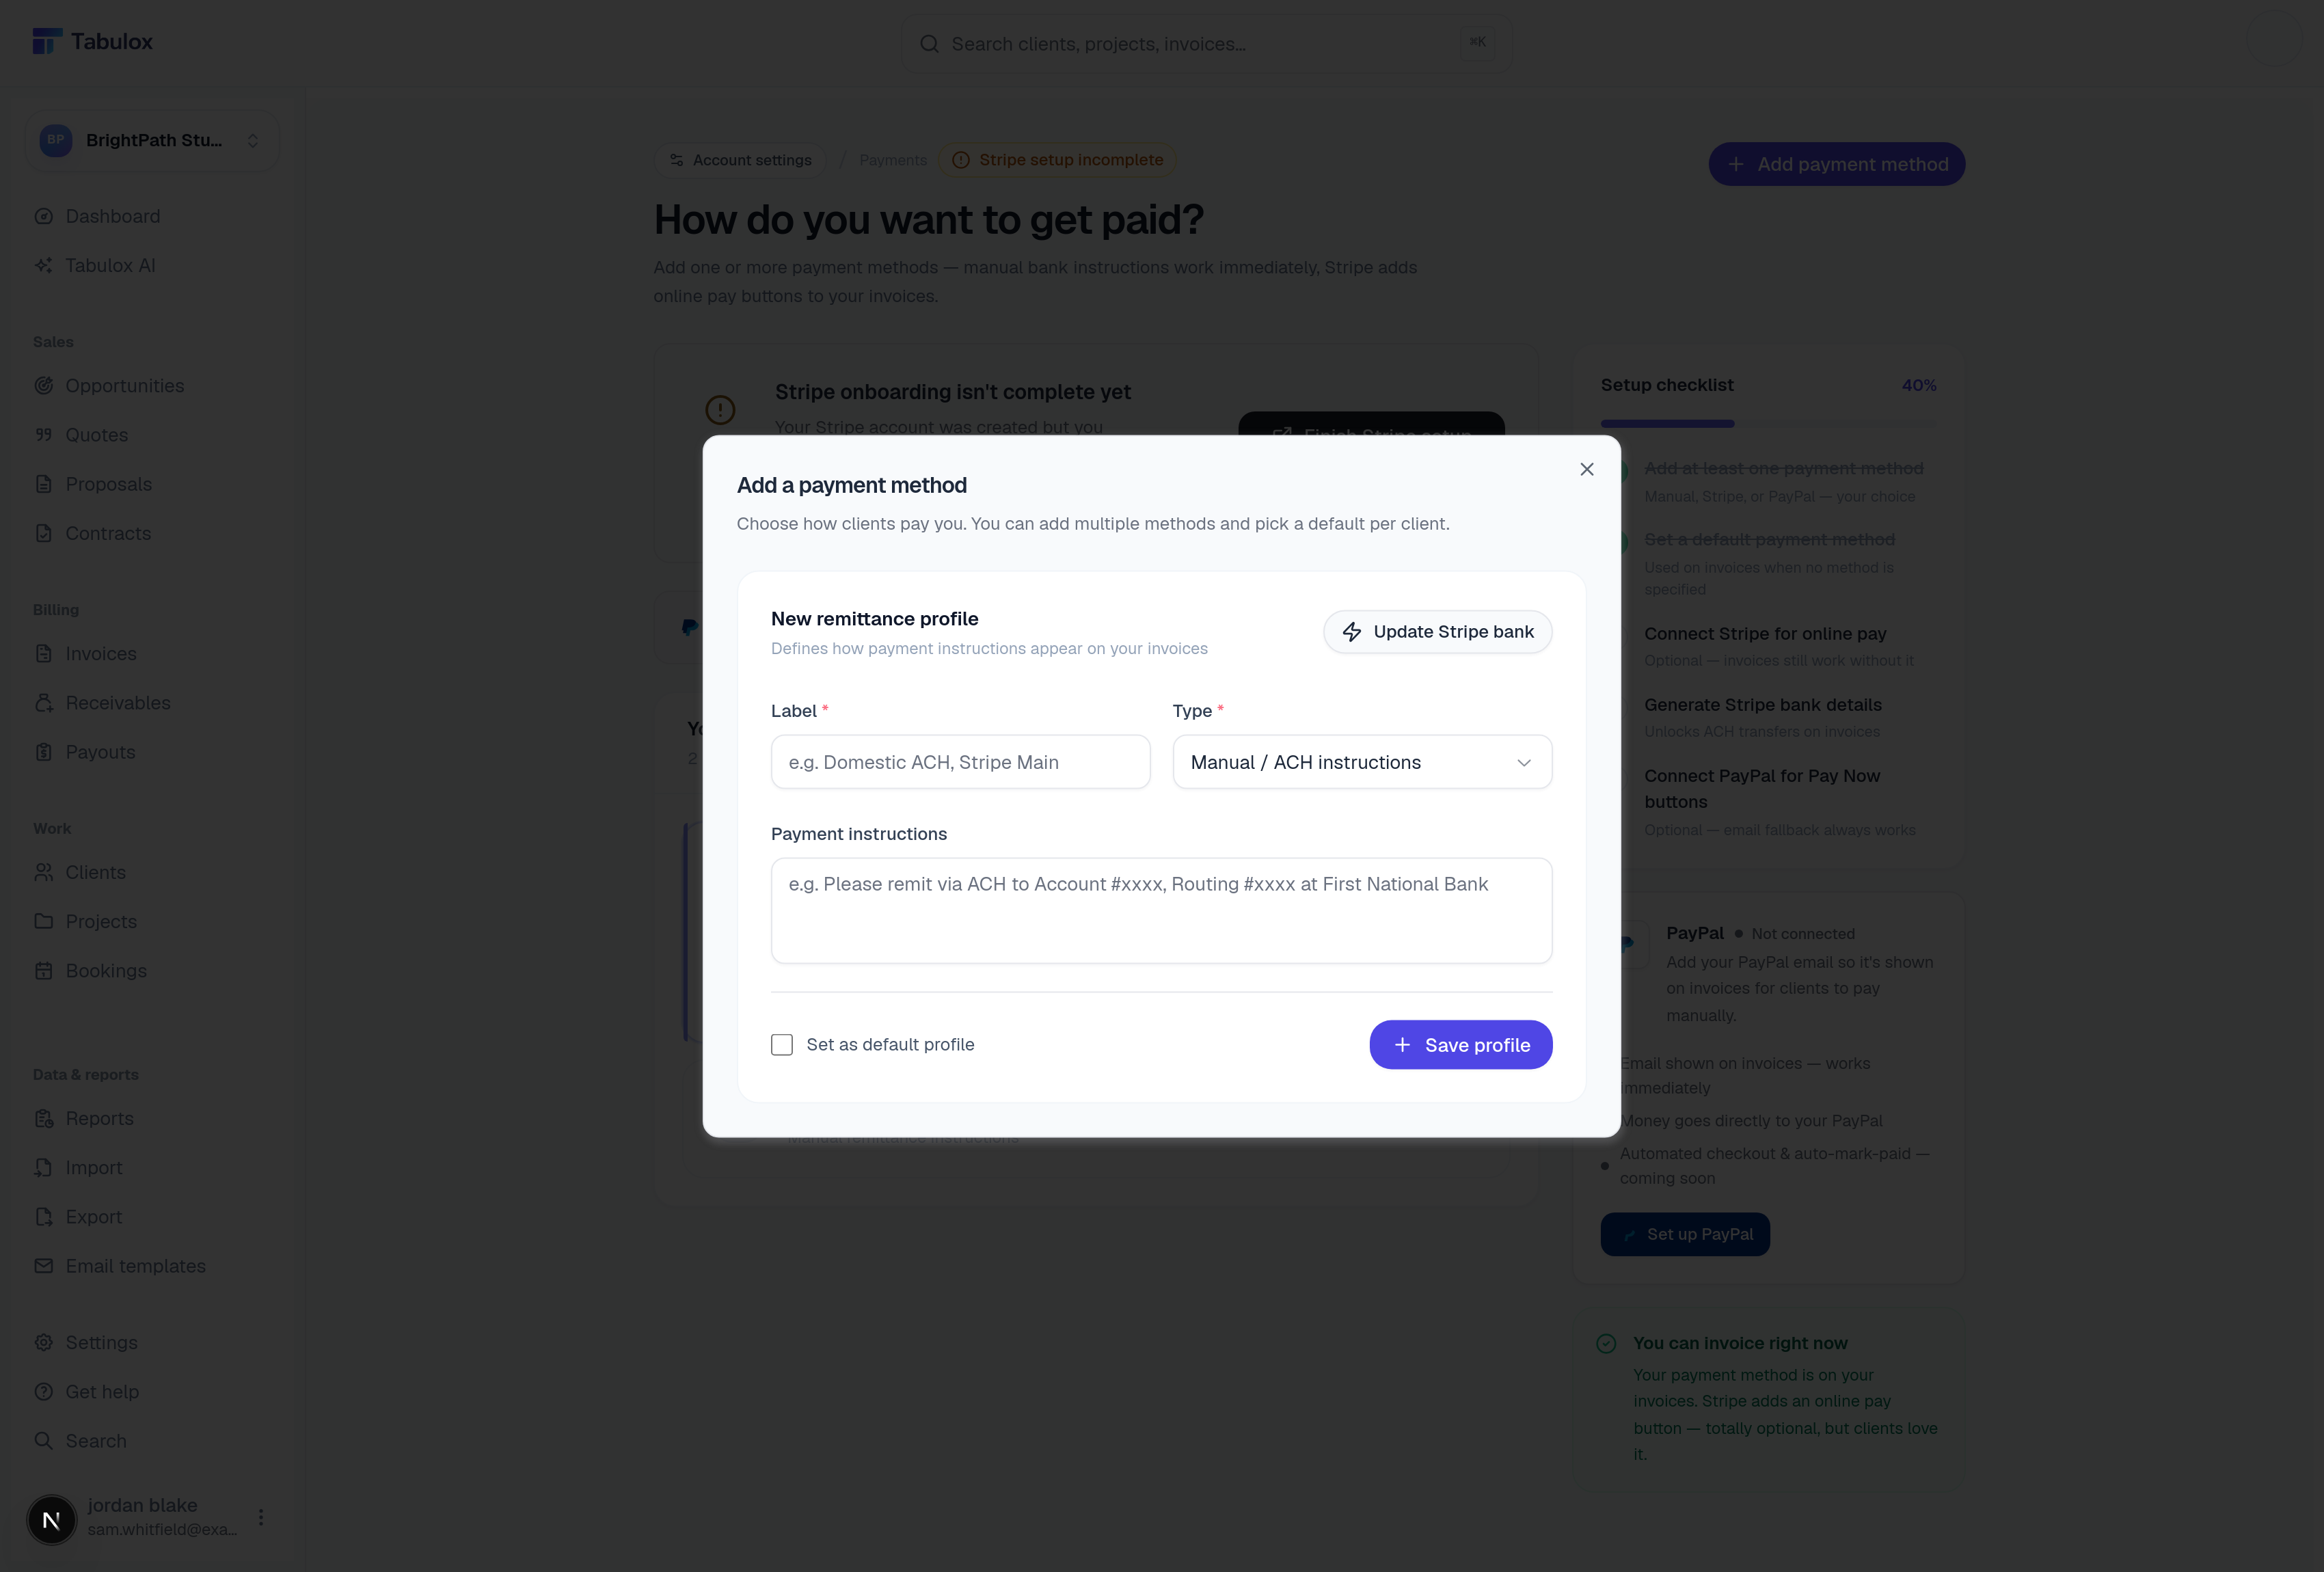
- Label
Your own name for this method, e.g. "Domestic ACH" or "Stripe Main" — shown on the profile card, not to clients.
- Type
Manual / ACH instructions, Stripe Connect, or PayPal. The form below changes based on this choice.
- Type-specific fields
Manual shows a free-text Payment instructions box. Stripe shows a button to launch the Connect flow (save the profile first, then generate bank details). PayPal asks for your merchant email.
- Set as default profile
The default is what appears on an invoice when no specific method is chosen for that client — check this if this should be your go-to.
Every saved method shows as a card in Your payment methods, where you can make any of them the default, edit, or delete (archive) them — archived profiles collapse into a small expandable list rather than disappearing, so past invoices that referenced them still make sense.
The setup checklist
The right-hand panel tracks five things: adding at least one payment method, setting a default, connecting Stripe, generating Stripe bank details, and connecting PayPal. Only the first two are required to start invoicing — Stripe and PayPal are both optional, called out explicitly as such in the checklist itself. Once you've added any method at all, a green "You can invoice right now" card confirms it.
Don't over-think this at first. Add manual bank instructions to unblock invoicing today, then come back and connect Stripe later when you want clients paying with a card instead of a bank transfer — nothing about the manual setup needs to be undone to add Stripe on top of it.
Once money actually starts moving, Payouts is where you track it — balance, payout schedule, and payout history all live there.
Team
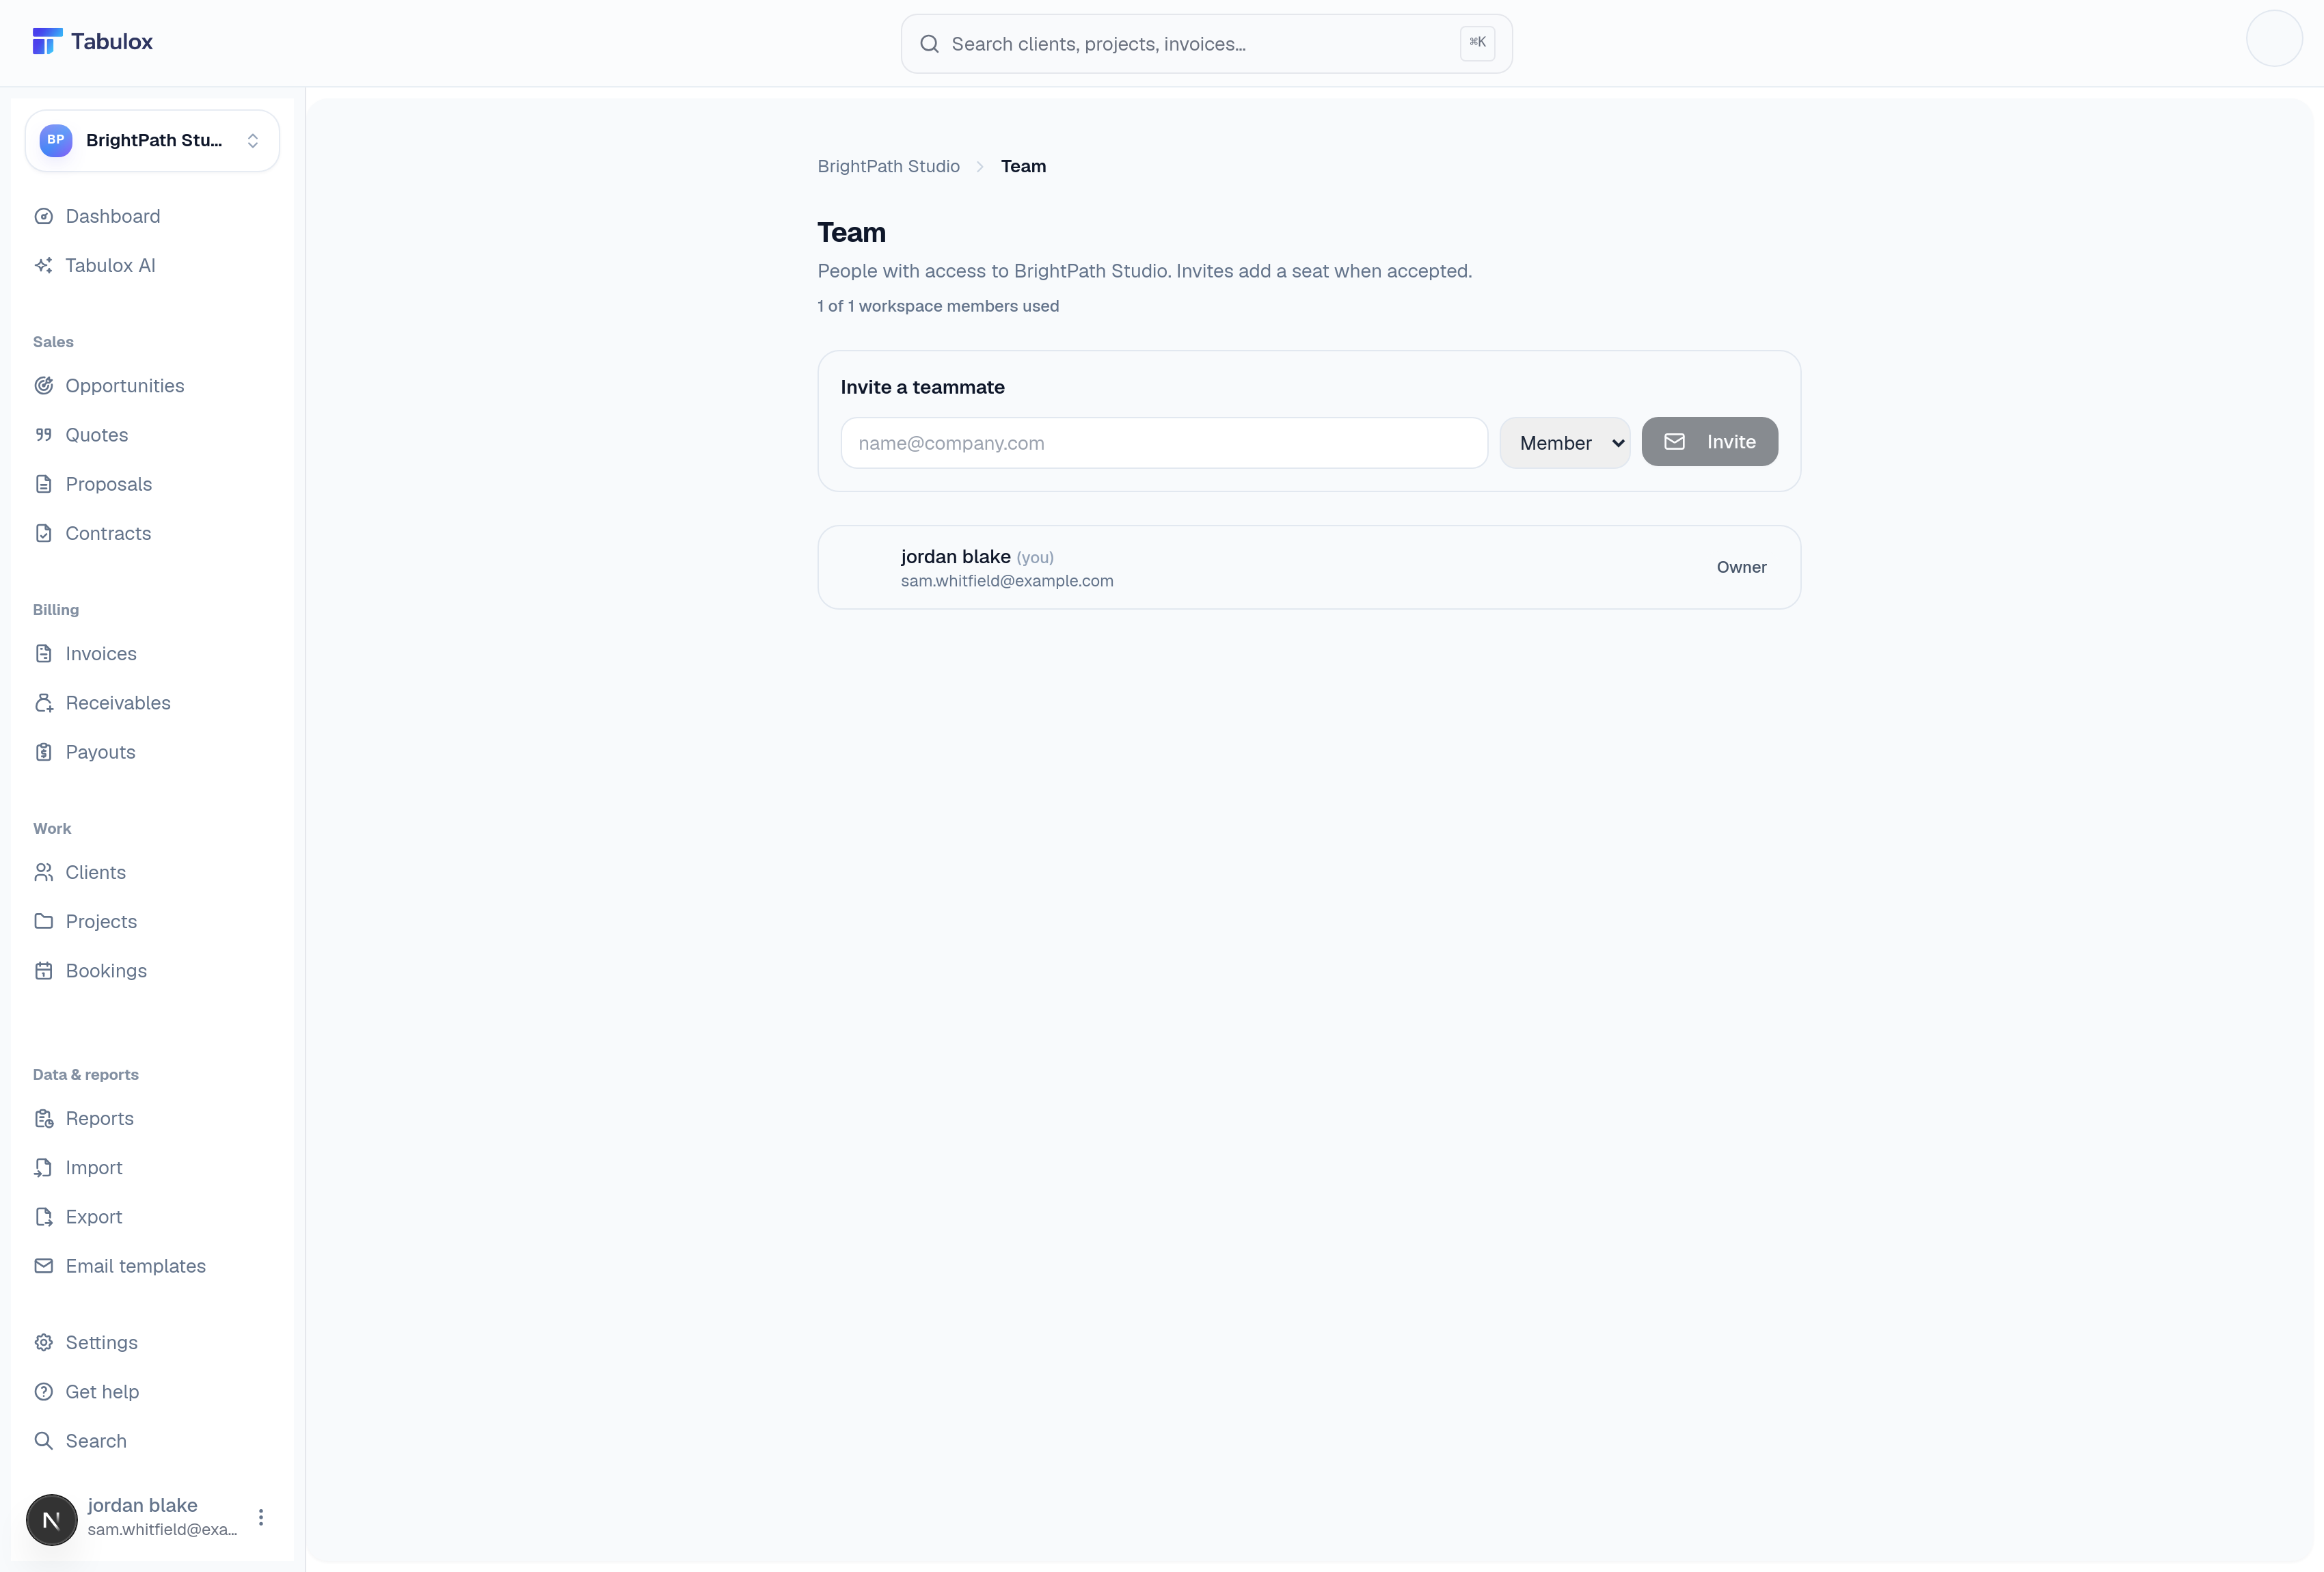
Invite a teammate by email, choose a role from the dropdown, and click Invite — they'll get an email to accept. The page shows how many seats you're using out of your plan's limit; upgrading in Billing raises that cap. Everyone on the team, including you as the owner, is listed with their role.
Email templates
This is where the actual emails Tabulox sends — invoice delivery, quote delivery, reminders — get built and customized. It's the deepest editor in Settings: a real block-based email builder with live variables, a raw-code mode, and a preview that renders against your actual data. Two screens make it up: a browsing gallery, and the editor itself ("Studio").
The template gallery
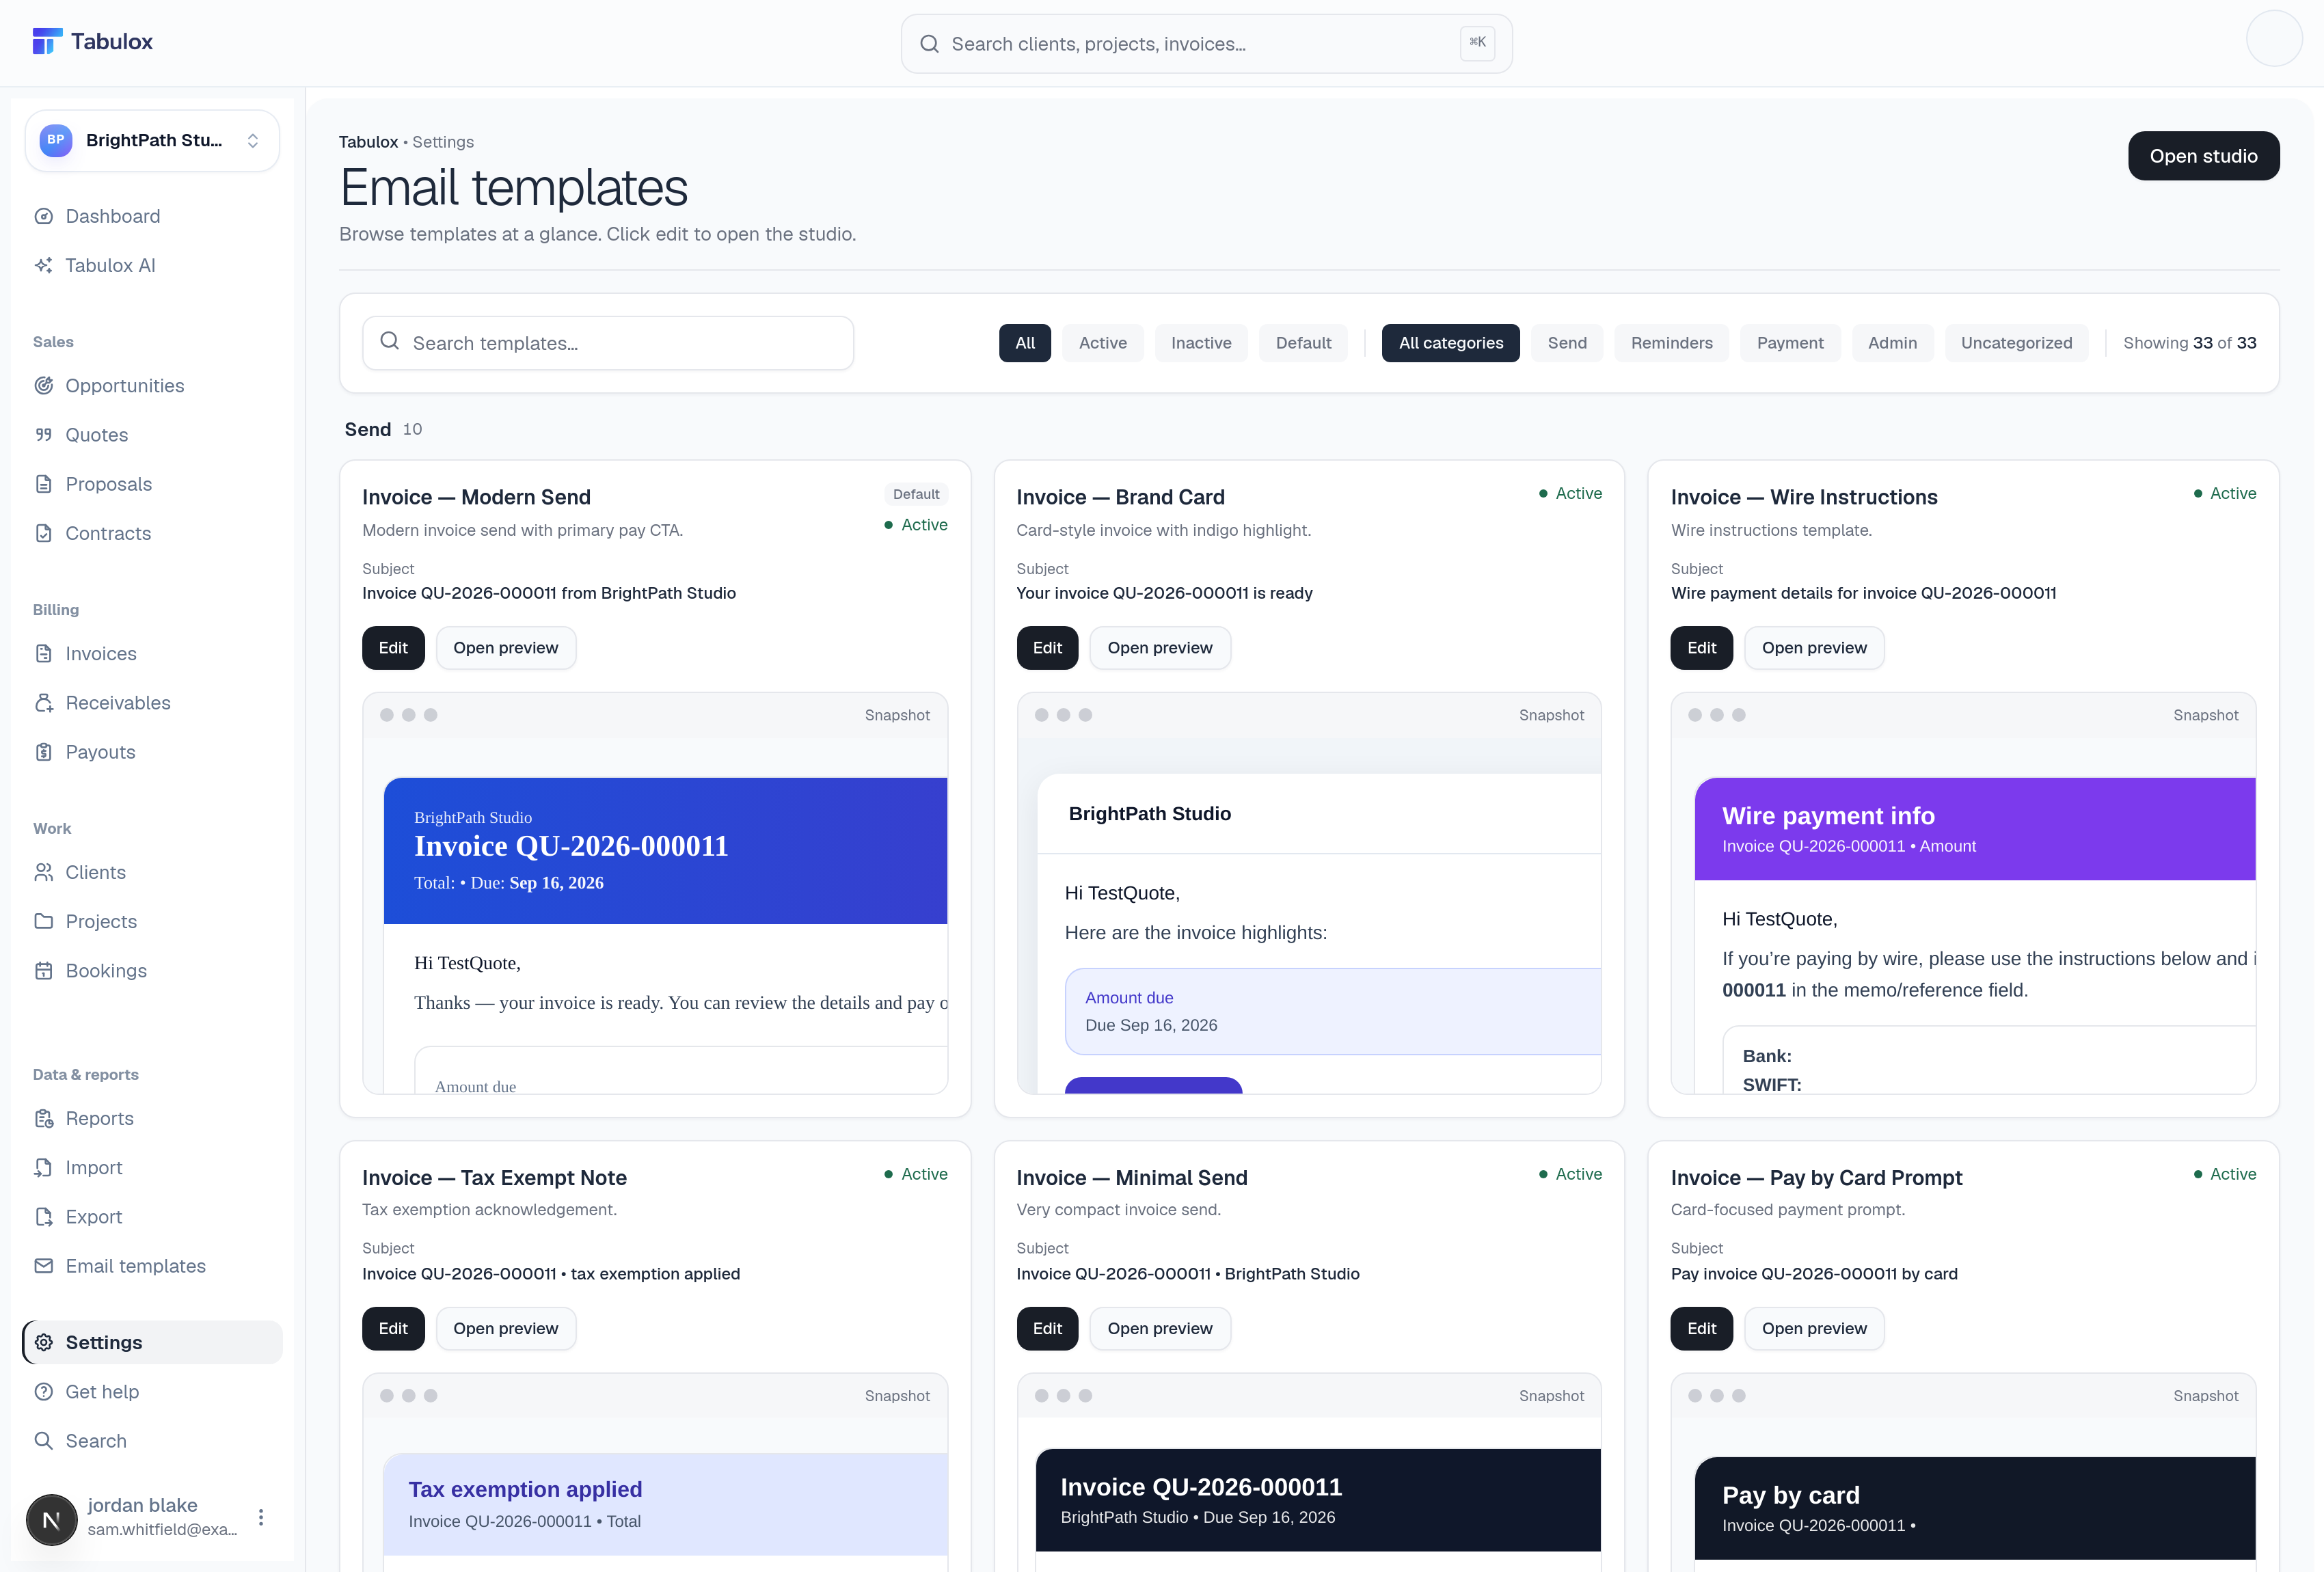
Landing on Email templates in the sidebar takes you here first — a browsable grid of every invoice template, both built-in and your own, each card showing a live snapshot, its subject line, and Edit / Open Preview buttons. Search by name, and filter with two rows of chips: All / Active / Inactive / Default for status, and All categories / Send / Reminders / Payment / Admin / Uncategorized for category. Open Studio (top right) jumps into the full editor.
This gallery only ever shows Invoice templates. To work with Quote, Project, or Opportunity templates, go straight to Studio and switch the Entity dropdown there.
Studio — the editor
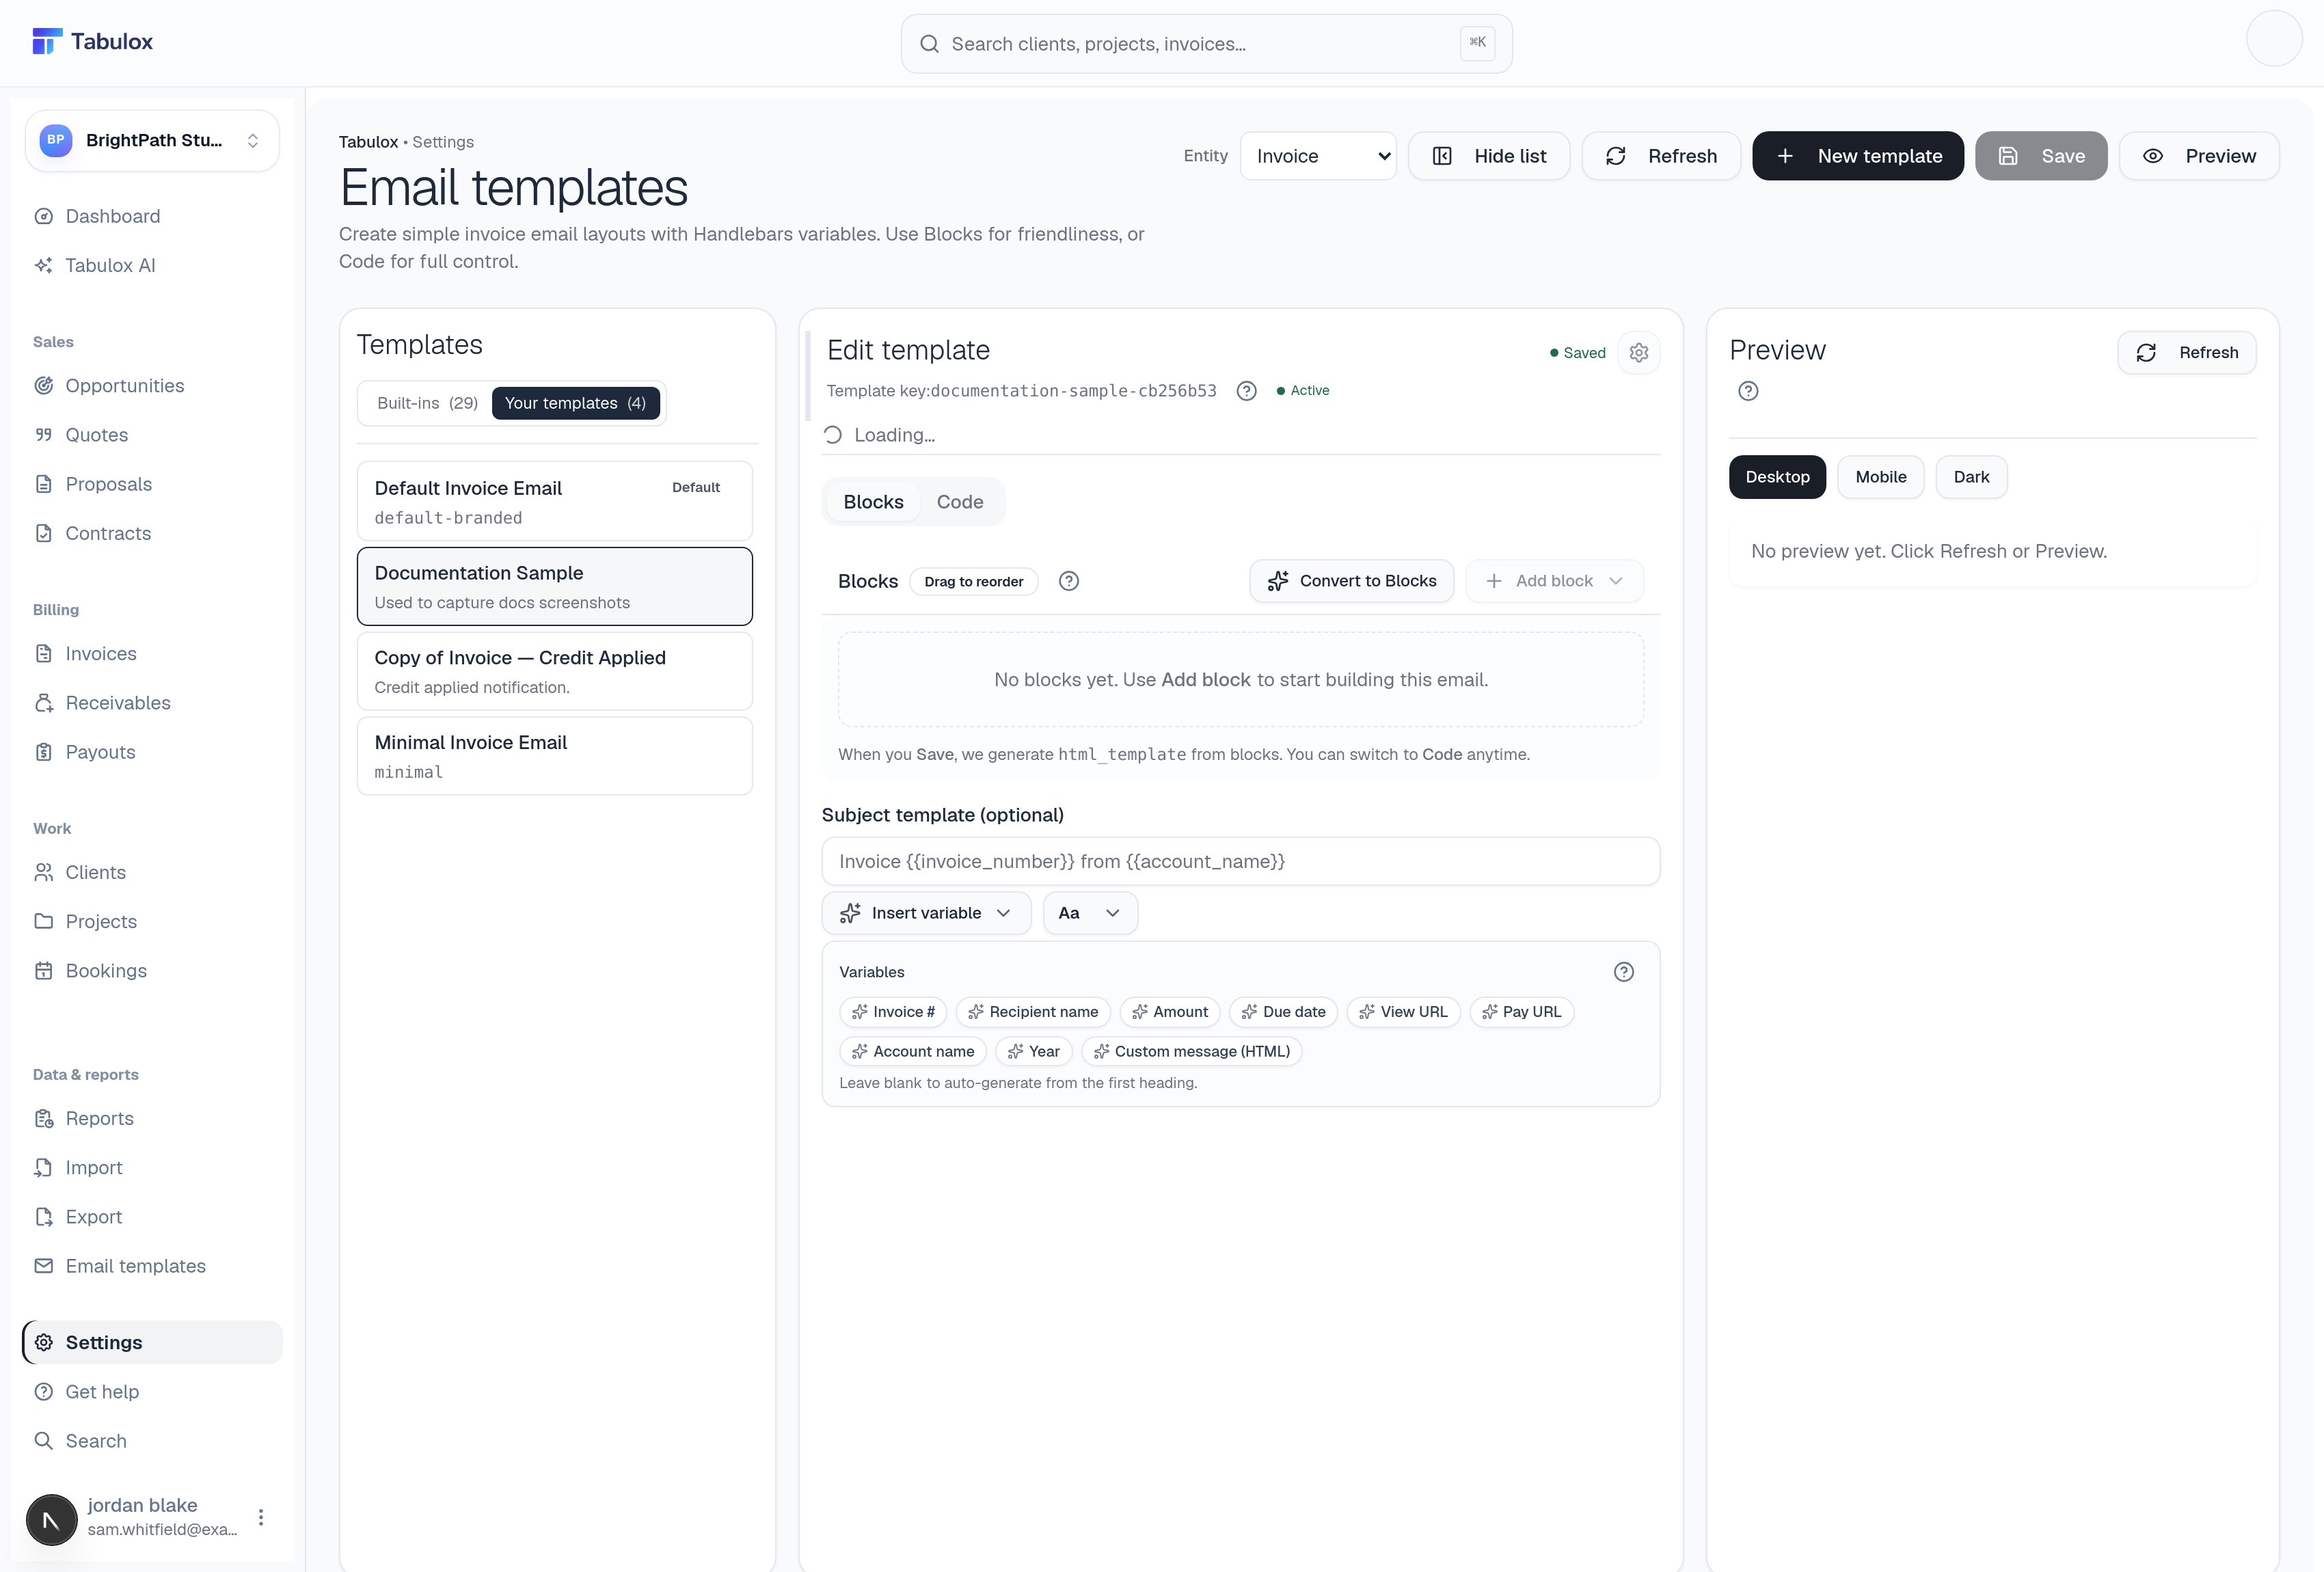
- Entity
The dropdown at top switches which document type you're editing templates for: Invoice, Quote, Project, or Opportunity. Switching it swaps the whole template list. Built-in templates currently only exist for Invoice and Quote — Project and Opportunity will show an empty Built-ins tab until you create your own.
- Built-ins vs. Your templates
The left panel has two tabs. Built-ins are Tabulox's pre-written starting points — polished, but read-only; you can't edit or save over one directly. Your templates is everything you've created, with Default and Inactive badges where relevant.
- Copy to edit
Select a built-in and a Copy to edit button appears — it clones the template into Your templates (named "Copy of <original name>") with the same subject and HTML, ready to customize. This is the only way to turn a built-in into something editable.
Creating a template
Click New template:
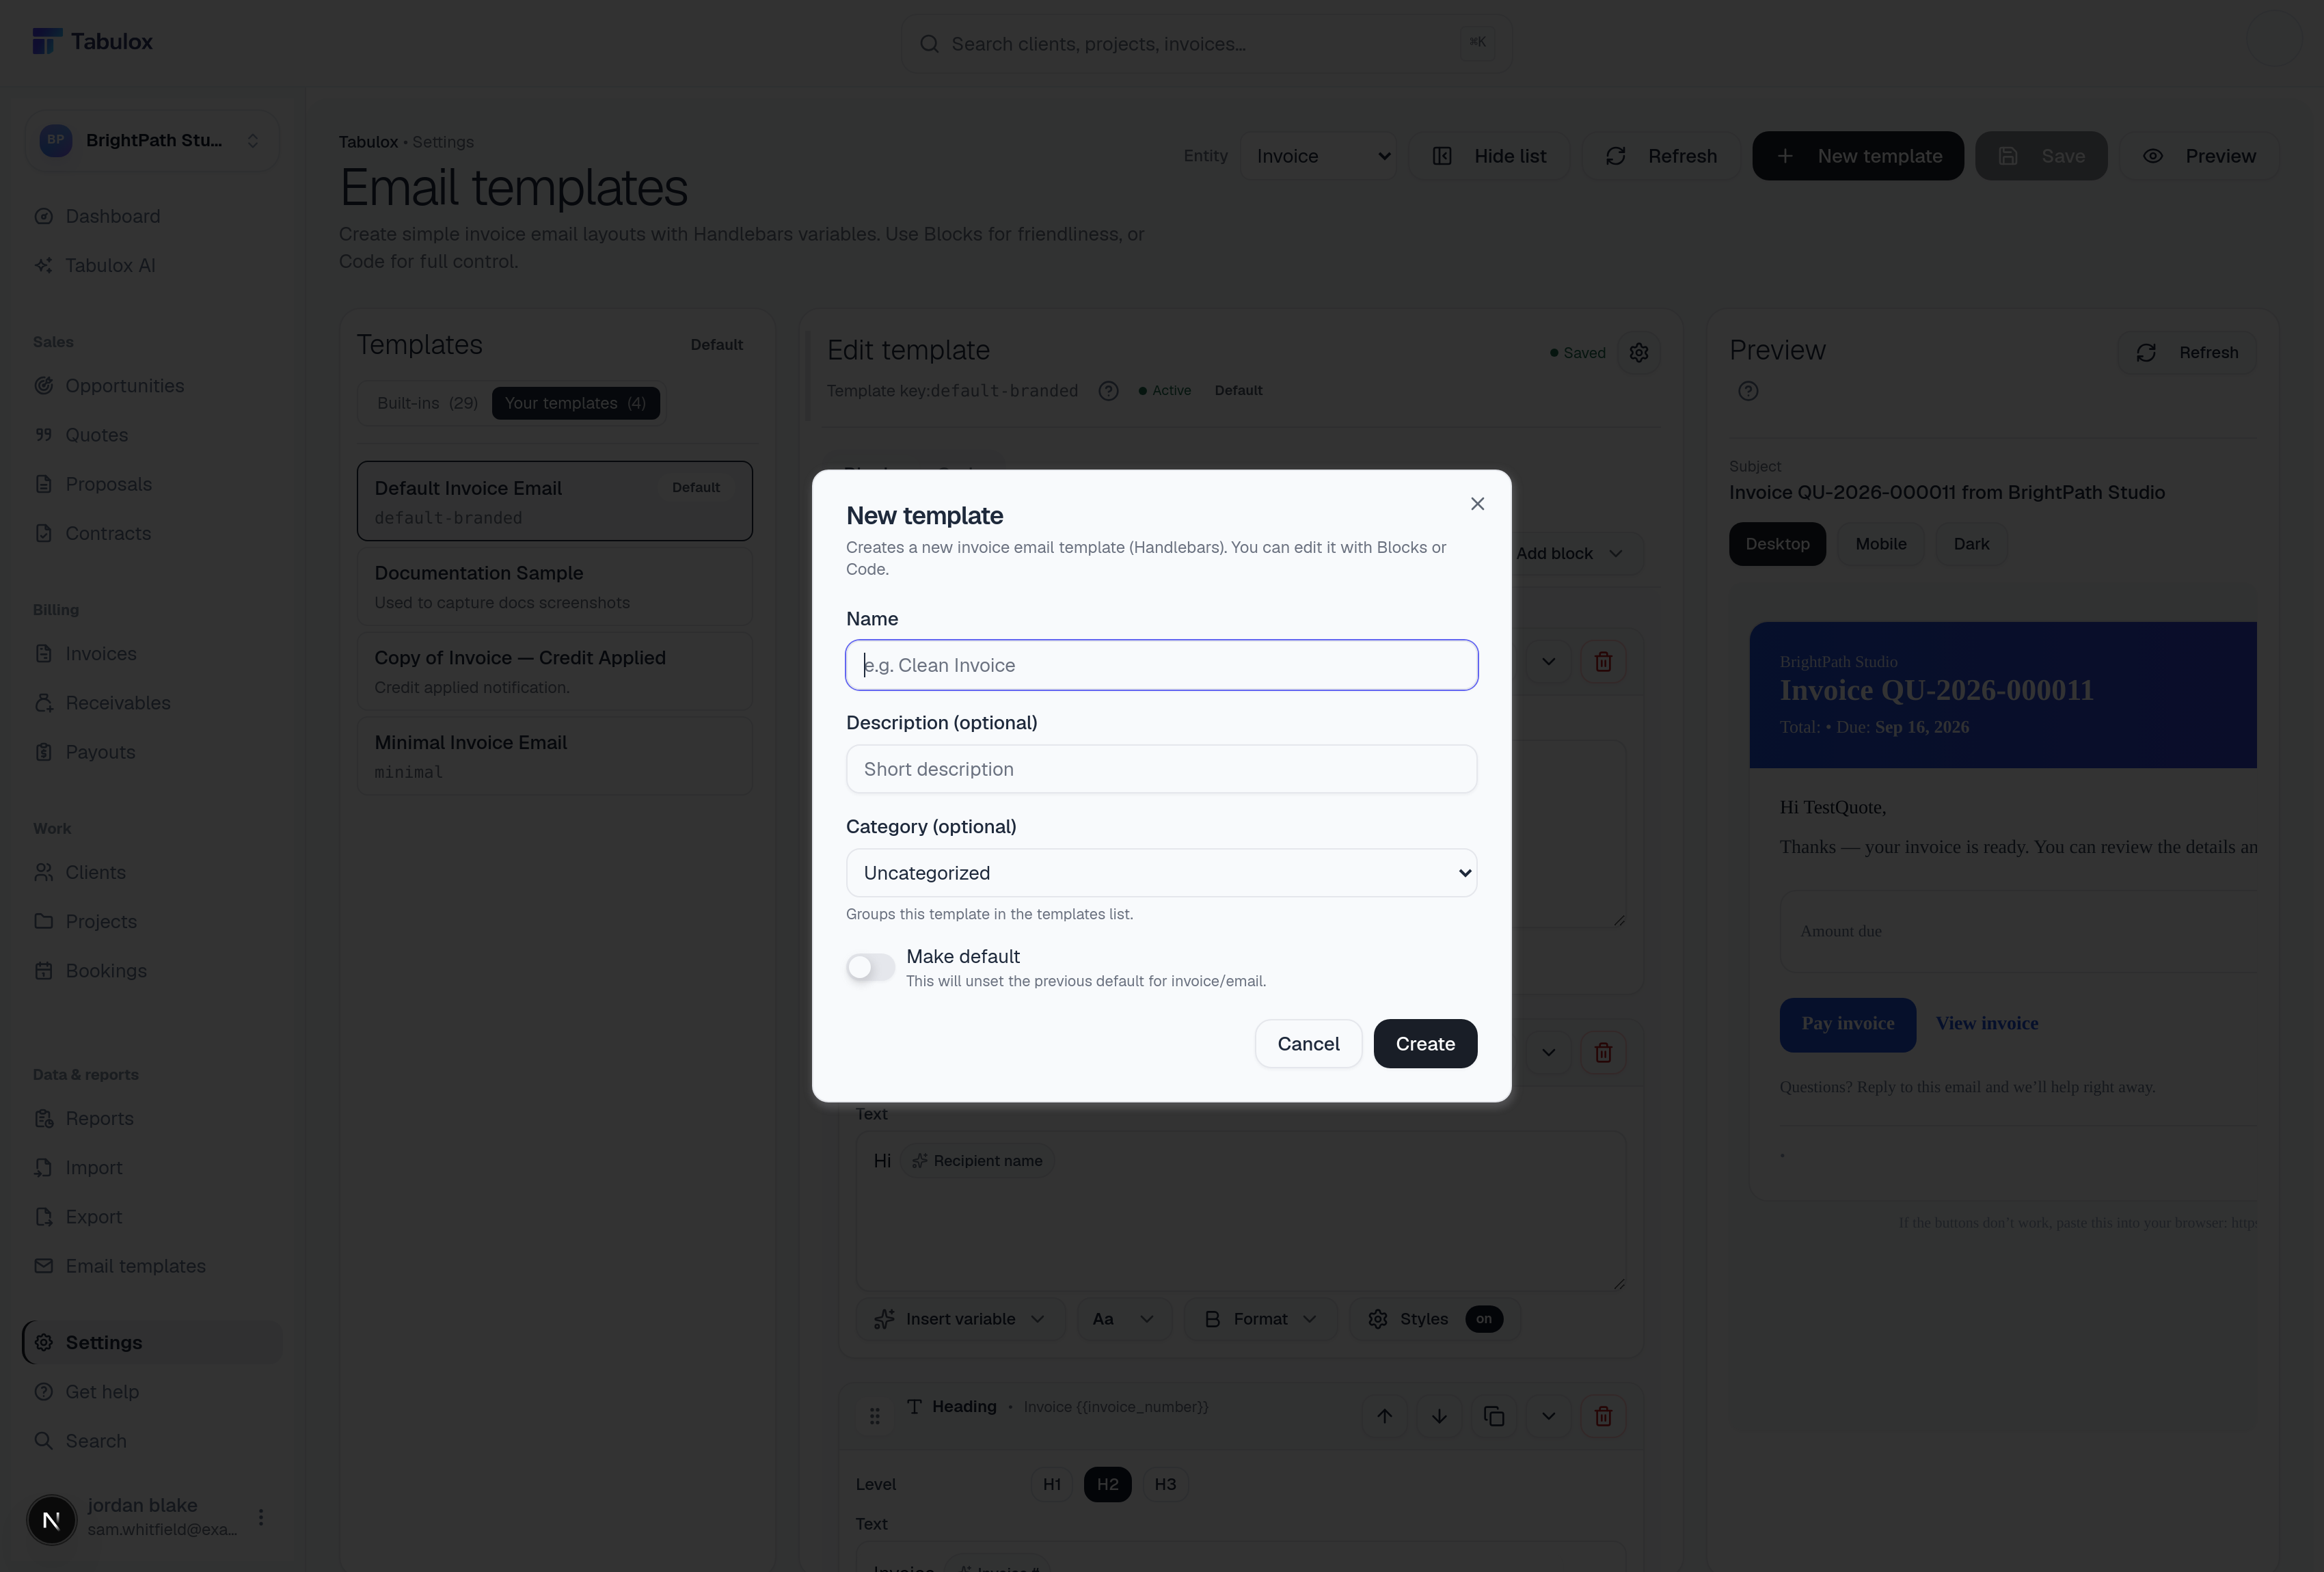
- Name / Description
Name is required and shows in your template list; description is optional, just a note to yourself.
- Category
Uncategorized, Send, Reminder, Payment, Decision, or Admin — purely organizational, used for filtering in the gallery.
- Make default
Flip this on and the new template becomes what's used automatically for this entity type — unsetting whichever template was default before.
Every new template starts from the same built-in starter layout — there's no "blank" option and no way to clone one of your own existing templates from this dialog. If you want a variant of something you already built, the practical path is Code mode: open the source template, copy its HTML, paste it into a fresh template's Code tab.
Building in Blocks
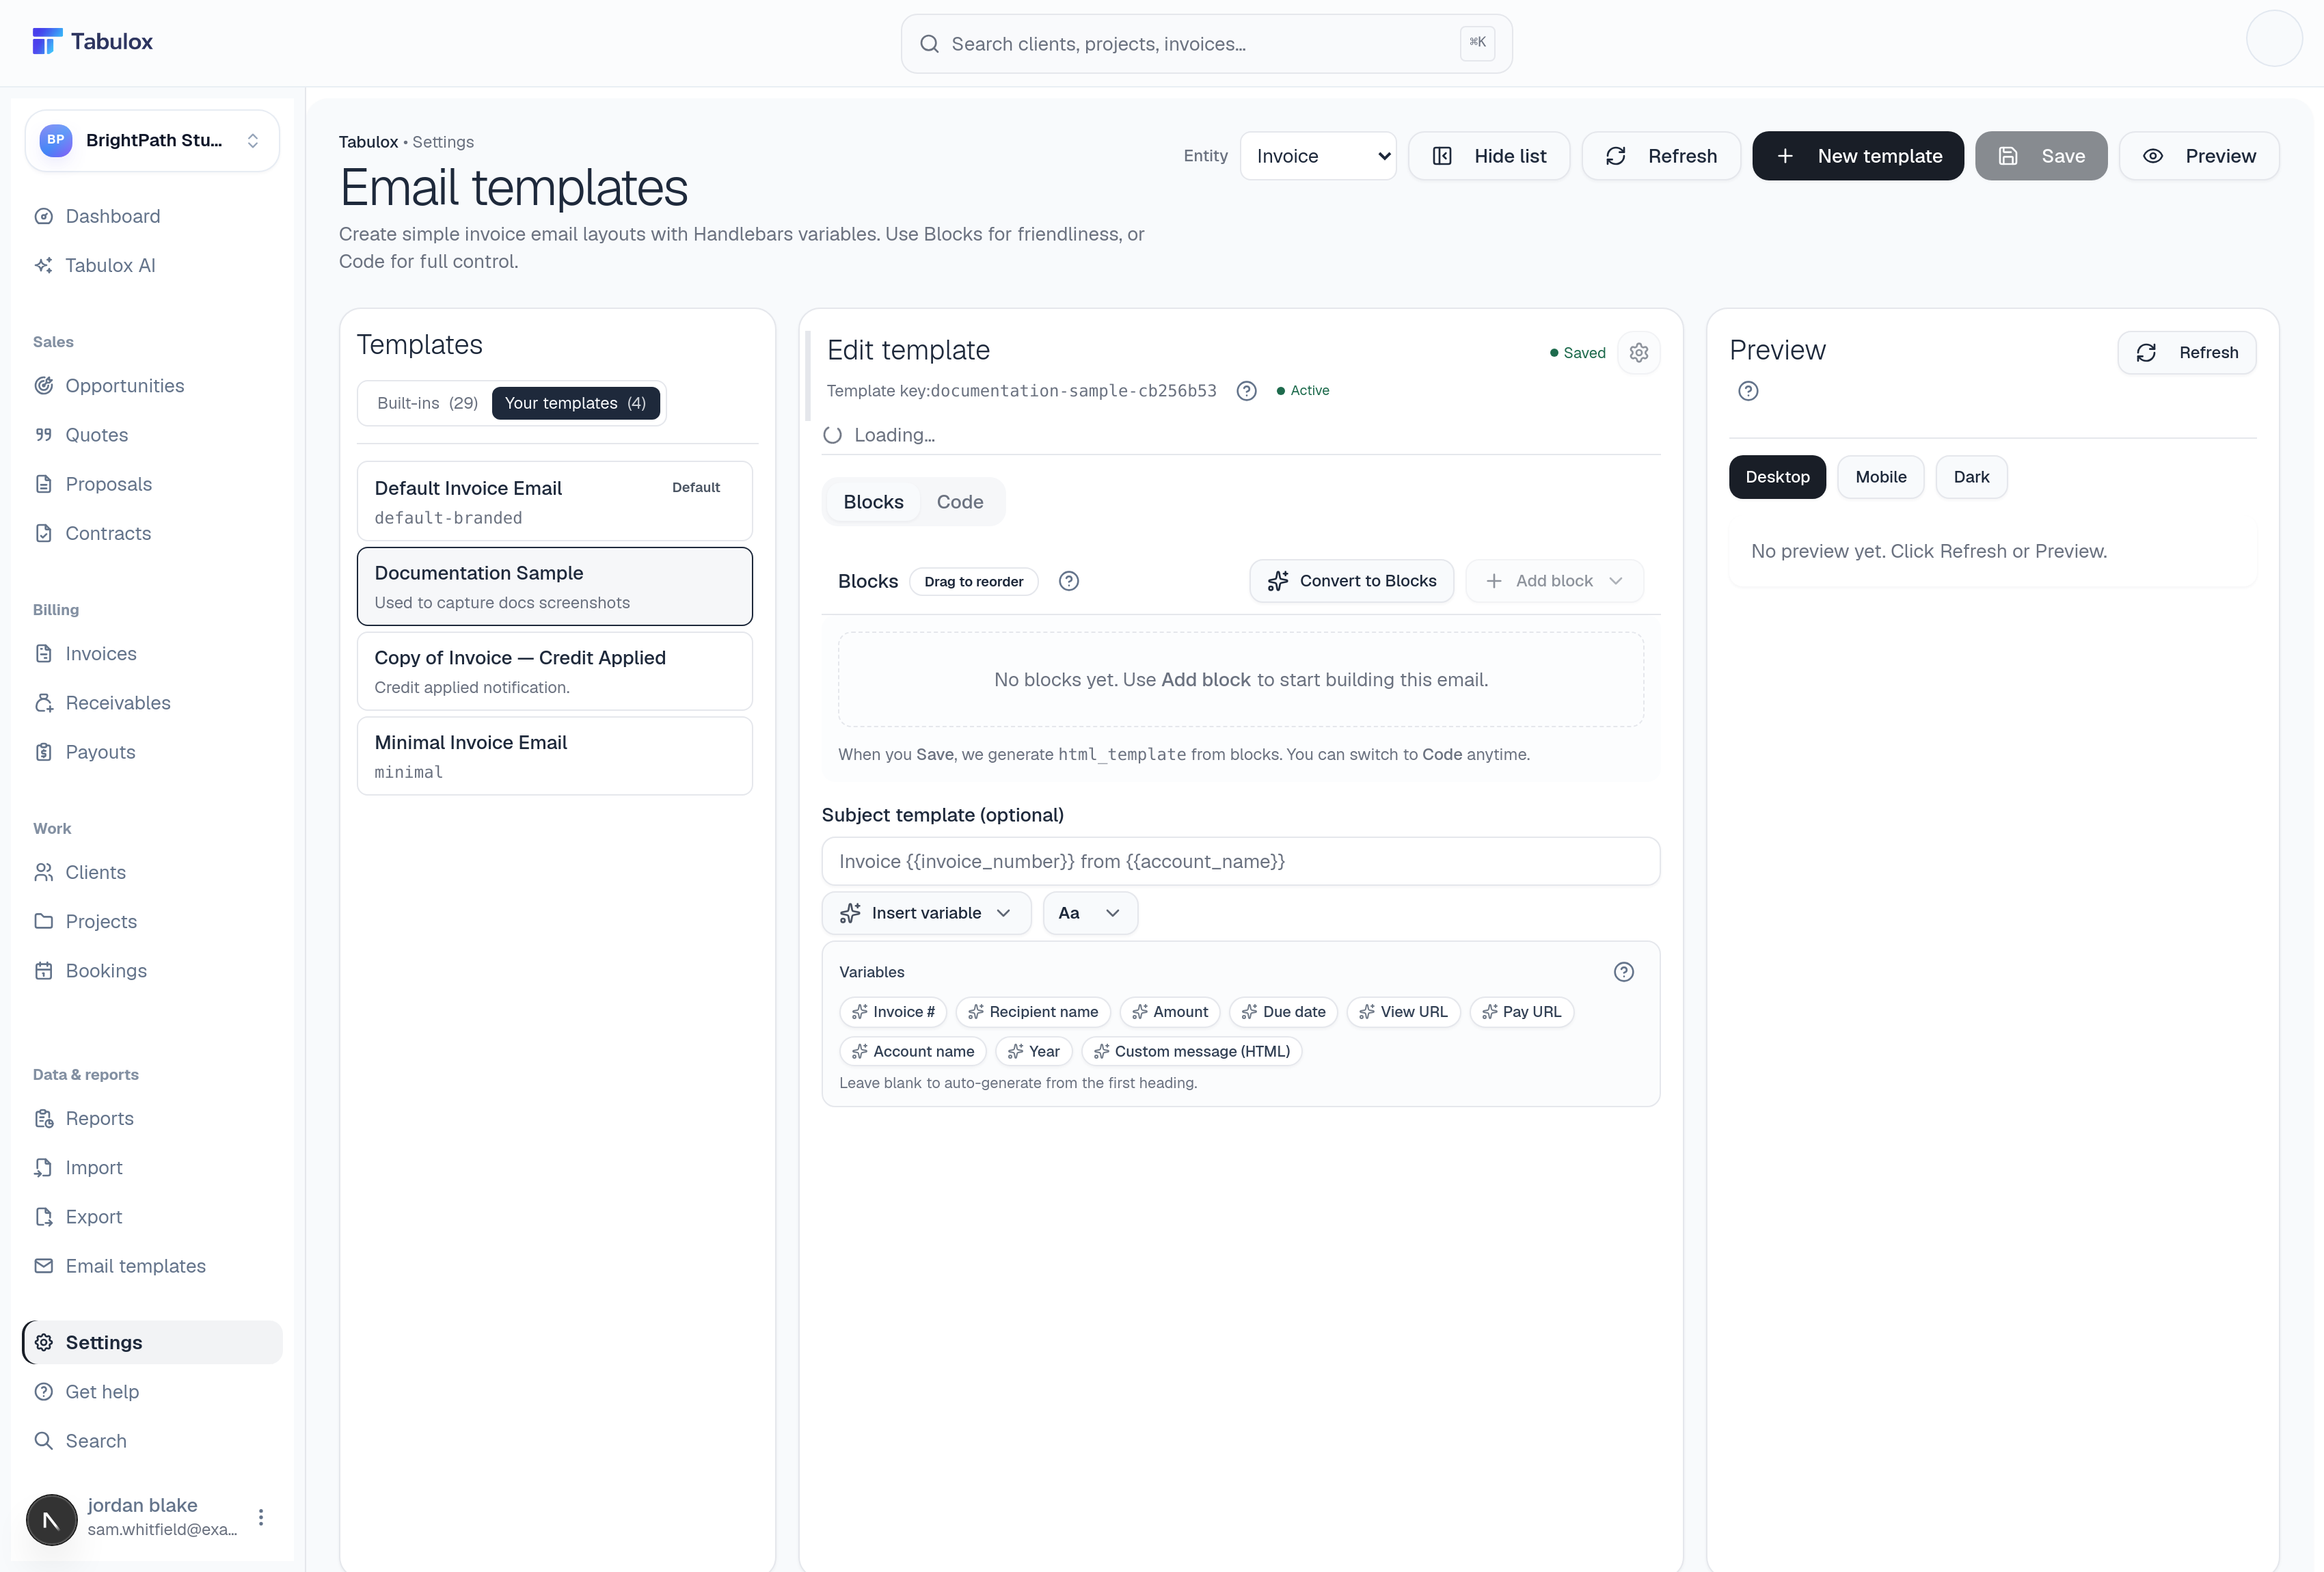
Six block types, added via Add block (top right of the Blocks panel):
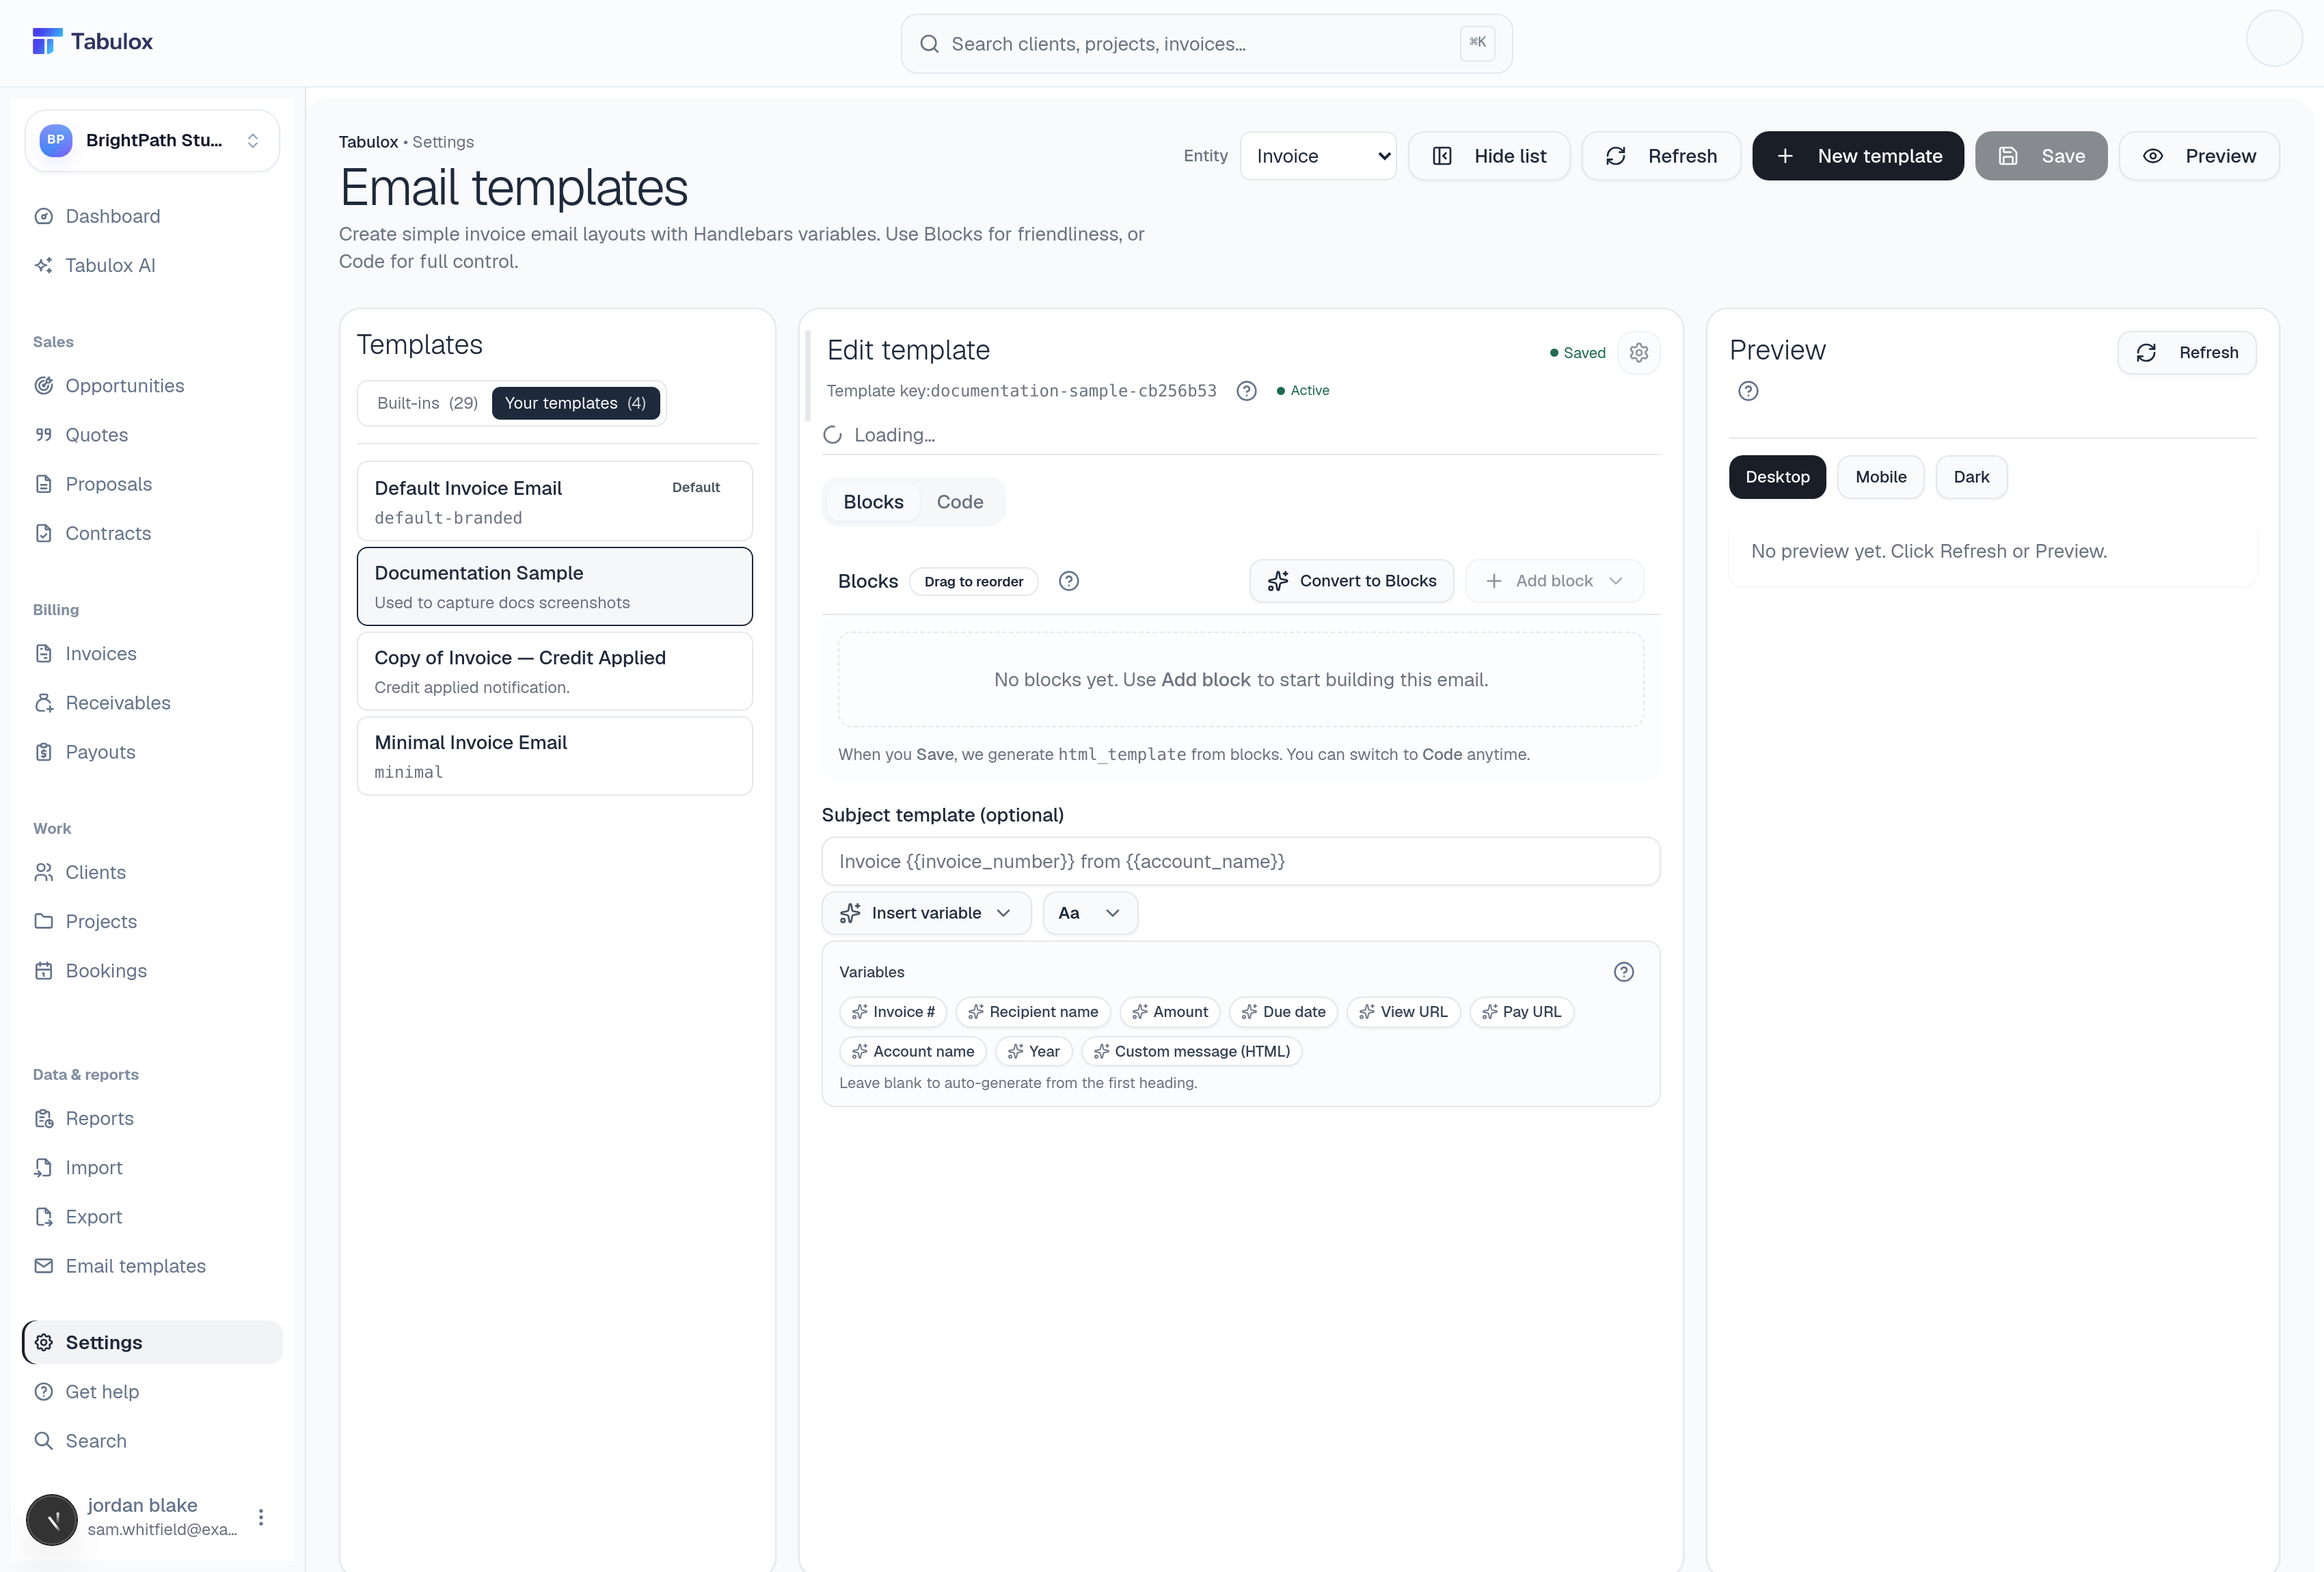
- Heading
Pick a level — H1 / H2 / H3 — then type the text. A style popover controls alignment, text/background color, size, weight, padding, radius, italic, underline, and border.
- Paragraph
A multiline text block. Same style popover pattern: background, text color, radius, padding, border.
- Button
Set a Label and a Link (typically a variable like
{{view_url}}). Button styles covers Variant (solid / outline / ghost), Align, a Full width toggle, background/text/border colors, and numeric Radius, Pad X, Pad Y, Weight. - Divider
A plain horizontal rule — no configurable fields.
- Spacer
One field: Height (px), 0–120.
- HTML
A raw HTML/Handlebars textarea for anything the other blocks can't do, with its own Box style popover (background, text, border, radius, padding) wrapping whatever you write.
Every block shares the same toolbar: a grip handle to drag and reorder, Move up/down arrows, Duplicate (inserts a copy right after), Collapse, and Delete. Hover between any two blocks — or above the first one — for an inline Add control to insert a new block at that exact position, not just at the end of the list.
Variables
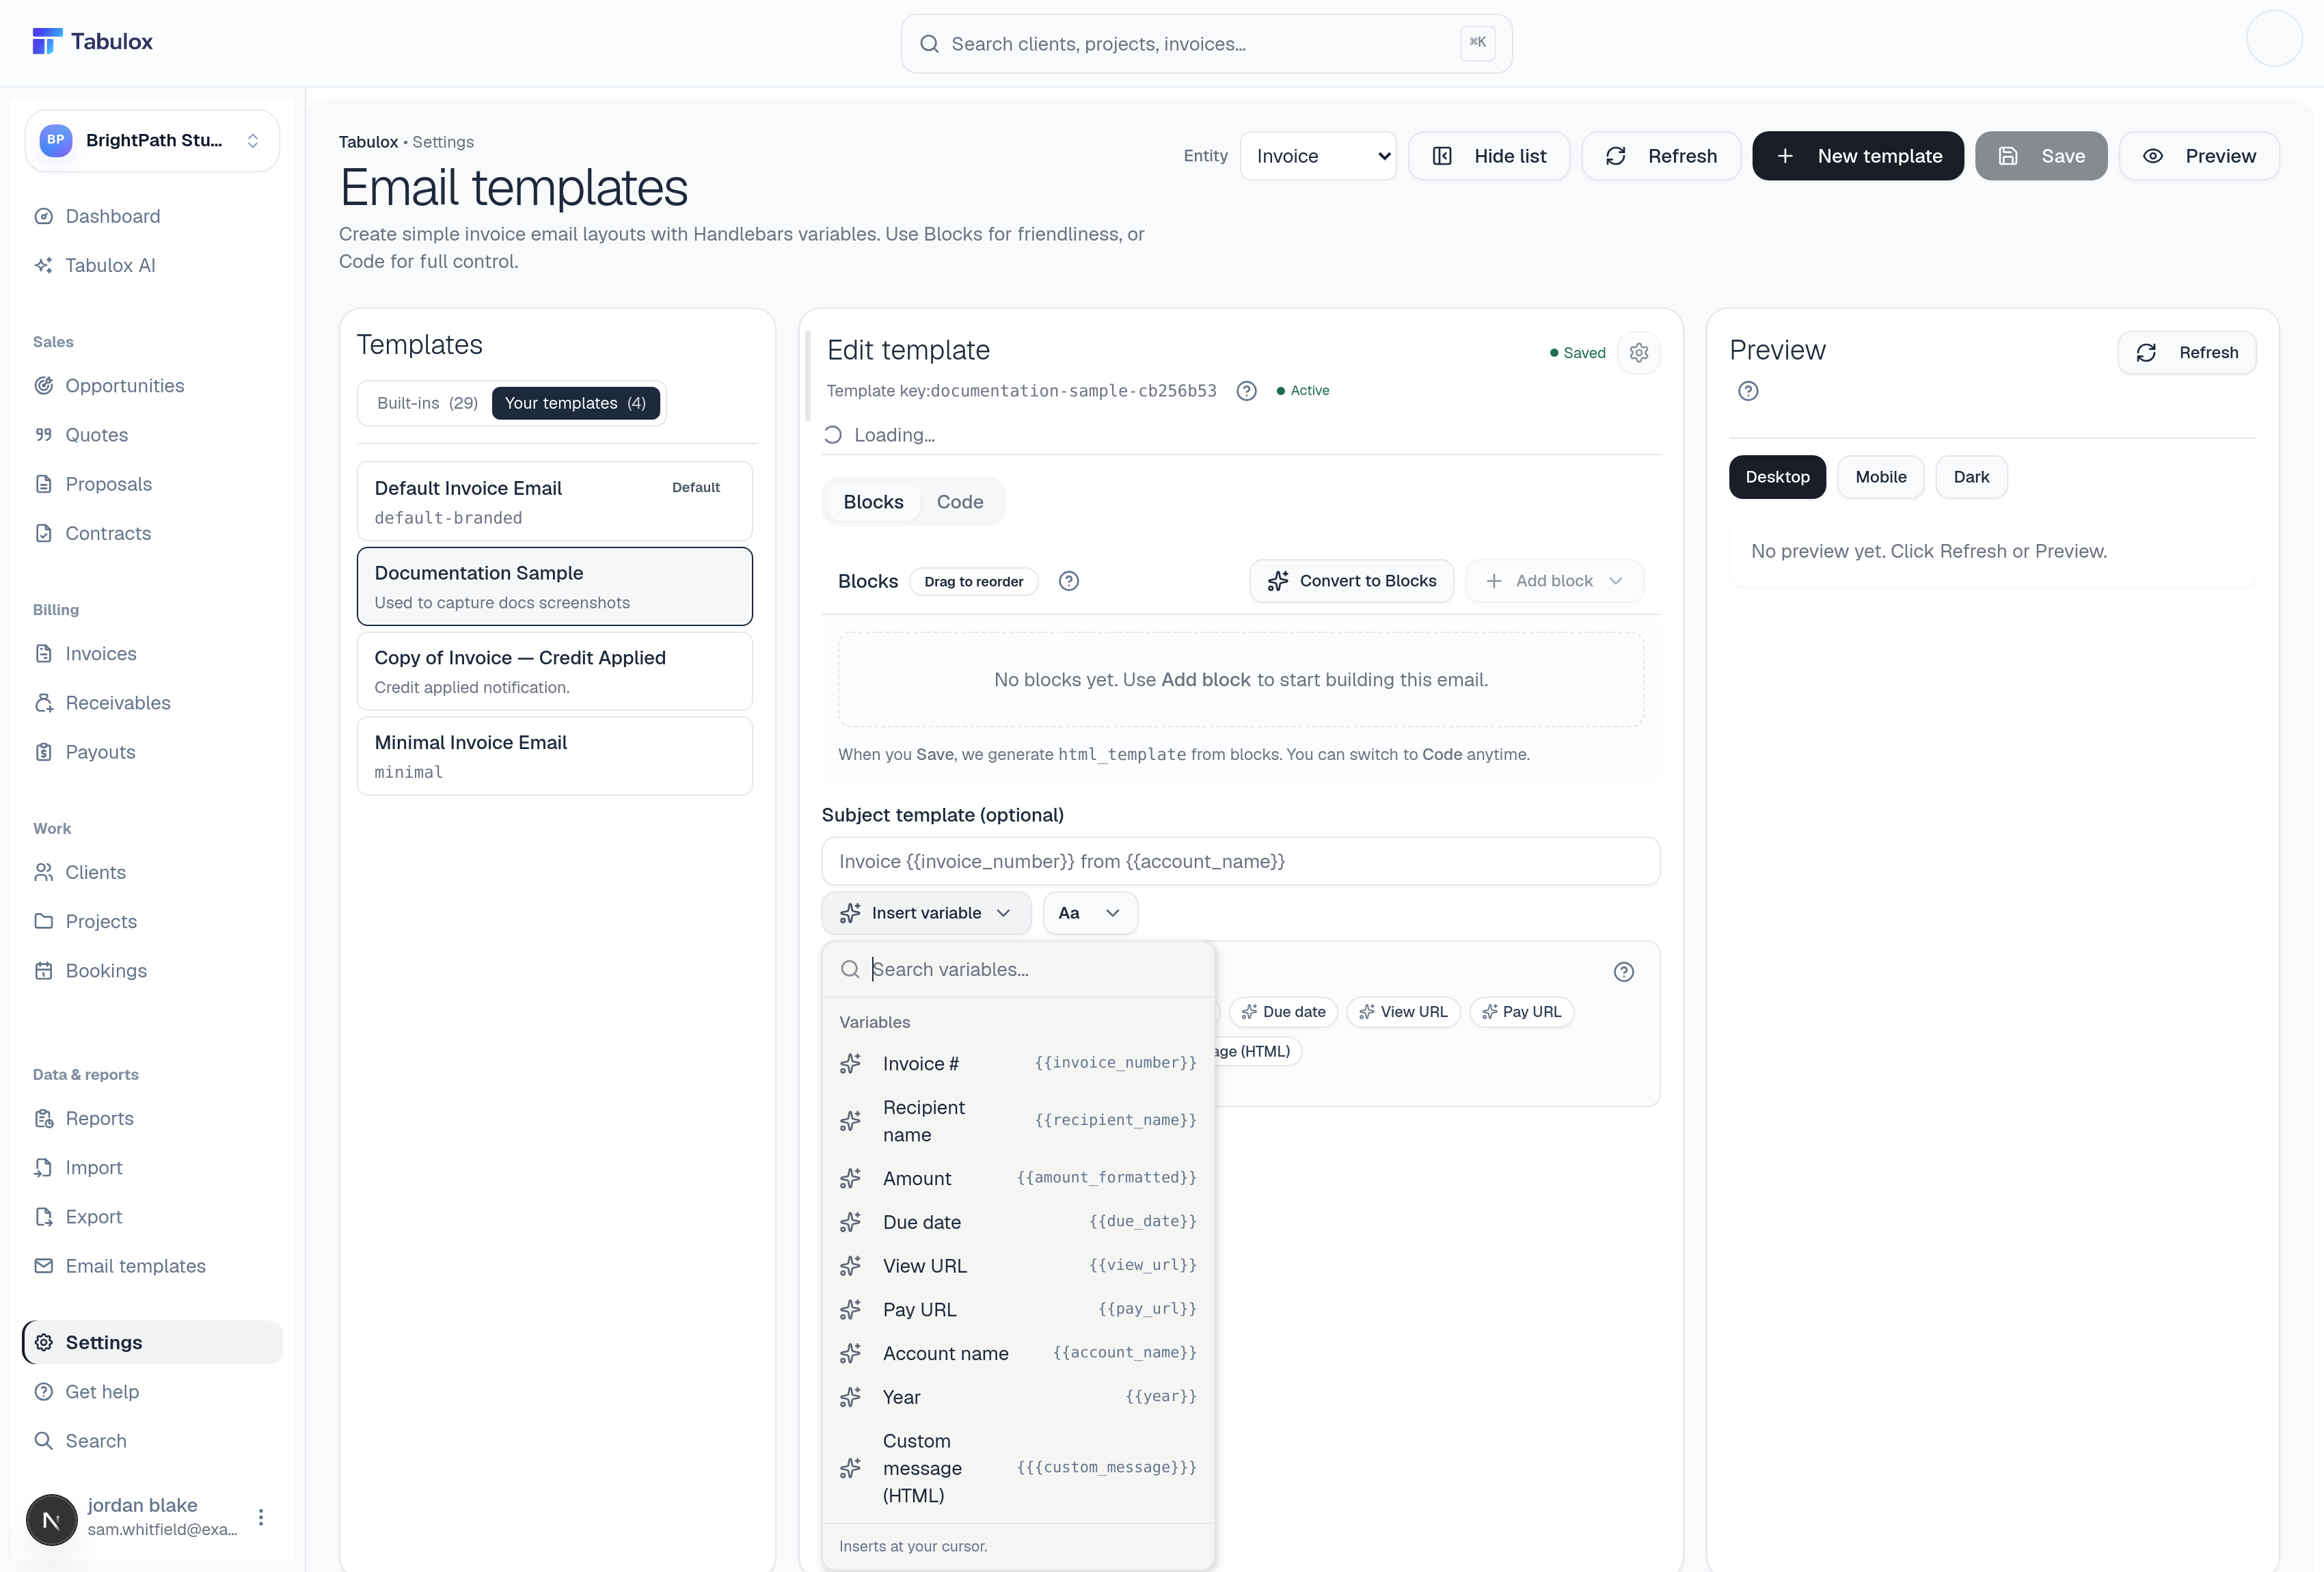
Click Insert variable on any text field (Heading, Paragraph, Button link, HTML, or the Subject line) to open a searchable list and insert at your cursor. Nine tokens are exposed in the picker:
| Chip | Handlebars |
|---|---|
| Invoice # | {{invoice_number}} |
| Recipient name | {{recipient_name}} |
| Amount | {{amount_formatted}} |
| Due date | {{due_date}} |
| View URL | {{view_url}} |
| Pay URL | {{pay_url}} |
| Account name | {{account_name}} |
| Year | {{year}} |
| Custom message (HTML) | {{{custom_message}}} |
A persistent row of the same chips also sits under the Subject field for
one-click insertion. Recognized tokens render as small pill chips inline
in the text, not raw {{...}} syntax, so you can spot them at a glance.
Custom message is the one triple-braced (unescaped) token — it's the
personal note someone can type when actually sending a document, and the
starter layout already wraps it in a conditional so it only appears when
there's something to show: {{#if custom_message}}{{{custom_message}}}{{/if}}.
The 9-token picker isn't the complete variable set — it's the friendly
subset. The render engine also resolves a larger, undocumented-in-UI
layer (nested paths like company.name, invoice.number, arrays like
line_items, plus fields like subtotal_formatted, payment_terms, and
per-entity equivalents for quotes/projects/opportunities). These aren't
in the picker, but you can type them directly in Code mode if you know
what you're after.
Every text field also carries a small formatting toolbar: Aa for case transforms (UPPERCASE, lowercase, Capitalize, Sentence case) and Format for Bold/Italic/Underline plus a Link tool — with the usual Cmd/Ctrl+B/I/U shortcuts while your cursor is in the field.
Code mode
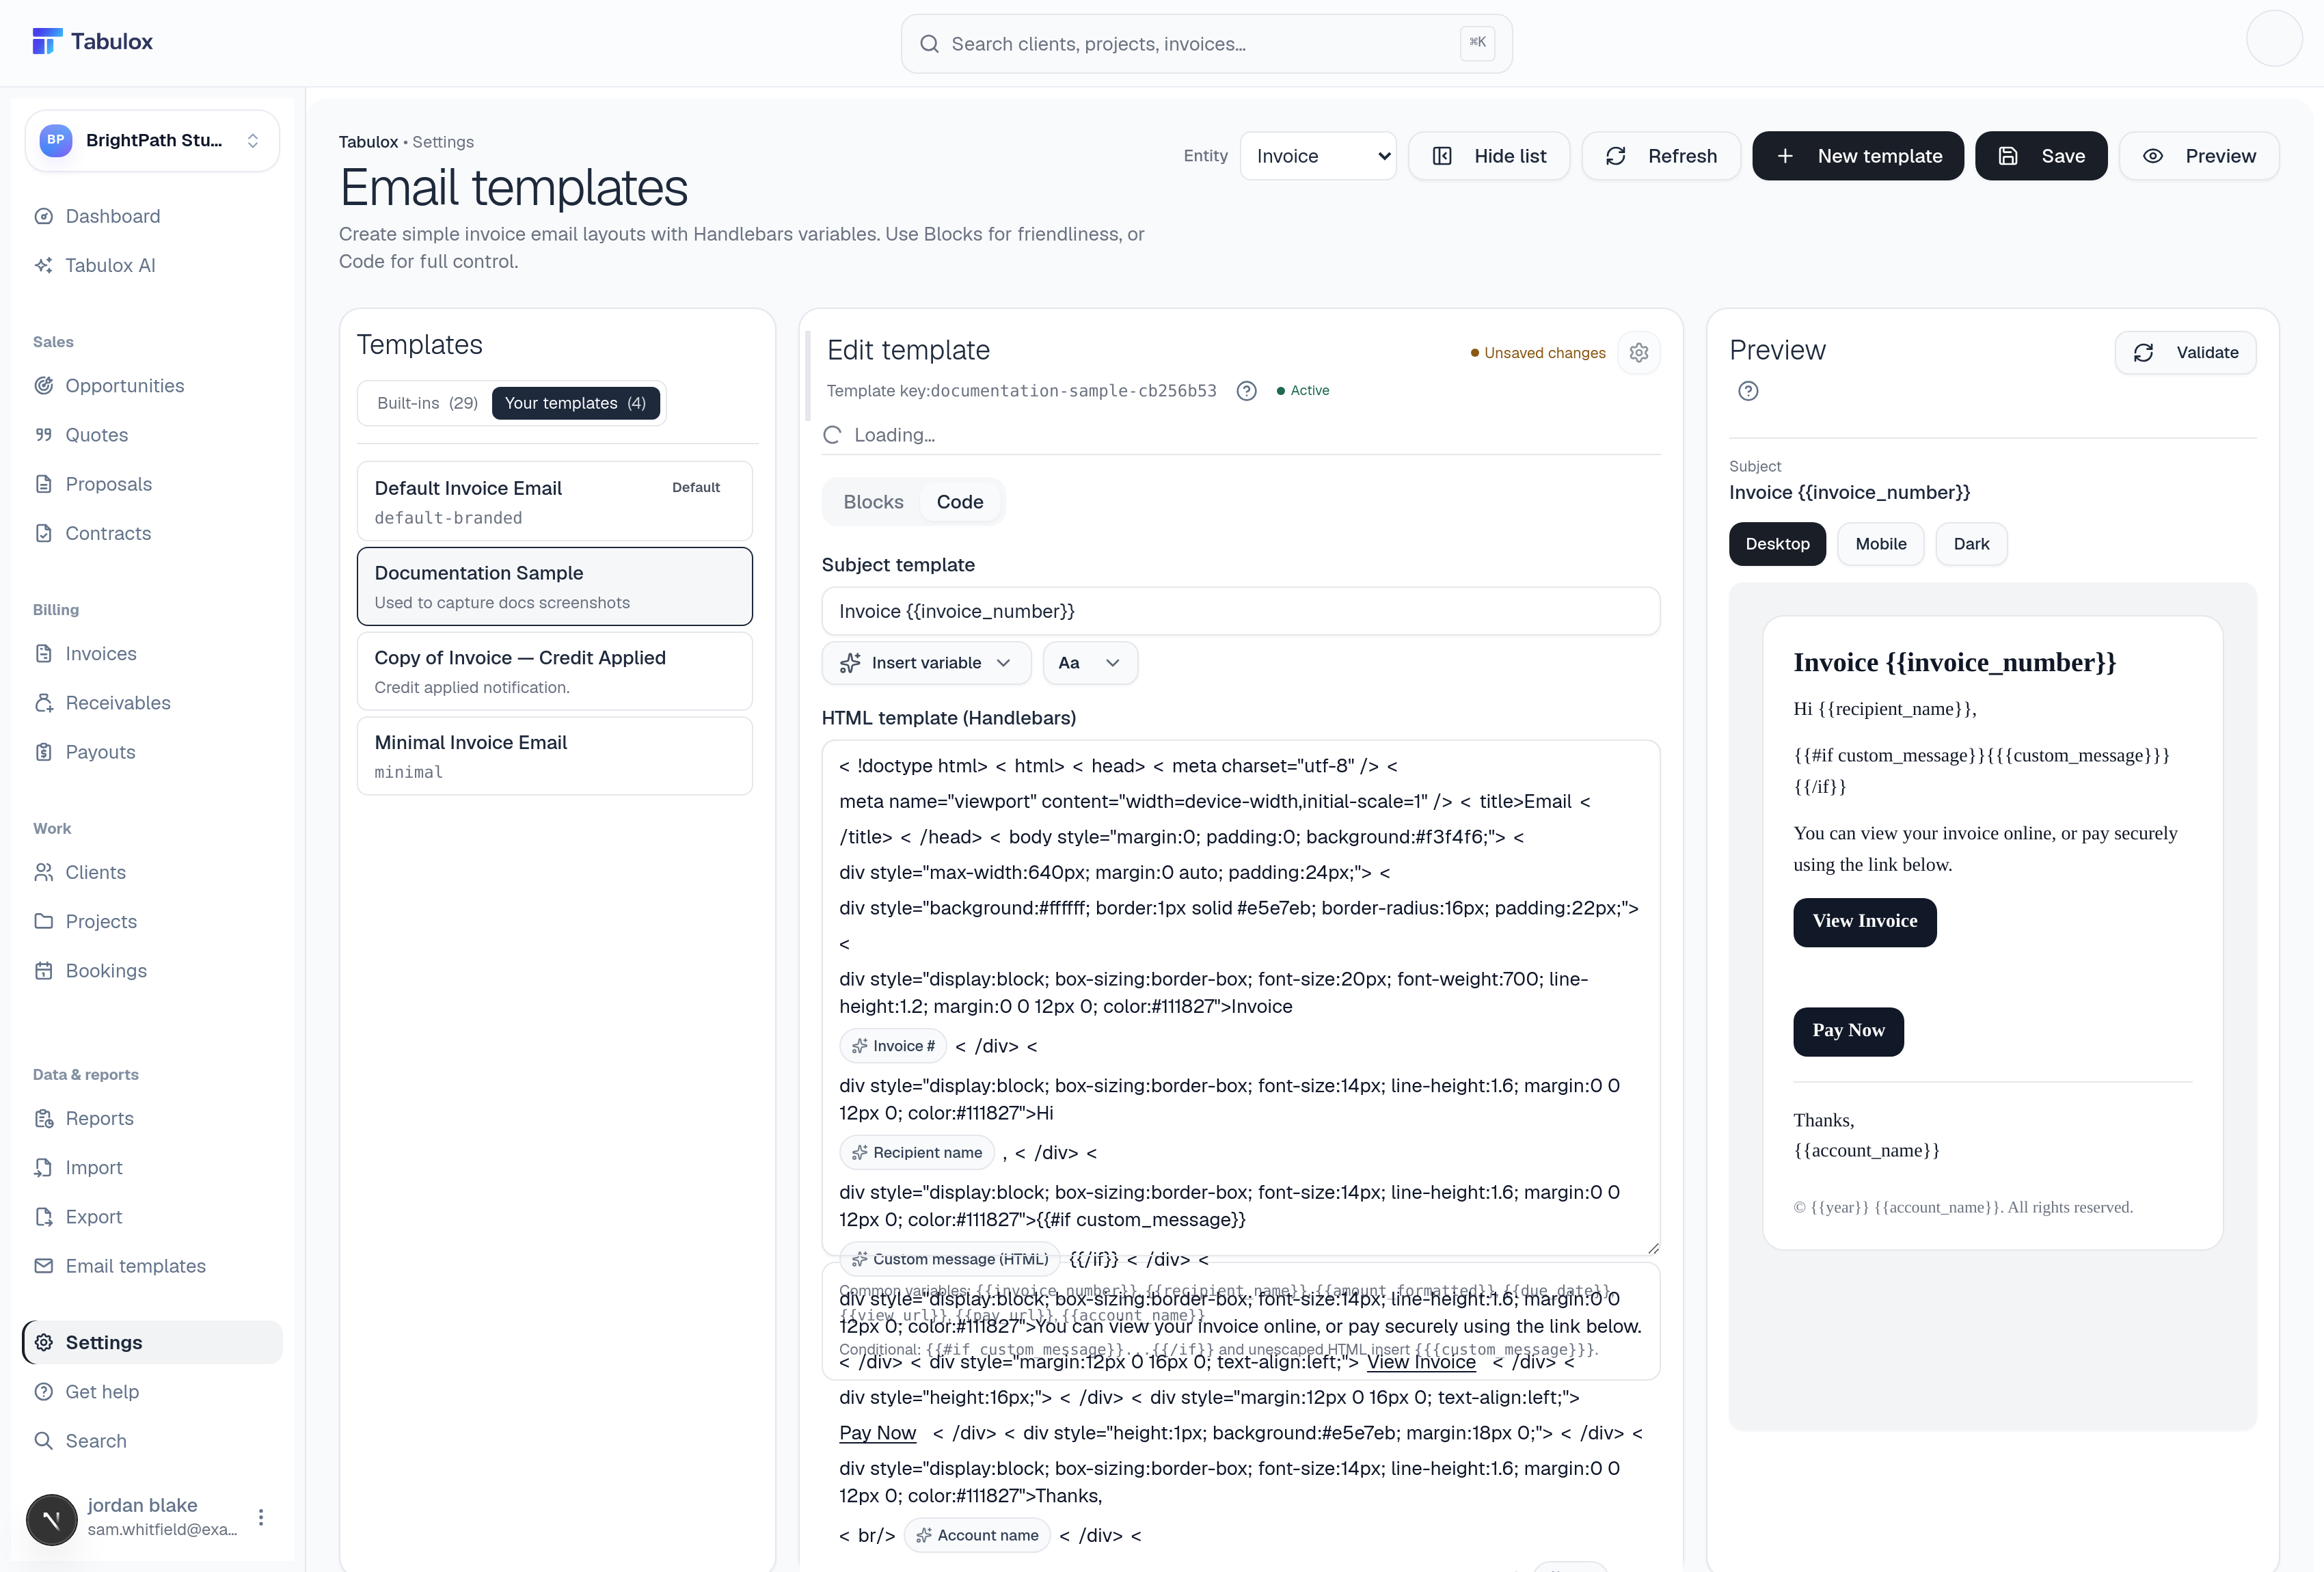
Switch to the Code tab for the raw Subject template and HTML
template (Handlebars) — full control, no block constraints. It's plain
text (no syntax highlighting), but recognized {{tokens}} still render as
chips inline, and the same Insert variable / Aa tools are available on
both fields. A static reference box below the editor lists the common
tokens and the conditional-block pattern as a reminder.
Moving from Blocks to Code is safe — if you haven't written HTML yet, it generates it from your blocks; if HTML already exists, switching tabs doesn't touch it. Going the other direction is different: Convert to Blocks does a one-way, best-effort parse of your raw HTML (headings become Heading blocks, paragraphs/divs become Paragraph blocks, link-like buttons become Button blocks, everything else collapses into one catch-all HTML block). It's a heuristic, not a real parser — review the result before saving over hand-written HTML you care about.
Preview
The right-hand panel renders the actual template with real content:
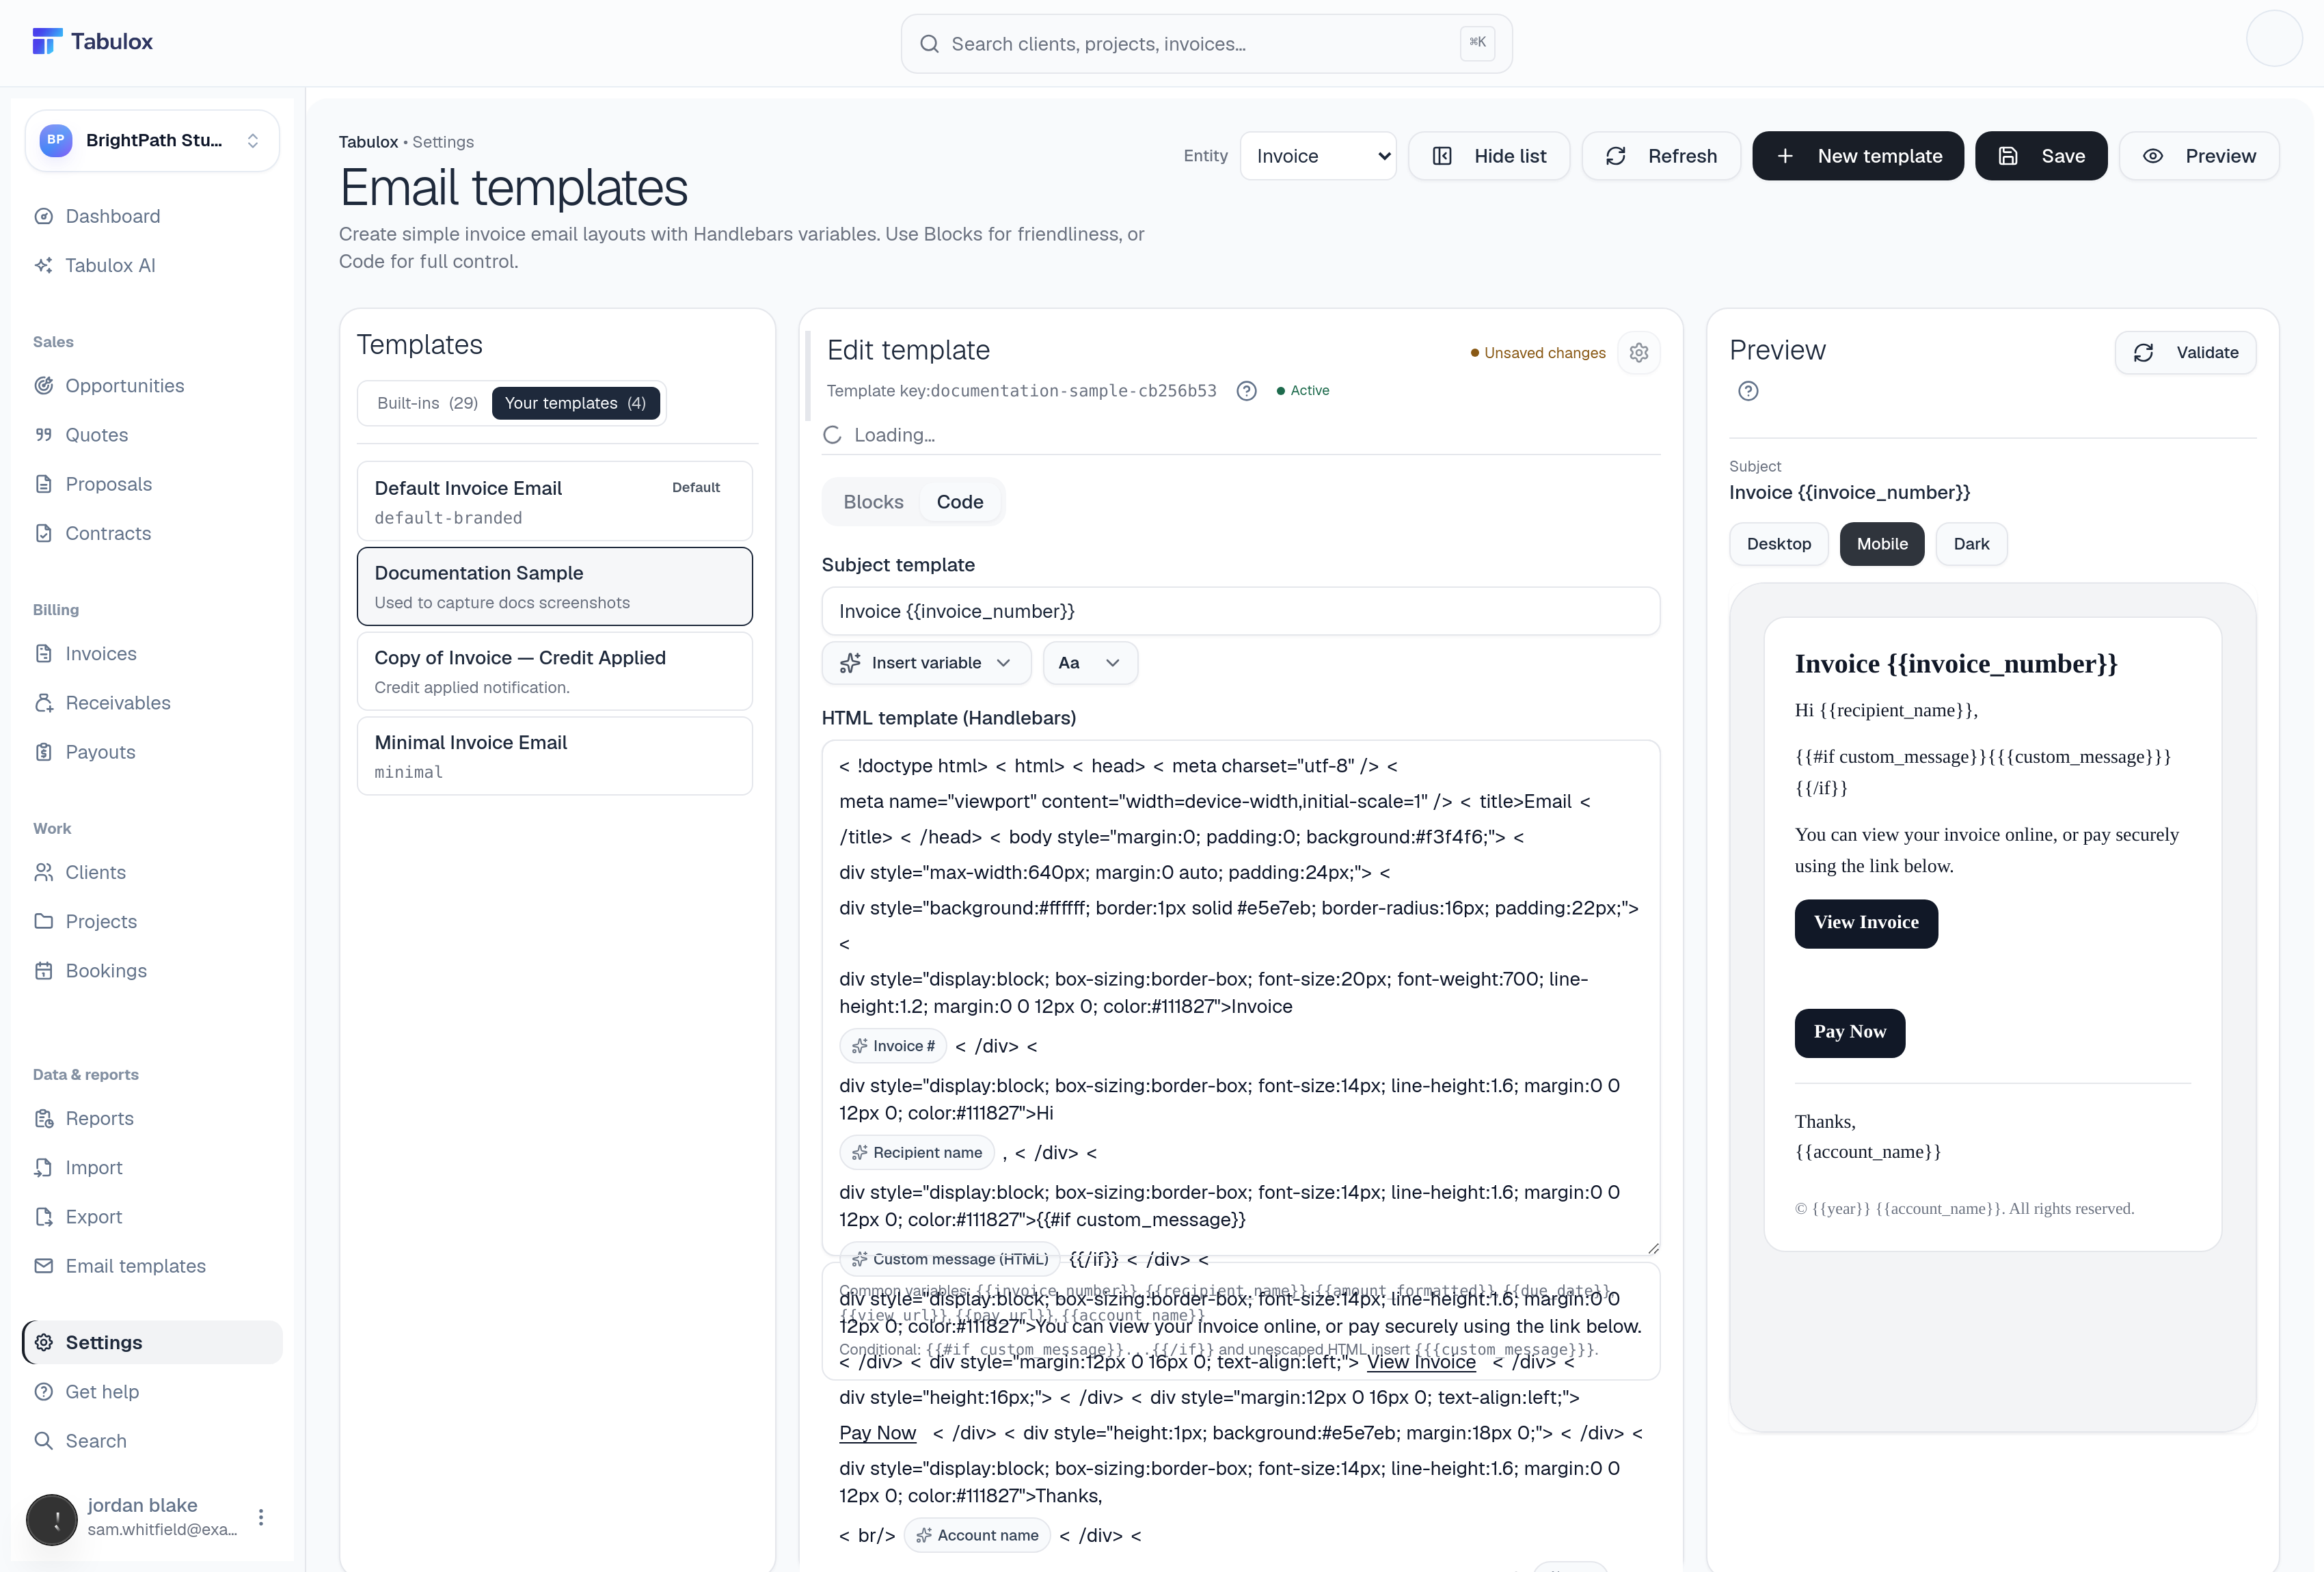
- Desktop / Mobile / Dark
Desktop and Mobile change the preview's viewport width (Mobile wraps it in a phone-width frame). Dark only recolors the surrounding preview chrome to simulate a dark-mode inbox — it does not change how the email itself renders, since that's controlled by your own styling.
- Refresh / Validate
Re-renders the preview. The button relabels itself Validate when you have unsaved changes, so you always know whether you're looking at saved or in-progress content.
- Preview in a new window
The Preview button (main toolbar) opens the same render full-size in a new tab.
The preview isn't fake data by default — it pulls your account's most recent real invoice (or quote, matching whichever Entity is selected) and renders the template against it. Only if no real record exists does it fall back to a synthetic sample.
There's no "send a test email to yourself" button here — Studio is purely for authoring. Sending a real test only happens from the actual Send dialog on an invoice or quote, where you can also pick a different template than the account default for that one send.
Saving and template settings
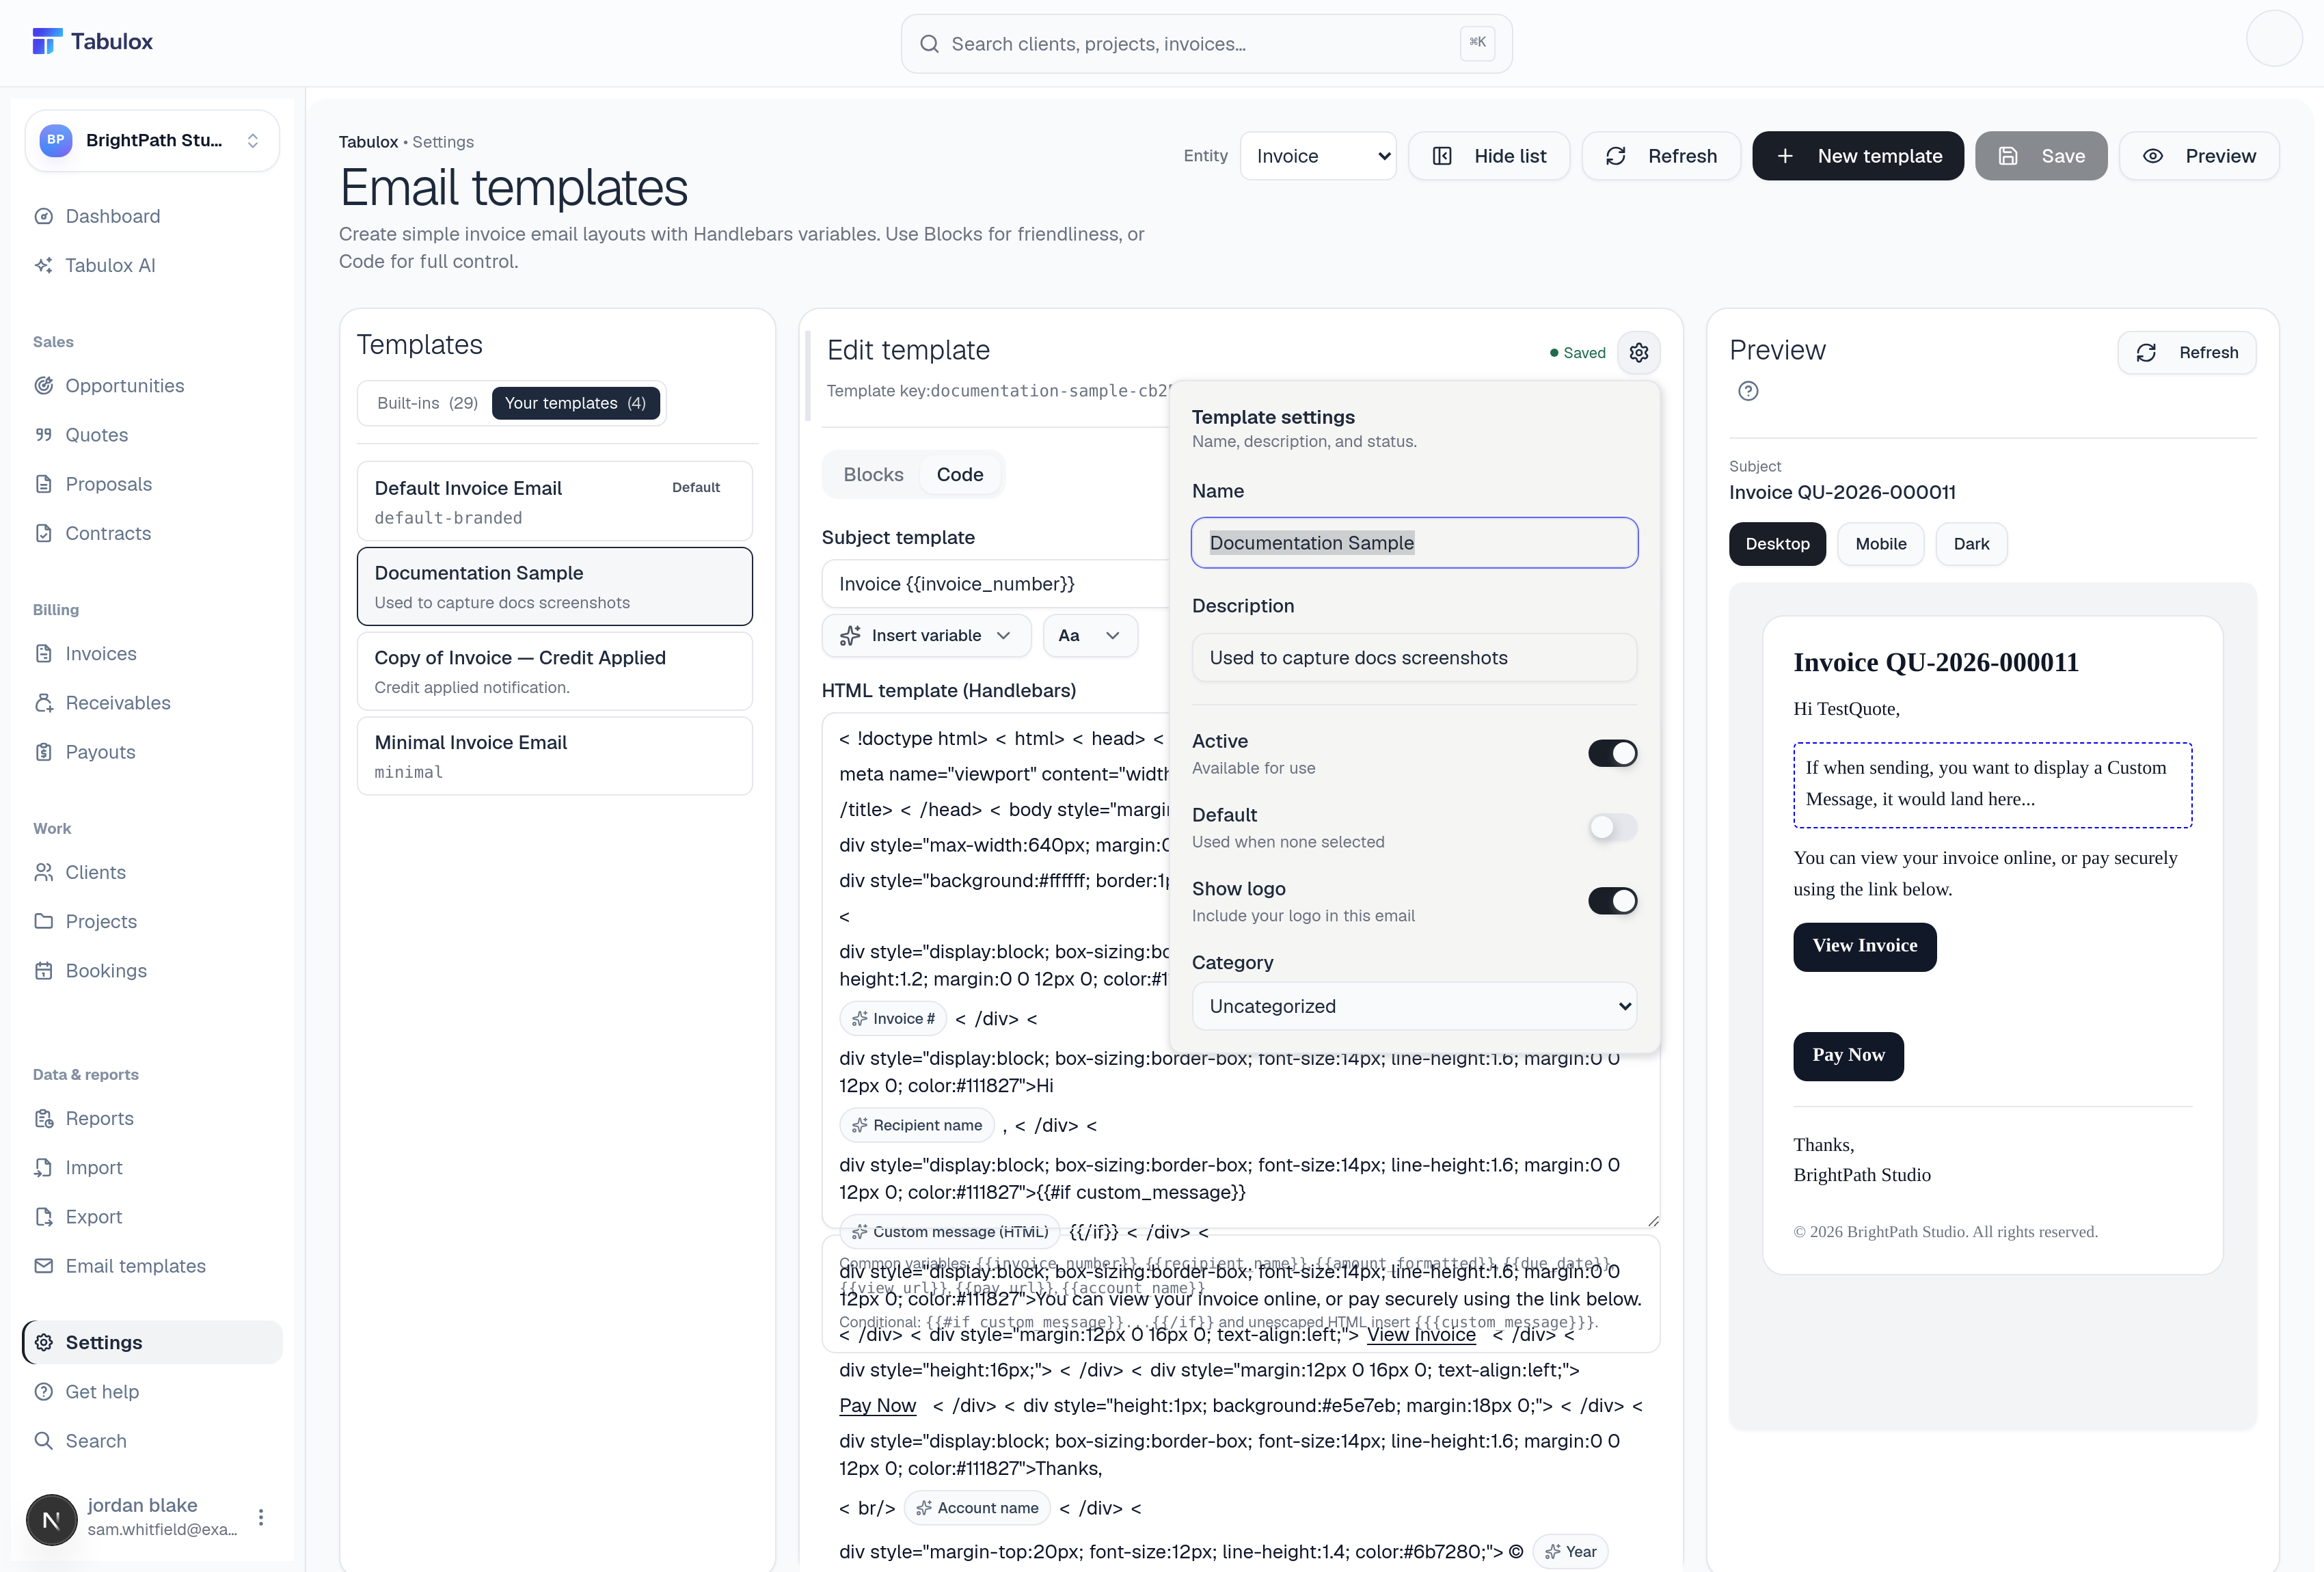
Save writes directly to the live template — there's no separate publish step, and no version history. The next document sent using this template's key picks up your change immediately. The header shows Unsaved changes vs Saved so you always know your state, and if you try to switch to a different template with unsaved changes, Tabulox blocks the switch until you save or discard.
The gear icon opens Template settings:
- Name / Description
Editable any time, unlike the template key (shown just above, used internally — changing it isn't supported since automations and defaults may reference it directly).
- Active
Whether this template is available for use at all.
- Default
Makes this the template used when nothing else is specified for the entity type — turning it on unsets whichever template was default before.
- Show logo
Whether your account logo appears in this specific email.
- Category
Same six-option list as the New template dialog.
Two real gaps worth knowing about: there's currently no way to delete a whole template, and no way to duplicate one (only individual blocks can be duplicated, not the template itself). To retire a broken template, toggle Active off or unset it as Default rather than trying to remove it — and if a custom default template breaks something, there's no one-click "revert to built-in" either; Copy to edit the built-in again to get a clean replacement.
Billing
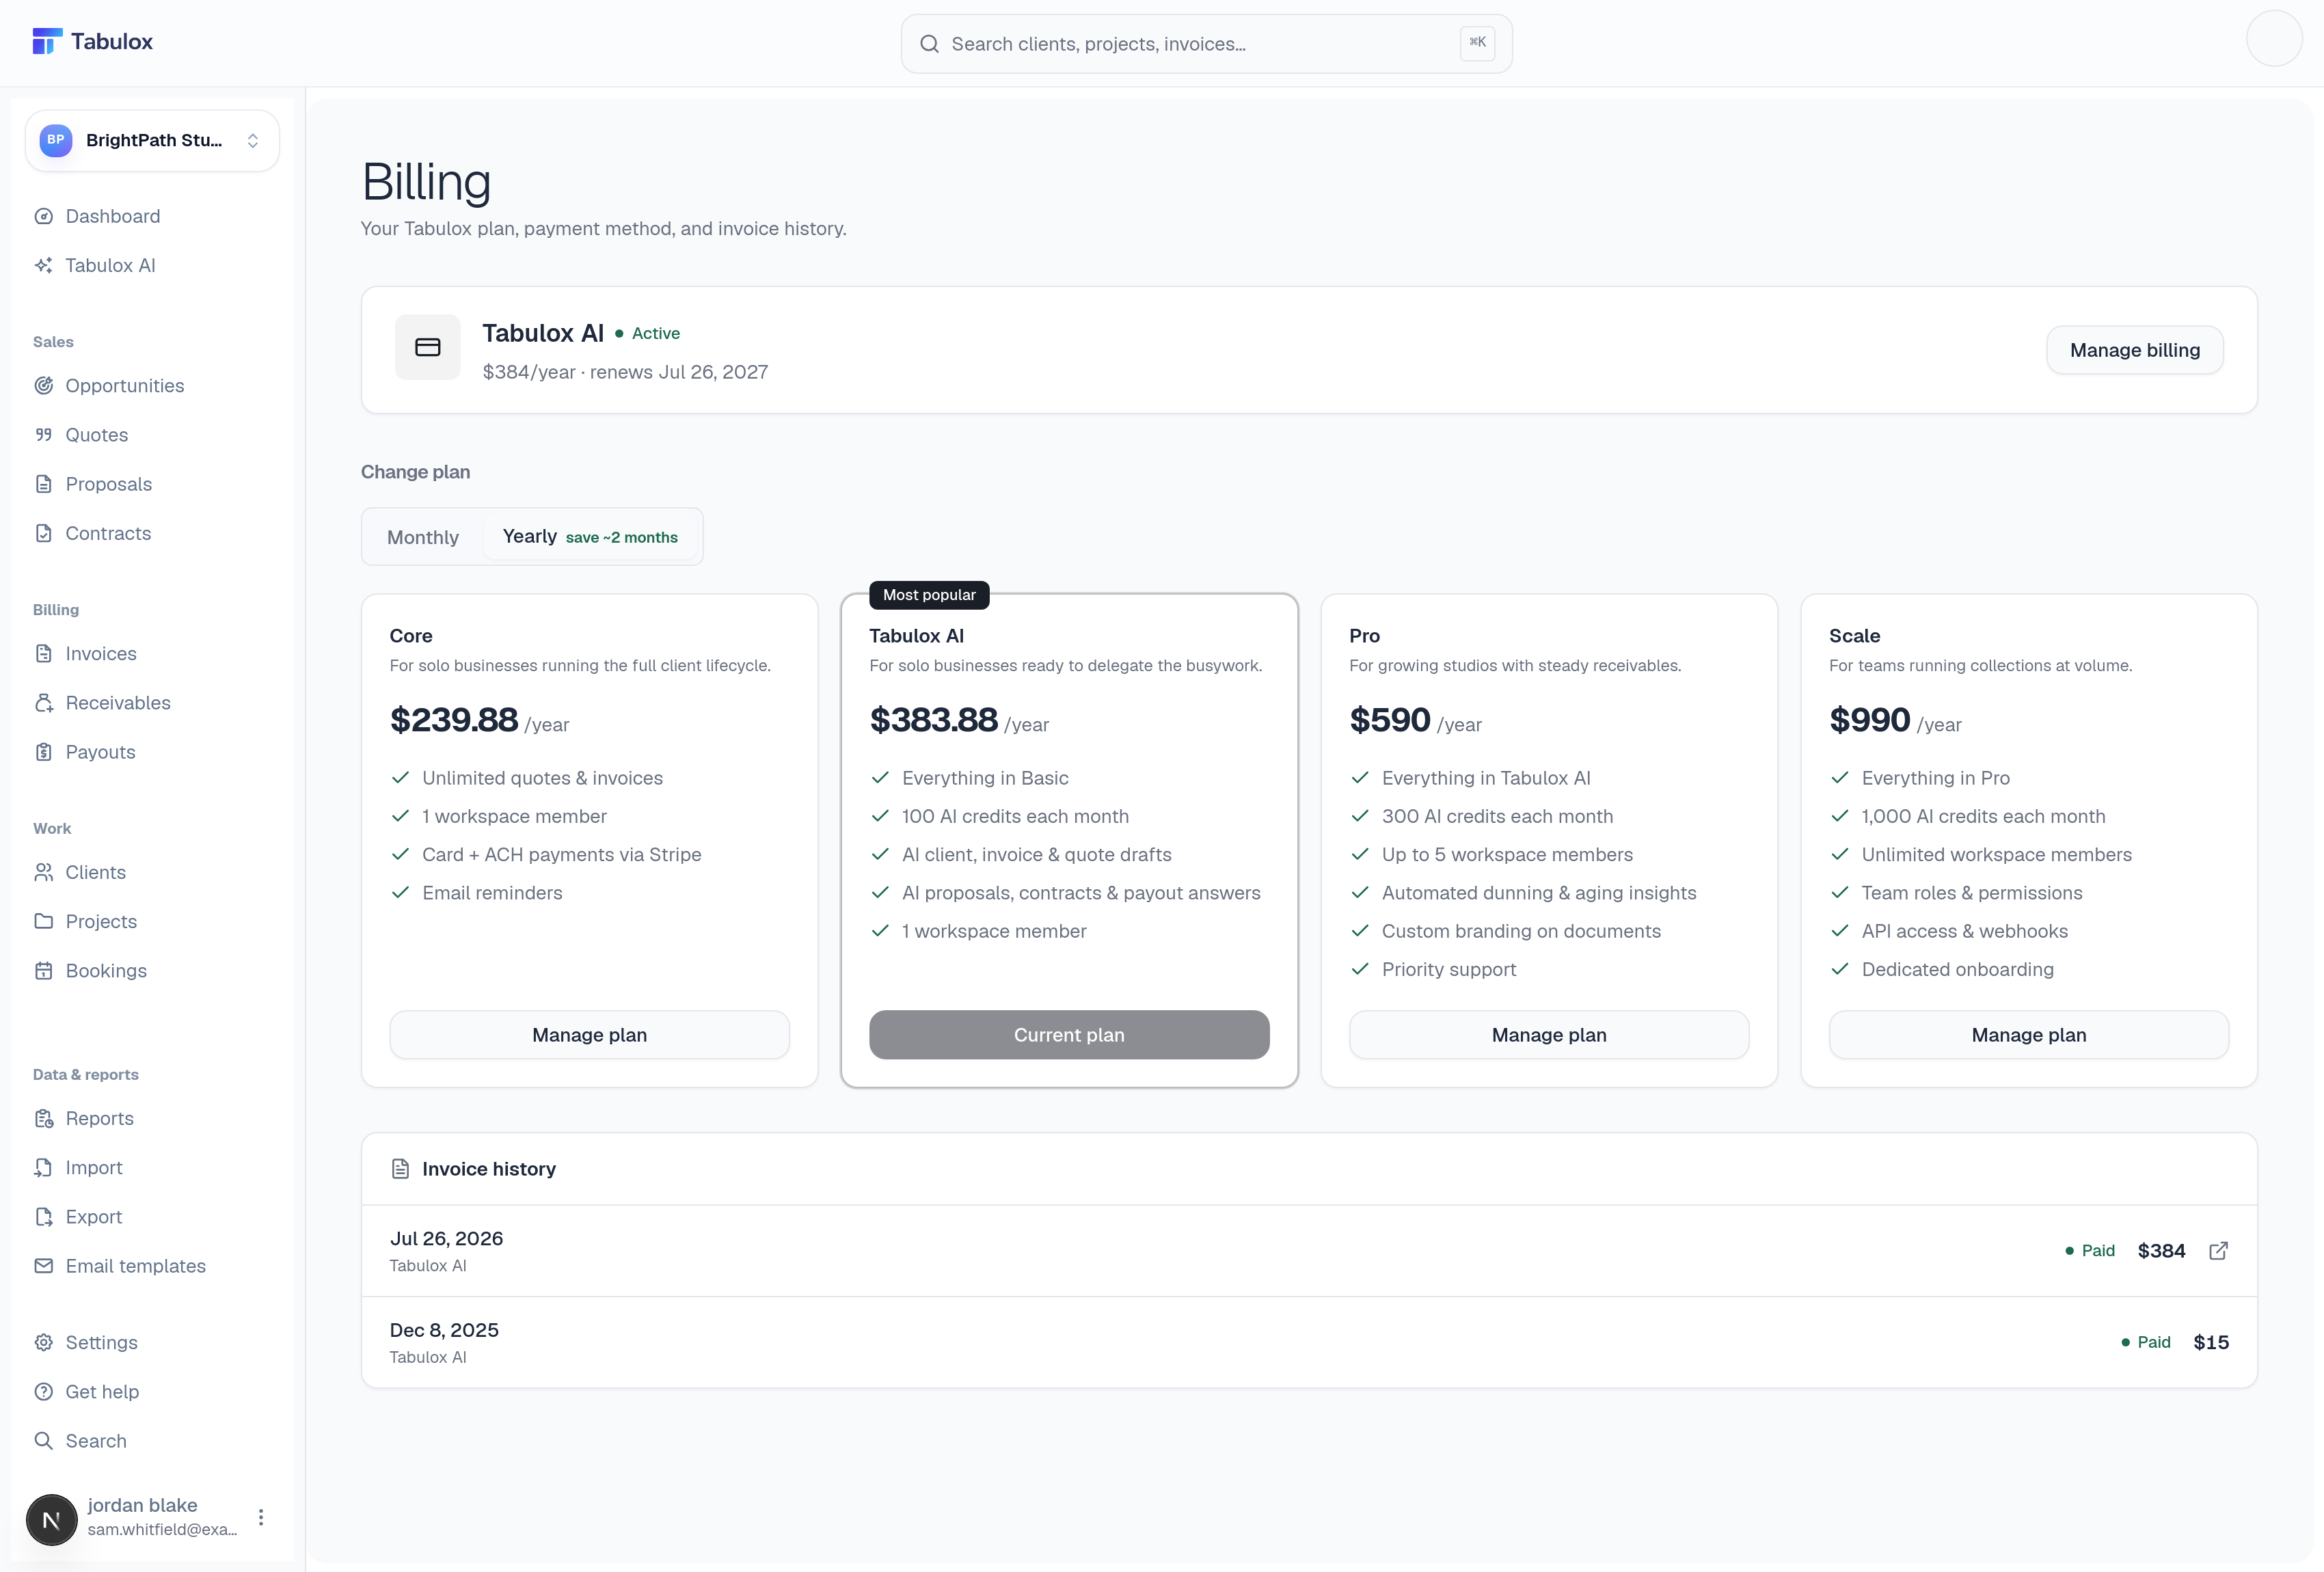
Your current plan, price, and renewal date sit at the top, with Manage billing for updating your payment method. Below that, every plan is laid out side by side so you can compare and switch (toggle Monthly/Yearly first — yearly saves roughly two months):
- Core — the essentials: unlimited quotes and invoices, one workspace member, Stripe card + ACH, email reminders.
- Tabulox AI — everything in Core plus monthly AI credits and AI-drafted client communications, quotes, and proposals.
- Pro — more workspace members, automated dunning and aging insights, custom branding on documents, priority support.
- Scale — unlimited workspace members, team roles and permissions, and API access & webhooks for integrating Tabulox with other systems.
API keys and outgoing webhooks are a Scale-plan capability managed through the API directly rather than a settings screen in the app today — reach out if you're on Scale and want to wire up an integration.
Invoice history at the bottom of the page is your own billing receipts from Tabulox — separate from the invoices you send to clients.