Bookings
Bookings lets clients (or prospects) put time on your calendar directly, without the back-and-forth of finding a slot by email. It's a separate scheduling layer from Projects — use it for discovery calls, kickoff meetings, or recurring check-ins.
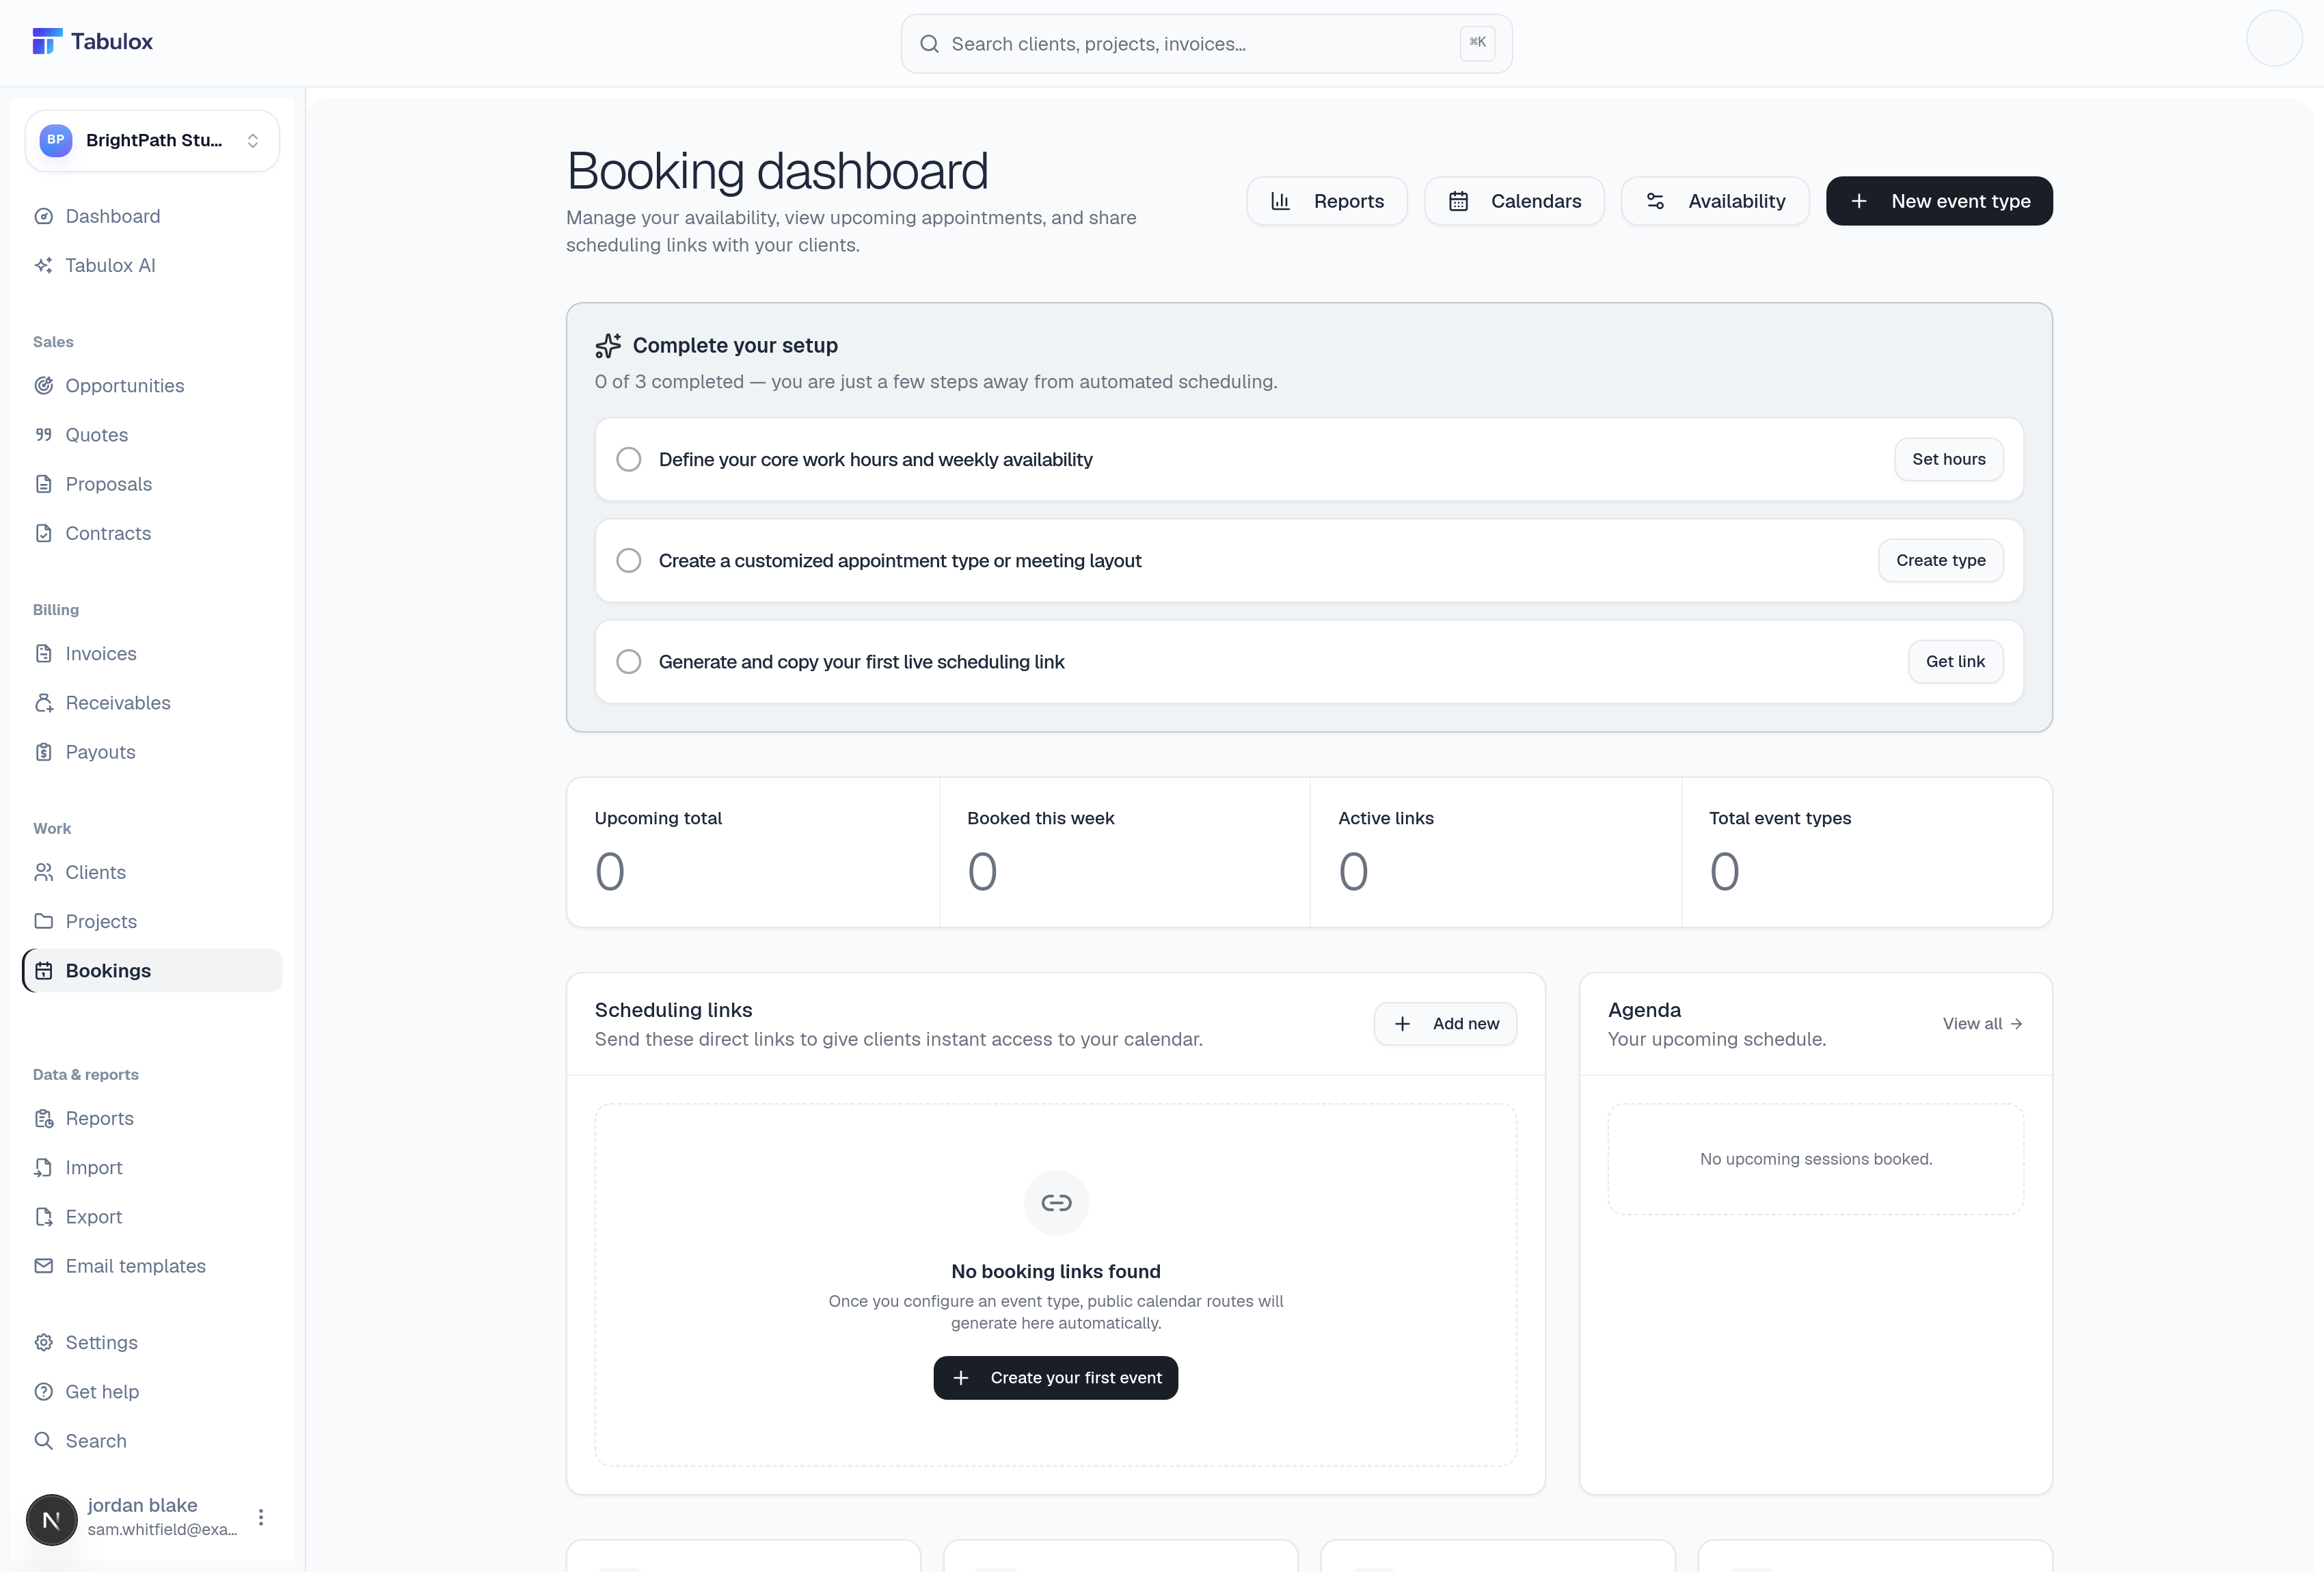
Booking Dashboard — where the sidebar takes you
This is what the sidebar takes you to: a setup checklist, live stats, and your active scheduling links in one place. It's the fastest way to see everything at once, and it's where the steps below actually happen.
From here, Appointments (/booking/appointments) is one click away —
a chronological log of every session booked through your public
scheduling links (the last 100), each showing the attendee, event type,
and time. Once you've shared a link and someone schedules with you,
entries populate there automatically — nothing to set up on that page
itself.
Setting up scheduling
Three things need to exist before a client can book time with you:
- Availability
Define your working hours and buffer rules — when you're actually open to be booked, account-wide.
- Event types
A bookable meeting layout: name, duration, and meeting mode (video call, phone, or in person). You can have several — a 15-minute intro call and a 60-minute kickoff session are two different event types.
- Scheduling links
Each event type generates a public link (
/book/<token>) you can copy and send to anyone. Open it and you'll see exactly what your client sees — your real availability, ready to book.
Once all three exist, the Booking Dashboard's setup checklist clears and you're live. From there:
- Calendars — connect an external calendar (Google/Microsoft) so existing events block your availability and new bookings show up where you already look.
- Reports — booking volume and trends over time.
Give each event type its own link and share the specific one for the meeting you want — e.g. don't send your general link when you really want someone booking the 30-minute onboarding slot.
Creating an event type
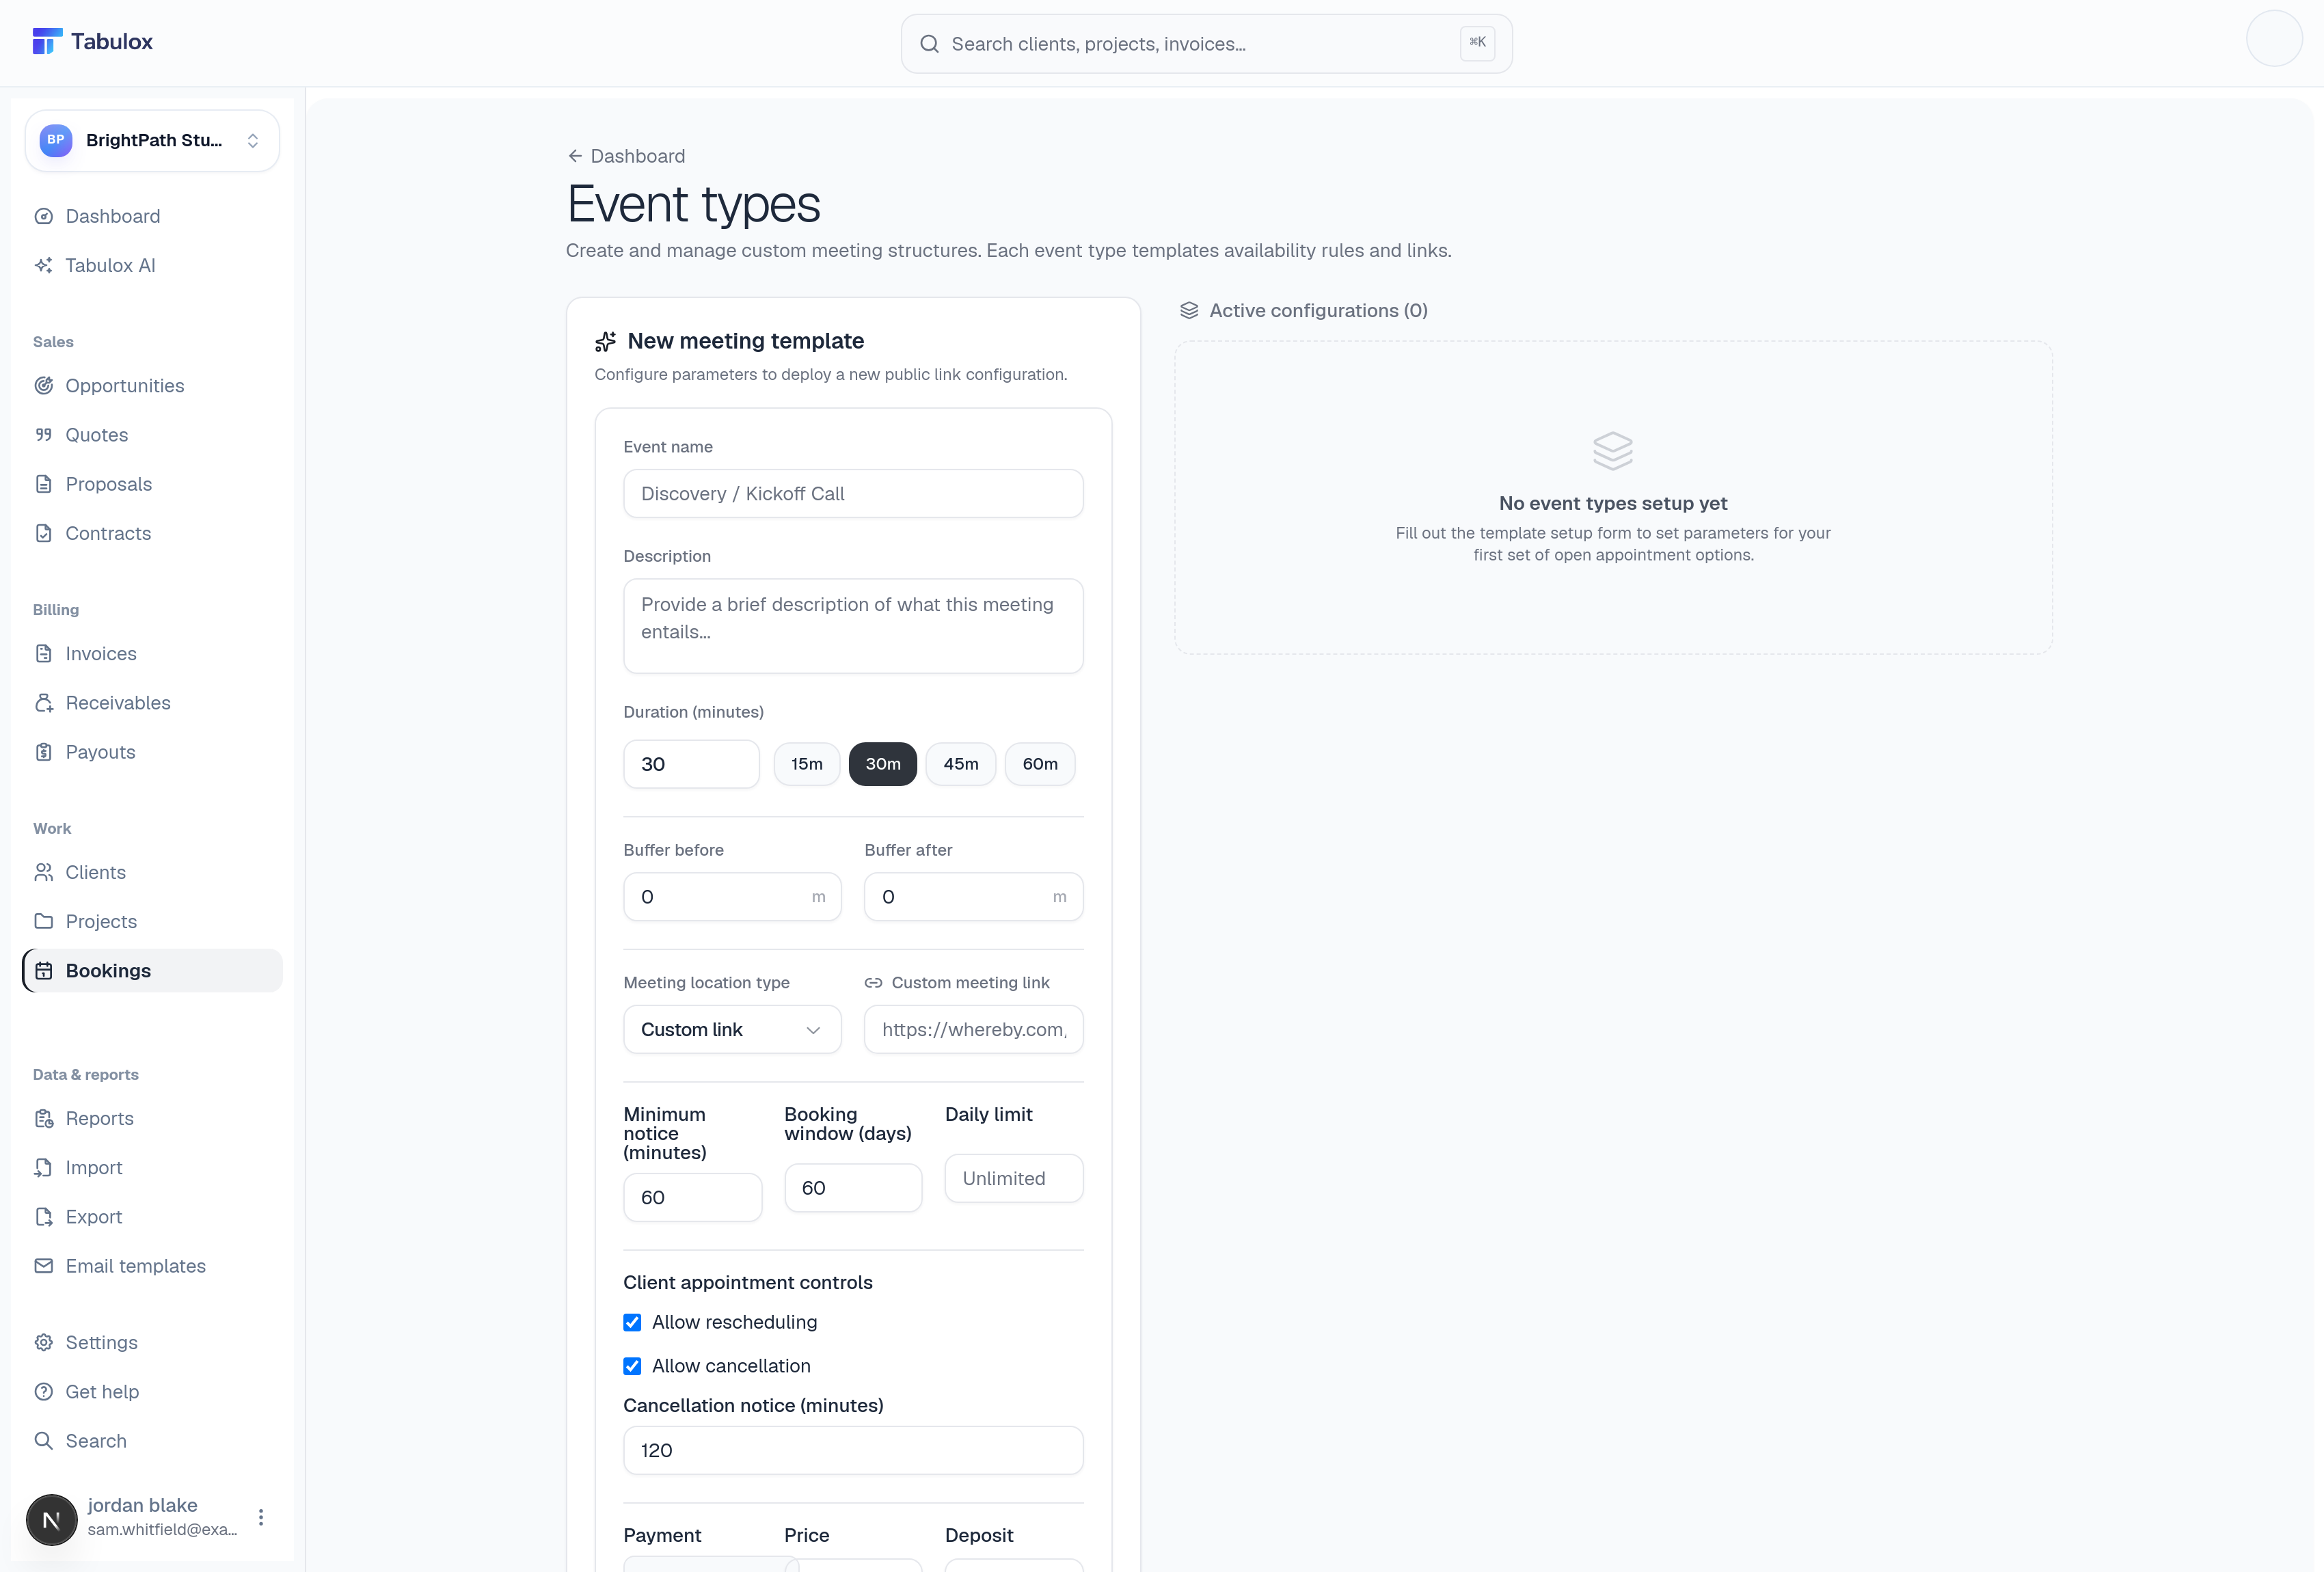
Event Types (/booking/event-types) is where you define each bookable
meeting. The form sits inline next to your existing list — no separate
dialog:
- Basics
Event name, description, and duration (pick a preset — 15/30/45/60 minutes — or type a custom number).
- Buffers and location
Buffer time before/after each booking, and the meeting location type — a custom video call link, phone, or in person.
- Booking limits
Minimum notice (how soon someone can book before the slot), booking window (how far out slots are offered), and an optional daily limit on how many sessions you'll take in one day.
- Client controls & payment
Toggle whether attendees can reschedule or cancel themselves (with a cancellation-notice cutoff), and set a payment mode — none, full payment, or a deposit — if this meeting type is paid.
Further down, you can also set reminder timing (minutes before the meeting), intake questions to ask at booking time, a confirmation message, and a post-booking redirect URL.
Each event type gets its own public link (/book/<token>) the moment you
create it — the same pattern as an opportunity capture
form: one shareable link, no manual entry on your
end. The difference is who fills it out — a capture form creates an
opportunity when you share it around; a booking link creates an
appointment when the client uses it to pick a time, which is why
appointments show up in the ledger above without you creating them
yourself.