Opportunities
Opportunities is where every inbound lead starts — before there's a quote, before there's a client record, before anything is priced. It's your pipeline: what's coming in, what's stalling, and what's about to close.
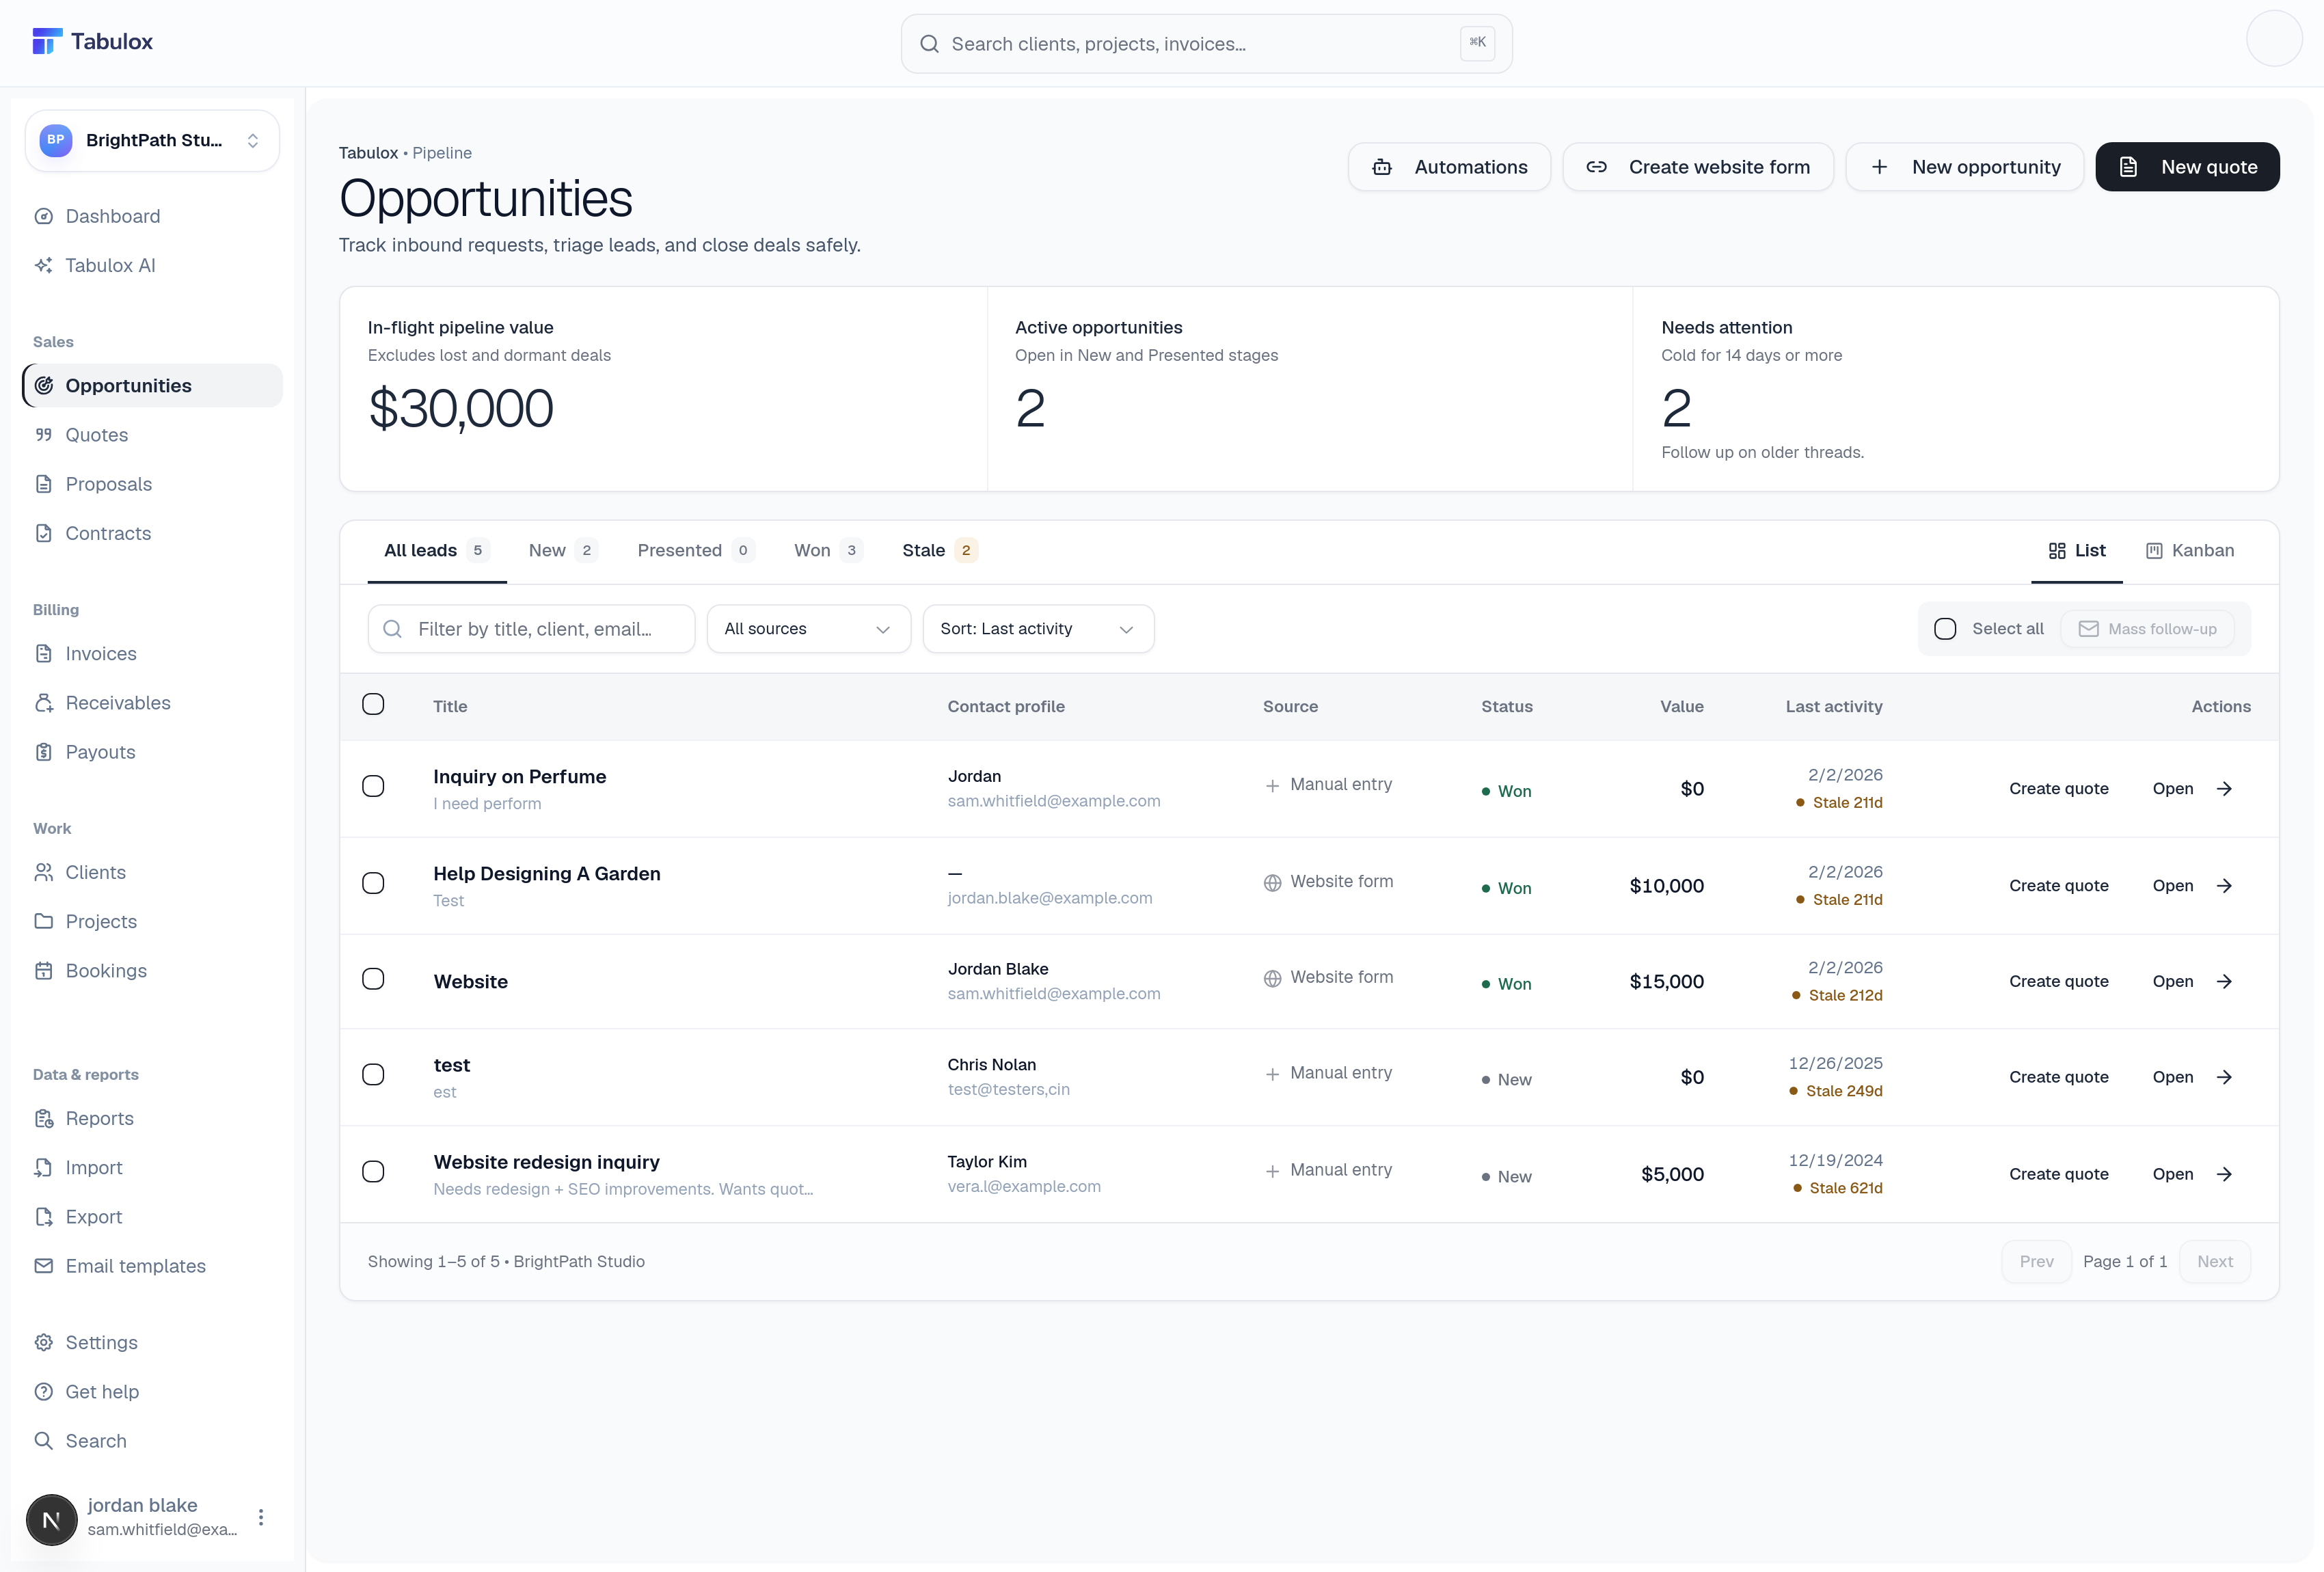
The three numbers up top
- In-Flight Pipeline Value
The dollar total of every opportunity that's still open — it excludes anything marked Lost or Dormant, so it only reflects deals you could actually still win.
- Active Opportunities
A count of opportunities currently sitting in the New or Presented stages — the ones genuinely in motion right now.
- Needs Attention
Opportunities that have gone cold — no activity in 14 or more days. This is the number worth checking first each morning.
Stage tabs
Right above the table, a row of tabs lets you filter the list by where a deal stands: All Leads, New, Presented (a quote has gone out), Won, and Stale (the same 14-day-cold definition as "Needs Attention," called out in red since it's usually the one worth acting on).
"Presented" is what Tabulox calls a lead once you've sent a quote for
it — an opportunity's status becomes QUOTED internally the moment a
quote goes out, and that's the point where it starts counting toward
"Active Opportunities."
Filtering and sorting
Below the stage tabs sits a search box (title, client, or email), a Source filter (Website Form, Landing Page, Social, Referral, Marketing, or Manual Entry — however the lead reached you), and a sort dropdown (Last Activity, Value, or Newest First).
The table
Each row shows the opportunity's title and short description, the contact's name and email, a colored source chip, a status pill, the estimated value, and a "Last Activity & Triage" column that flags anything stale in red so it stands out without you having to scan every row.
Two quick actions sit on the right of every row:
- Create Quote — opens the quote builder pre-filled with this opportunity's contact and details. This is the normal path from Opportunities into Quotes.
- Open — takes you into the opportunity's full workspace, where you can see its complete activity history, attach files, and manage it in more detail.
You can also switch the whole view from List to Kanban using the toggle in the top-right of the controls bar, which lays opportunities out as draggable cards by stage instead of table rows.
Creating an opportunity manually
Click New opportunity (top right) to log a lead by hand — useful for a call, a referral, or anything that didn't come in through a form.
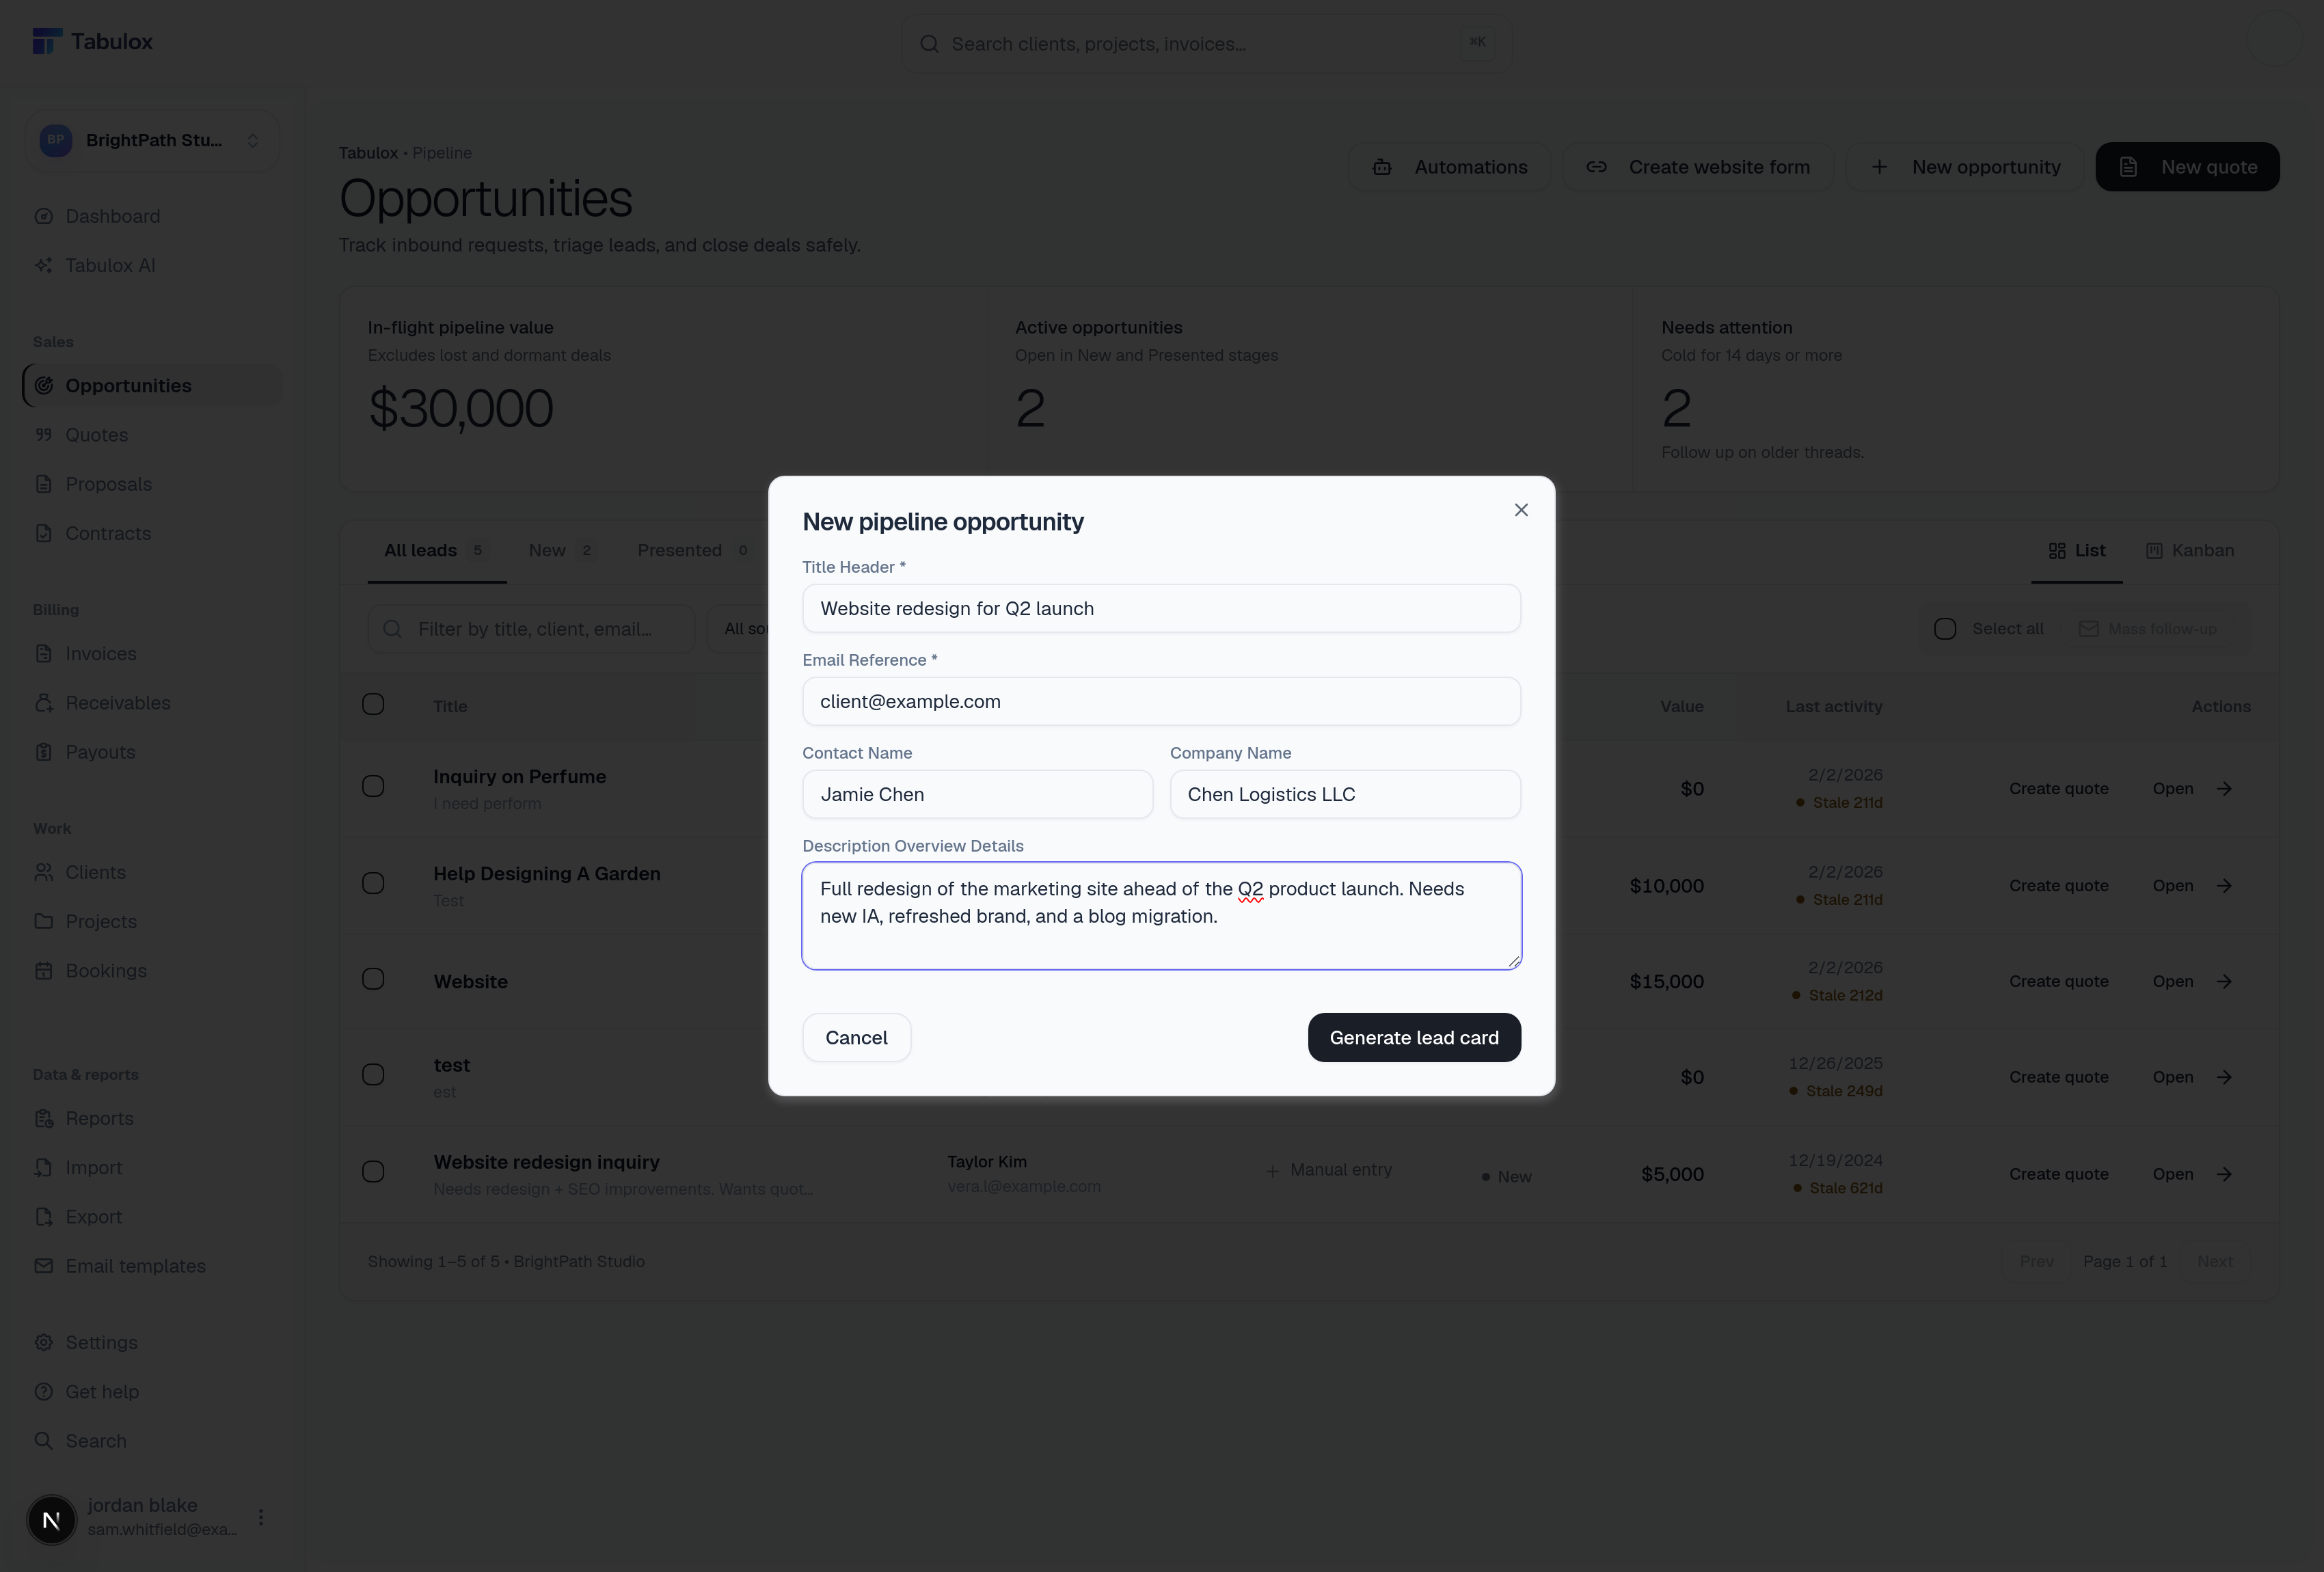
- Title Header
A short, descriptive name for the deal — this is what shows in the TITLE column of the list.
- Email Reference
The contact's email. Required — it's how Tabulox links this opportunity back to a client record later.
- Contact Name / Company Name
Both optional. Fill in what you know now; you can flesh out the rest once the deal is further along.
- Description Overview Details
Free-text notes on scope, timeline, or anything else worth remembering about the ask.
Click Generate Lead Card and the opportunity lands in New stage, ready to work.
Capturing leads with a website form
The Create website form button (next to New opportunity) is the other
way opportunities get created — a public form you embed on your site or
share as a link, so leads land in your pipeline without you typing them in
by hand. It lives at Opportunities → Create website form, which opens
the Capture forms page (/opportunities/capture).
Click New form and set the defaults every submission through it should get:
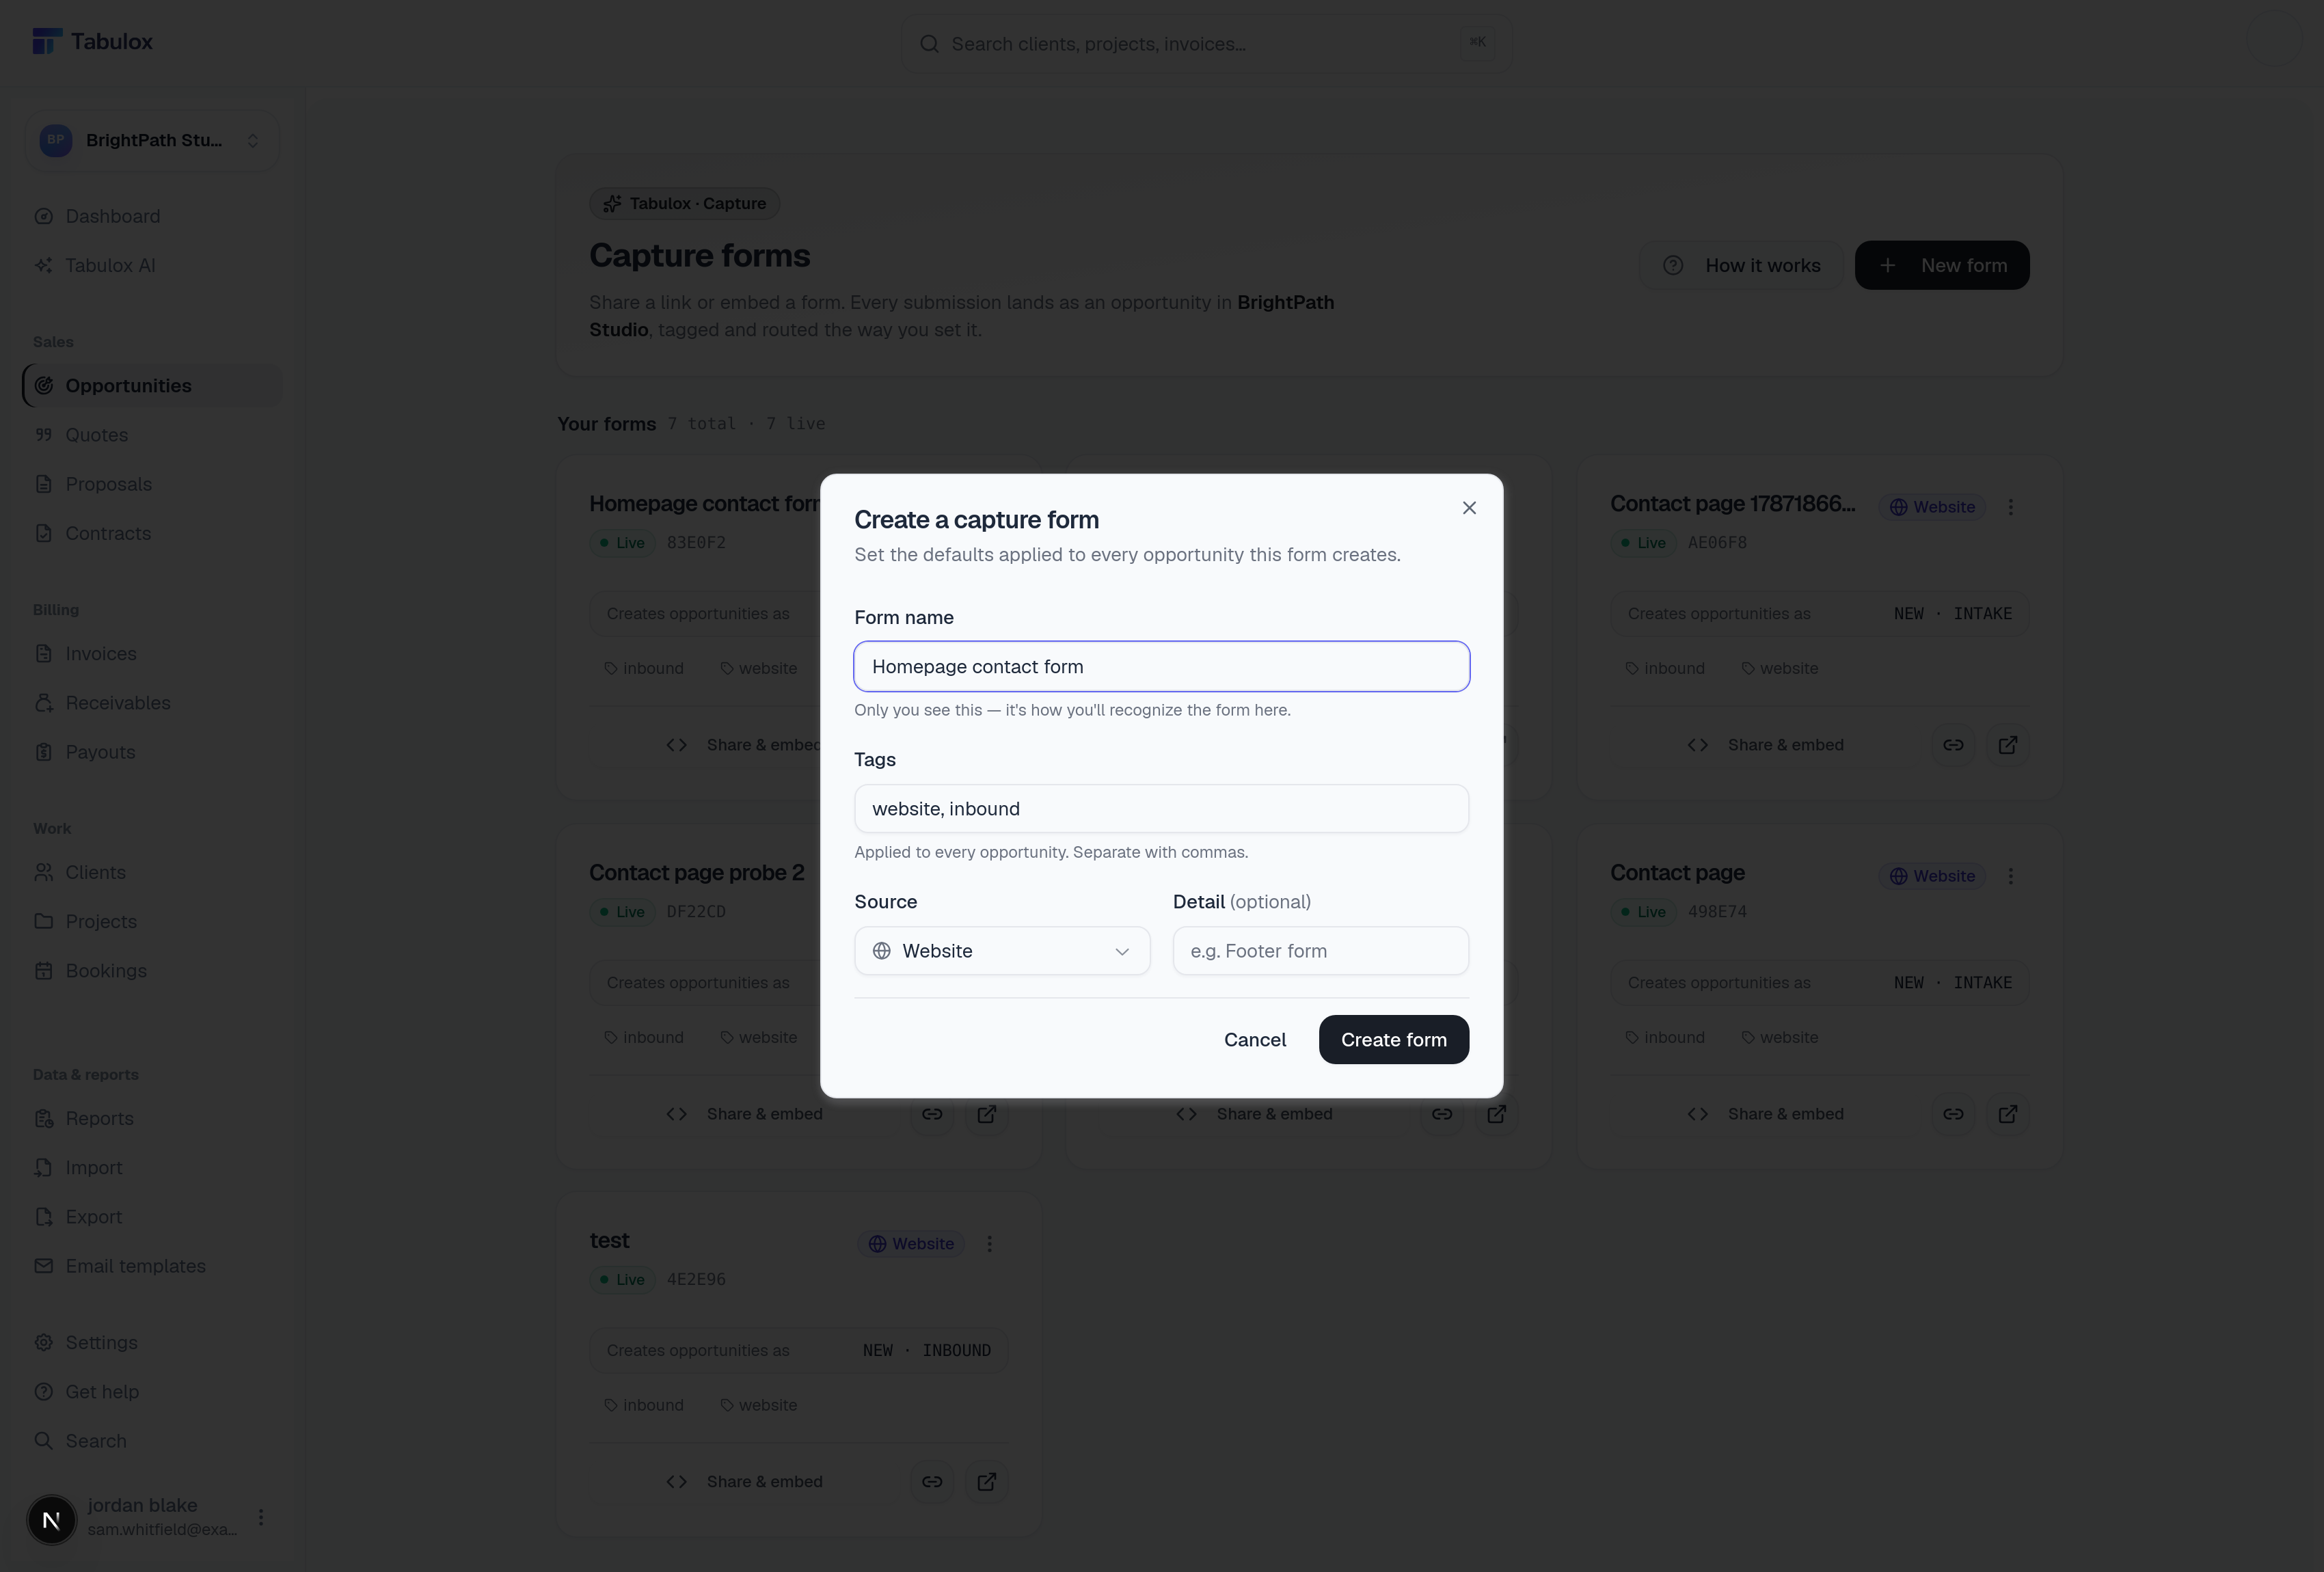
- Form name
Only you see this — it's how you'll recognize the form in your list. Use something that identifies where it's embedded, e.g. "Contact page" or "Q3 sidebar banner".
- Tags
Comma-separated tags applied to every opportunity this form creates — useful for filtering later.
- Source
Website, Landing page, Social, Referral, or Other — how leads from this specific form reached you. Shows up as the colored source chip on the opportunity row.
- Detail (optional)
A free-text note on exactly where the form lives, e.g. "Footer form".
Click Create form and you land on a Ready to share panel with the public link and an embed snippet:
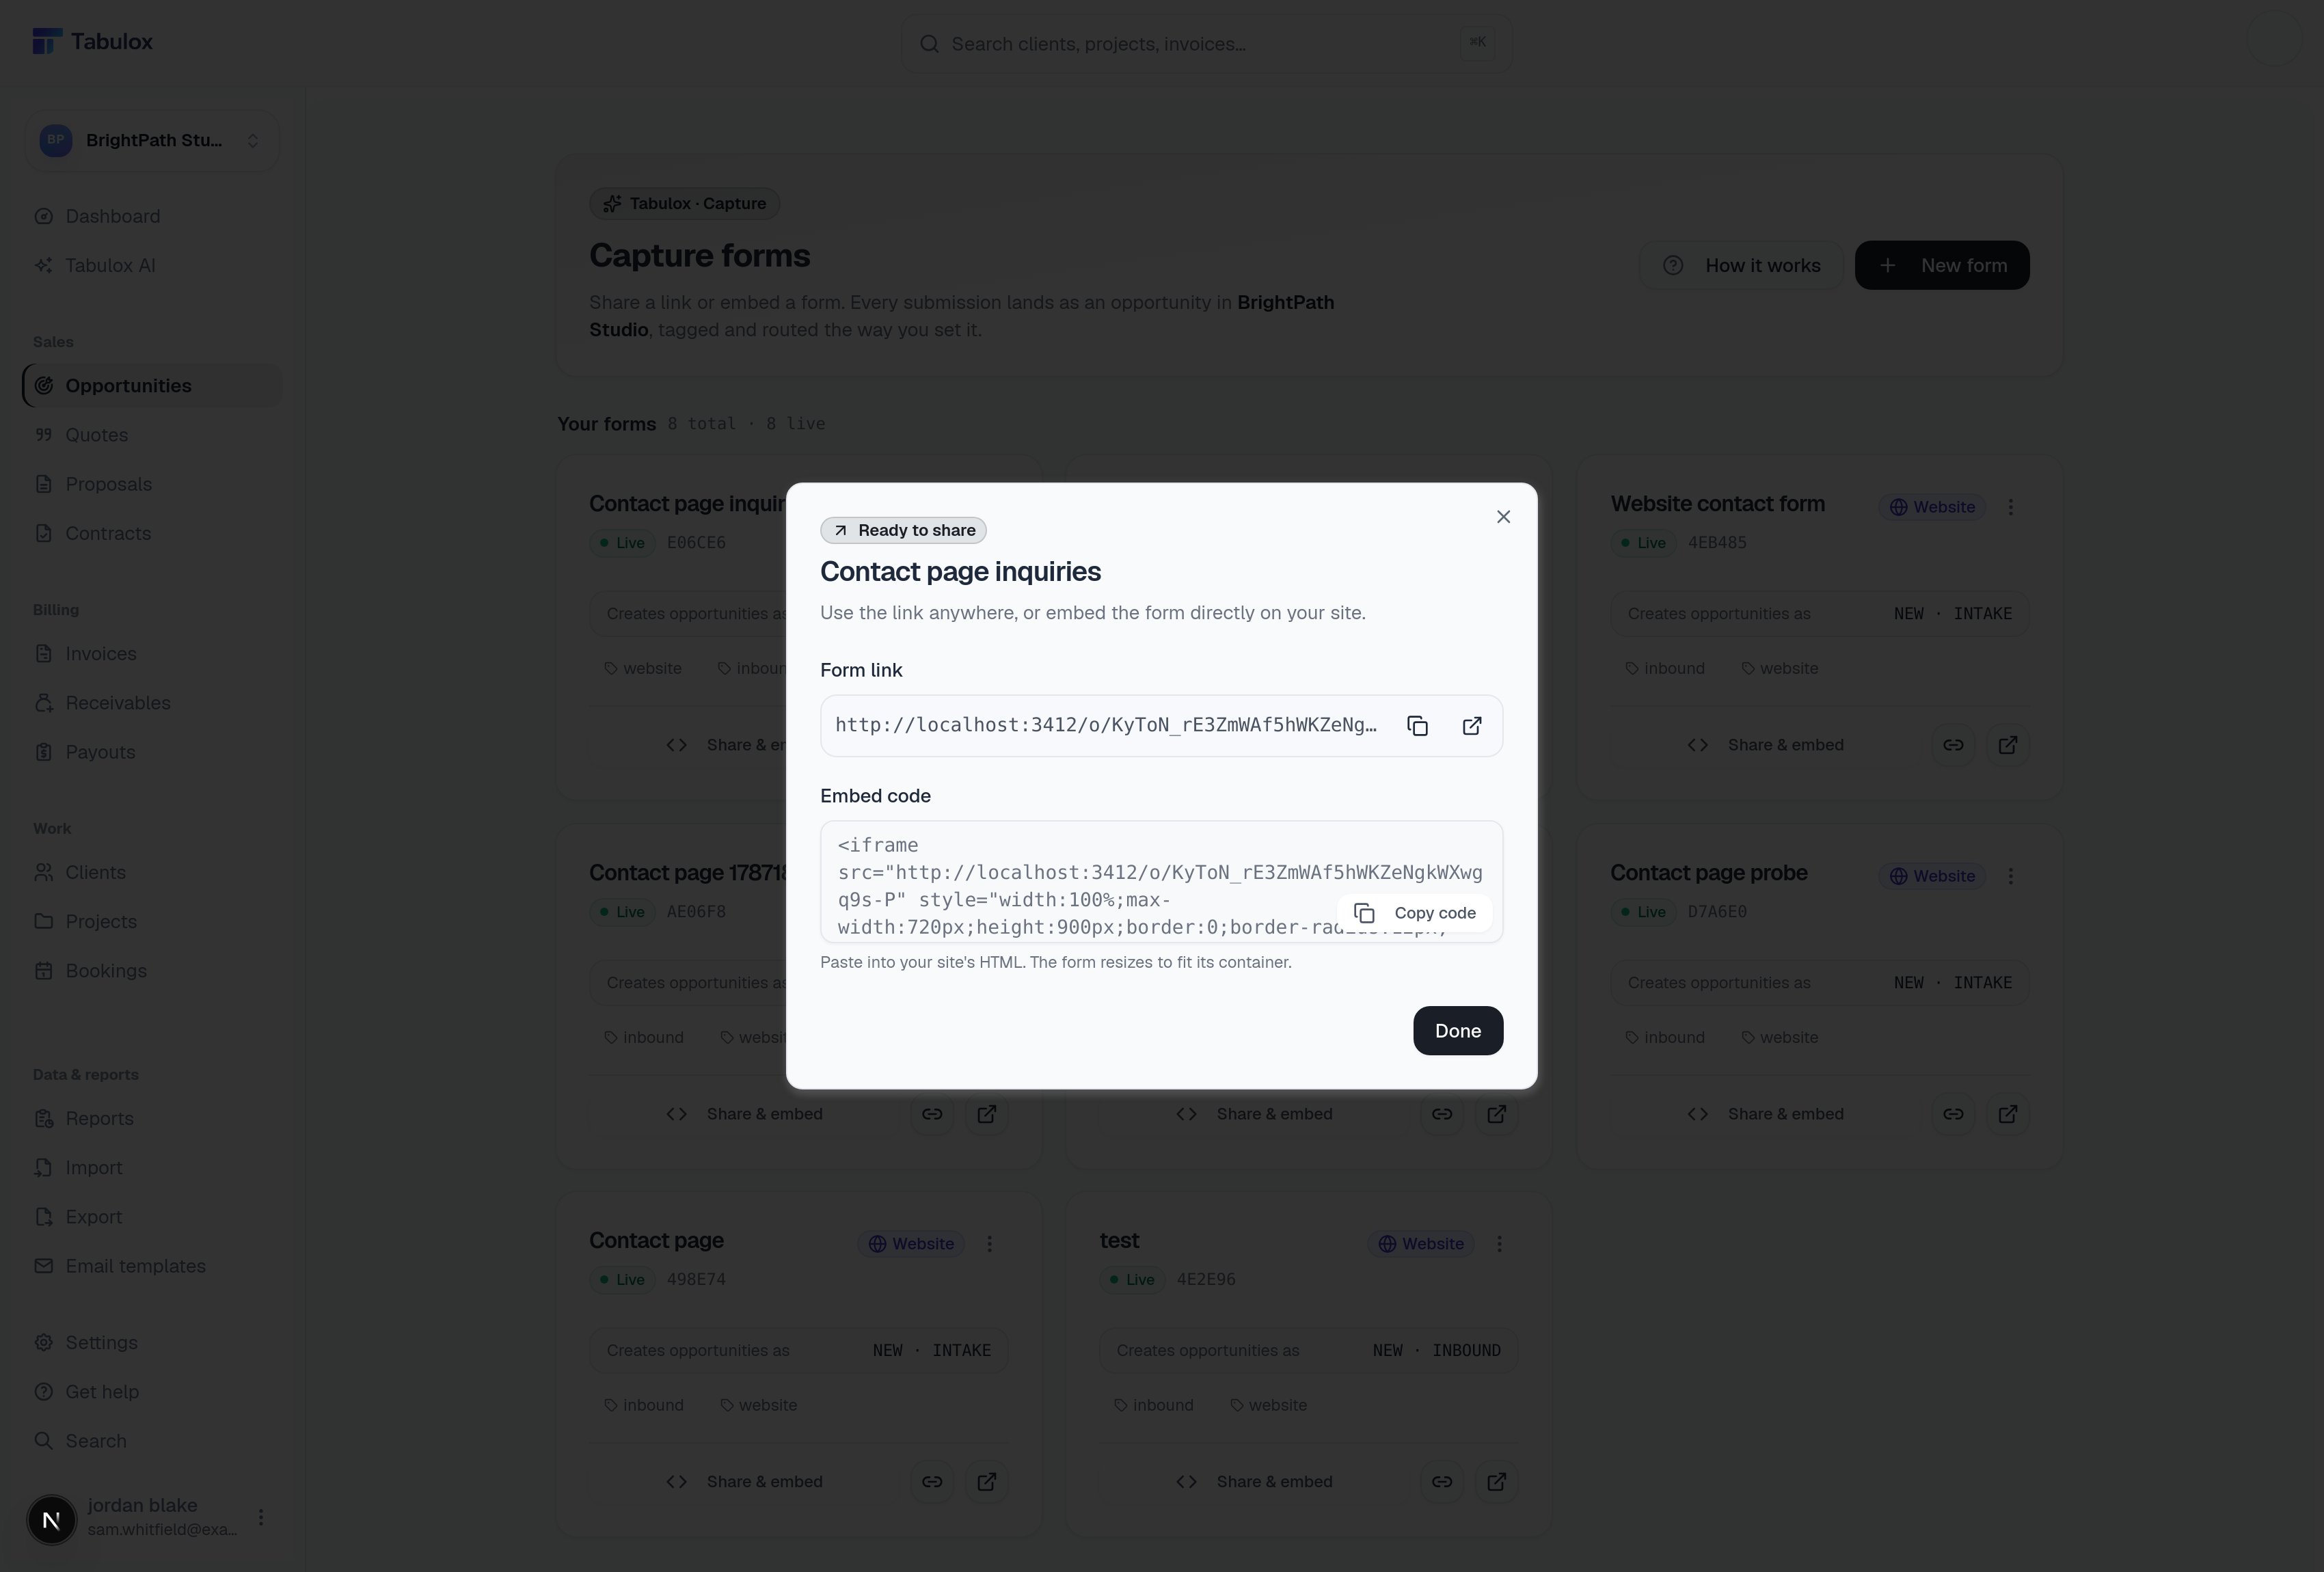
- Form link (
/o/<token>) — share it anywhere: a bio link, an email signature, a QR code. - Embed code — an
<iframe>snippet you paste directly into your site's HTML (WordPress, Webflow, Squarespace all accept this).
Here's what the person on the other end of that link actually sees:
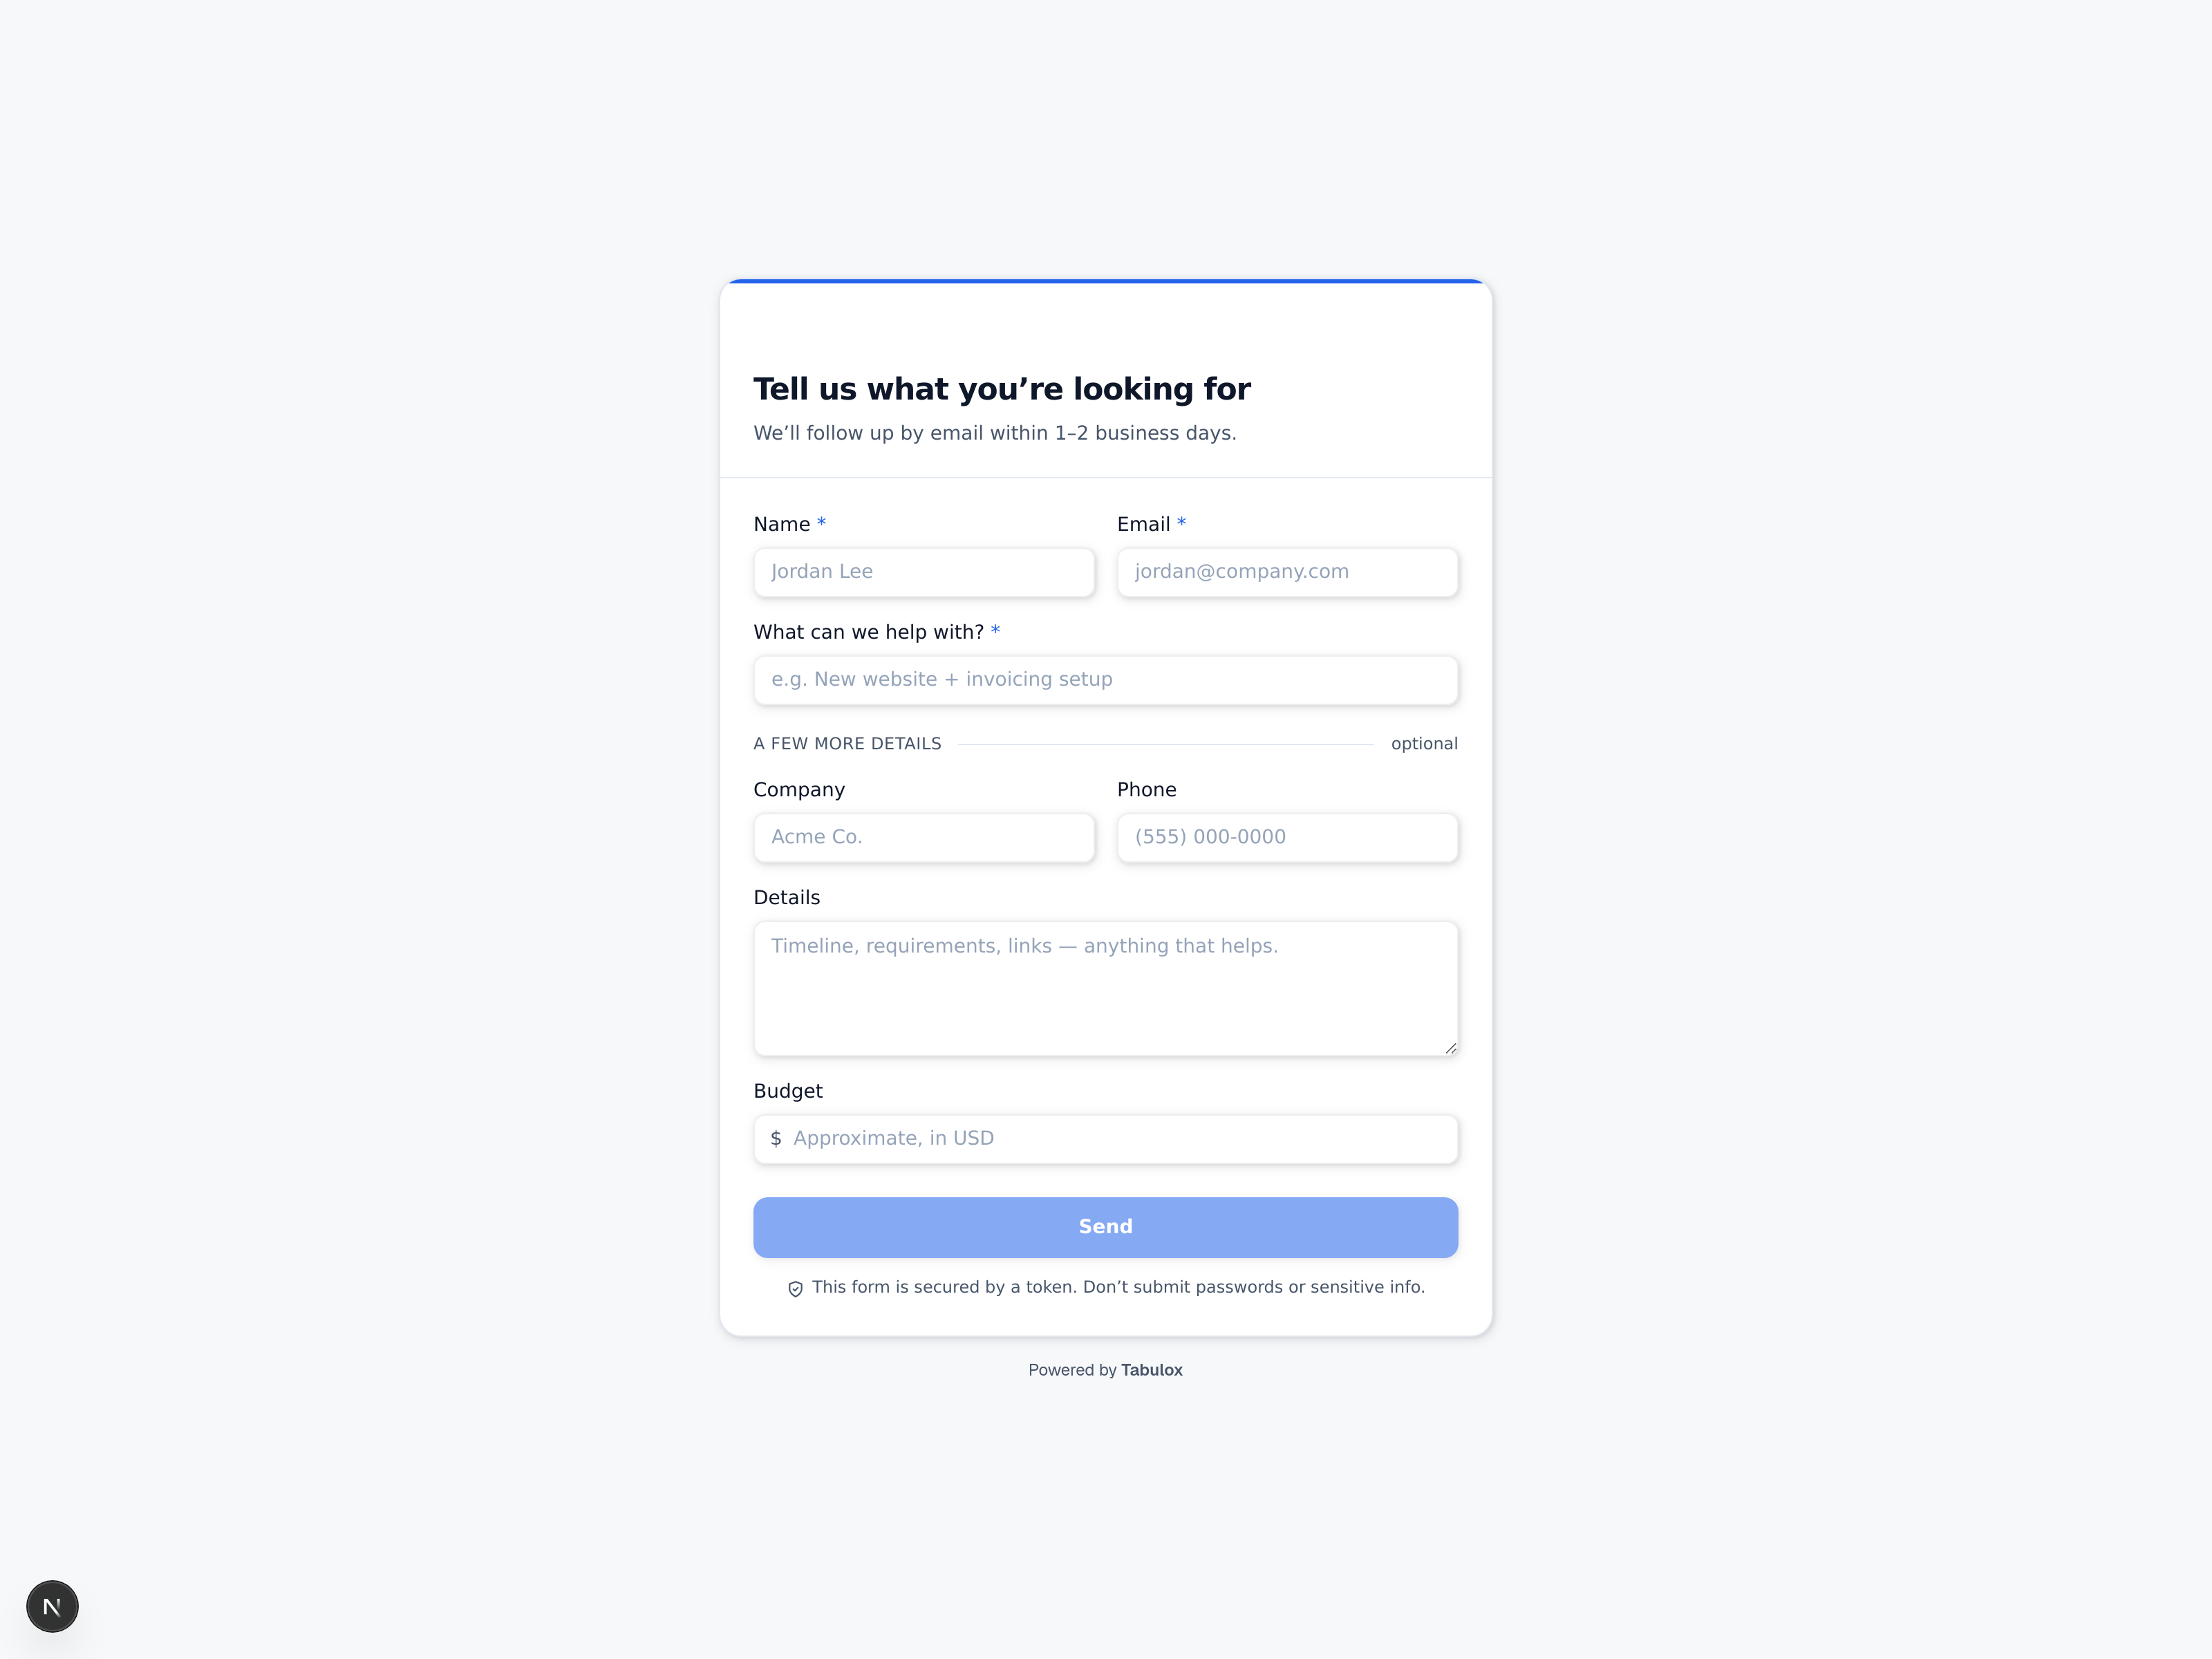
Every submission becomes a new opportunity automatically, pre-tagged and routed with the status/stage/source you set when you created the form — no manual entry, no inbox triage.
Back on the Capture forms list, each form card has a ⋮ menu:
- Edit design — customize the public form's branding and copy.
- Generate new link — rotates the token if the old link leaked; past submissions keep their attribution.
- Deactivate — stops new submissions without deleting the form or its history, e.g. once a promotion ends.
Create a separate form per channel or campaign (one for your homepage, one for a specific ad) so the Source/Detail on each opportunity tells you exactly which one it came from — attribution stays clean without any extra tracking setup.